Showing posts with label Gustav. Show all posts

Friday, 20 November 2020

Old Blue And Other Colours

“These 2 brigades were of the flower of the Army: old souldiers of 7 or 8 yeeres service (the most of them) and whom the King had there placed, for that he most relied on them.” Williams Watts describing the Old Blue and Yellow Brigades at the Battle of Lutzen.

This blog post looks at my approach to representing the Swedish infantry brigades of the Thirty Years War, in partiocular those at Lutzen 1632, using the Pike and Shotte rule system from Warlord Games.

The Swedish ‘colour’ infantry brigades, with their elaborate ‘squadron’ formations, are for me an iconic part of the Swedish army in this period.  I want to be able to reflect these formations, and explore their tactics, in my miniature versions of these brigades.

Here is a brief background to the Swedish infantry brigades of the period. 

(The Osprey “The Army of Gustavus Adolphus: Infantry (Men-at-Arms)” by Richard Brzezinski is an excellent introduction to this topic.) 

As Gustav Adolph’s main field army evolved during the 1620s key infantry regiments became known by the colour of their flags as well as their colonels’ names; hence we get the Yellow Regiment, the Green regiment, the Red regiment and so on.  Regiments, which were mainly an administrative formation, were grouped in to brigades for battles.  The brigades were named after their senior Oberst (Colonel) who commanded the brigade, or more simply the senior regiment’s colour.  So you have the Yellow brigade, the Green brigade etc. (It is worth noting that the Swedish army was recruited from across Europe, and at Lutzen the majority were German, but also with many Scots, and other nationalities, as well as Swedes.)

Gustav Adolph experimented and evolved how these brigades were organised as well as the tactics and formations used on the battlefield.  On the battlefield a brigade was broken down in to units, of around 500 men, called squadrons. Regiment strengths varied so that a brigade may be made up of one strong regiment, or a number of smaller regiments, so that it had enough men to form the required number of squadrons.  Each squadron in the brigade was made up pike and musket armed troops, with the ideal ratio of muskets to pikes generally increasing over time.

This picture shows a simplified view of a three squadron brigade.  This assumes a ratio of one pike to one musket.  As time went on squadrons would have had less pike and/or more musket.  Surplus musketeers were formed in to a reserve within the brigade, or were detached from the brigade and became ‘commanded shot’ supporting the cavalry, or carrying out some other separate function.  Using the three squadron brigade as a model, and using the quite detailed information available on the strengths of brigades, with the ratio of musket to pike for the Swedish infantry at Lützen I set about planning my toy soldier version of the Swedish infantry.  (See Osprey Campaign #68 Lützen 1632, by Richard Brzezinski for more info.)

My Old Blue Brigade


Here is how I formed my version of the (Old) Blue Brigade.  This brigade was made up of a single regiment, the Old Blue regiment, that was one of Gustav Adolph’s oldest regiments, recruited mainly with Germans. The epitaph ‘old’ was used informally to distinguish the regiment from a more recently formed Blue regiment, that was sometimes called the New Blue regiment, or the Swedish regiment, as it was recruited from native Swedes. The Old Blue regiment served from 1624 and was finally disbanded in 1652. 

It seems likely that the regiment had blue uniforms as well as blue flags.  I chose to show the unit in a variety of shades of blue to reflect different issues of cloth being provided to the troops over time.  Uniforms for the Swedish infantry were at the whim of their colonel and the availability of cloth where ever the regiment was serving.  

Although quite a strong regiment, as it formed a brigade on its own, it was one of the smaller brigades at Lutzen. It also had a roughly one to one proportion of pikes to muskets.  I therefore form the brigade as three ‘small’ pike units, and three ‘small’ musket units.  Each squadron in the brigade is made up of one pike unit and one musket unit.  There is also a light gun model and crew to represent the three pounder guns that were integral to each regiment.  

In Pike and Shotte (P&S) units are classified in to three basic size categories: small, regular and large.  At the Friends of General Haig club we tend to use 8 figures in two ranks for small infantry units, 12 figures for regular, and 16 for large.  So for Lutzen this means that the Old Blue Brigade of around 1,100 men scales down in my miniature version of the brigade to roughly 50 figures, with each figure therefore representing about 20 men.

During the battle of Lutzen the Blue brigade were attacked and roughly handled by Imperial cuirassiers.  I therefore have the pike in the ‘charge for horse’ pose.  (A bit of a pain with the long pikes, but I think it looks great!). The pike are a mixture of Foundry and Warlord, and the musket mostly Warlord, with the odd Foundry or Perry officer mixed in.  The light gun is from Warlord.


To control this complex formation in P&S games each brigade has its own Commander, and so this circular command base represents Oberst Winckel, the regiment and brigade commander.  Winckel and one ensign are Foundry, and the other ensign Warlord. All flags from Flags of War.

To bolster his cavalry formations, Gustav Adolph deployed small units of muskets and light guns from his foot brigades, with the cavalry.  Such detached musketeers were known as “Commanded Shot”.  In P&S I use small units of musket with a light guns to represent these supports for the cavalry.  This unit of commanded shot represents men coming from the Blue Brigade.  This units is mostly Warlord.  I like the kneeling and standing figures showing a salvo being fired, and the helmeted figures representing those making some effort to protect themselves while fighting amidst the swirling cavalry melees. (All Swedish musketeers were meant to wear helmets but it seems that most did without what must have seemed an unnecessary encumbrance for most of the time during a campaign.) 

On the wargames table

Having a larger number of smaller units, compared to the more conventionally organised infantry (with a single pike block and two wings of musket), needs a better level of command, and the small units can be brittle.  However the Swedish brigades are very flexible, difficult to outflank, and can out manoeuvre more unwieldy opponents.  It produces a very interesting asymmetry between the Imperial and Swedish foot that can spice up a Pike and Shotte game.

To represent the more experienced of the Swedish brigades at Lutzen (such as the Old Blue and Yellow brigades) I have experimented with adding P&S special rules such Drilled, Stubborn, and Salvo.  Other brigades, which fielded more men than the Old Blue, will also have larger, and potentially more, component units.

The commanded shot and light guns supporting the cavalry can be effective, but seem to be often left behind by their commanders in wargames who, at Lutzen, are in a hurry to capitalise on the Imperial weakness in cavalry numbers early in the battle before they are reinforced.  

I would be interested in any other ideas people have for representing the Swedish brigades on the table top.

Until next time!

Andy @ FOGH 


Saturday, 20 April 2019

Day of Battle


I’ve already written quite a few words about he day of Salute on the 6th April, but not yet actually written much about the Lutzen 1632 refight played out by the Friends of General Haig on the day.  This post therefore aims to correct this omission, and is the official battle report.

The order of battle has already been covered in a previous post here.

The troop rosters, set out for Warlord Games’ Pike and Shote, are also shared on Google drive here.

We followed the historical deployment as described in this picture.


We had divided each army into three commands.  We had six players and an umpire and so to start with we divided the commands among the six players.  As the day went on we allowed the players to have time off to go and see the rest of the show and so other commanders in the same army would take temporary control of their command.  The Imperial army had a fourth command (Pappenheim) which would arrive later and we decided to allow Wallenstein to command that in addition to his own command.


You can see it is a fairly cramped battle field, without much room for manoeuvre.  This was intentional, as the cramped conditions were all part of Wallenstein’s defence.  He knew that Gustav would try to outflank him and so he used the terrain to mitigate against this.  He also refused both flanks in an echelon formation, with some skirmishing Croats thrown forward to further protect each flank.


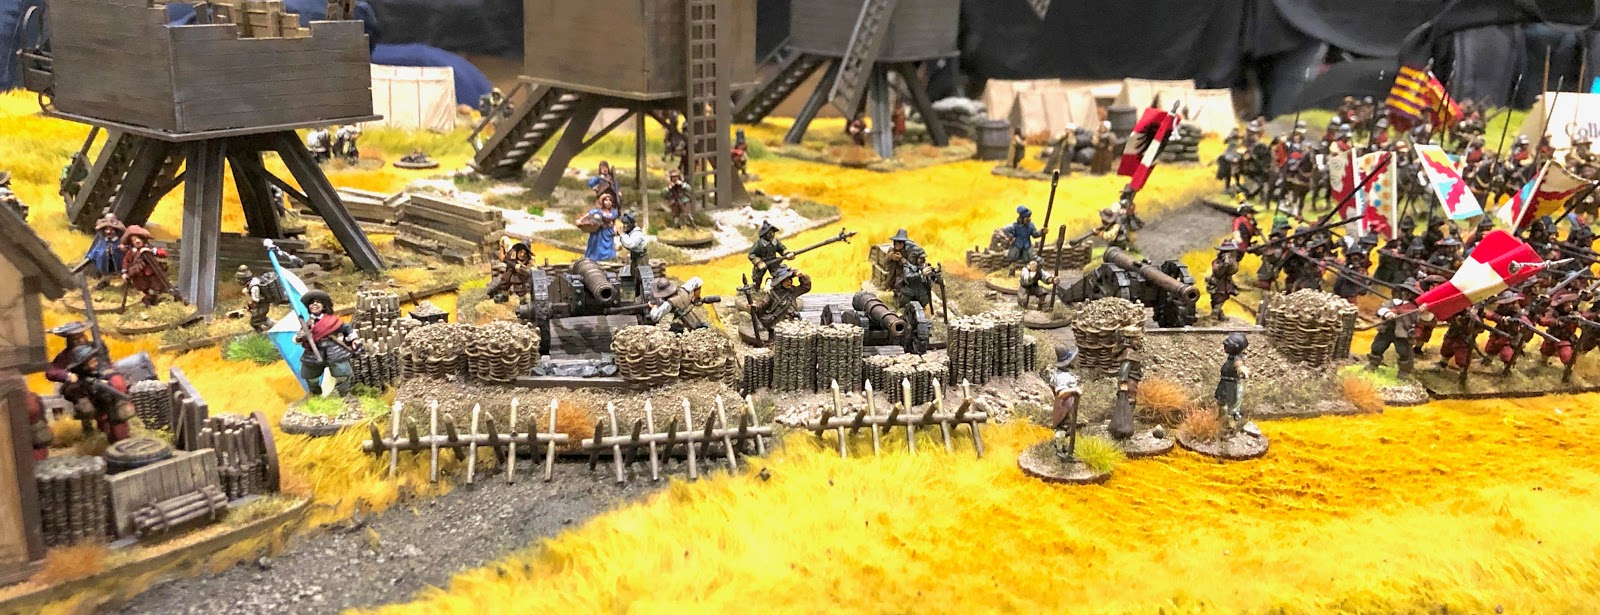
Wallenstein had the town of Lutzen burned to prevent the Swedes taking it and attacking through it.  He also used commanded shot to hold the gardens that surrounded the walls of the town.  The Imperial army also had two artillery redoubts, and had fortified the Miller’s house next to the Windmill battery.  The final Wallenstein touch was arming a group of camp followers to look like an infantry reserve on the left flank.


On the Imperial right we see the Windmill battery, the Miller’s House and the town of Lutzen.  There is little room for the Swedes to exploit their advantage in cavalry numbers here.  


They will need to take the gardens and the Miller’s house to allow they cavalry to move through the gap.  Wallenstein’s command here looks secure.


In the Imperial Centre we can see Colloredo has strength in depth, with cavalry units also mixed in the second line of the foot regiments.


The Imperial left under Holk looks the weakest position.  There is plenty of skirmishing light horse to try and slow down the Swedes.  Also some camp followers cowering at the back!


On the Swedish right we see Gustav Adolf II ready to attack the Imperial position. (In fact he is still waiting for his commanded shot and some more horse to deploy in this picture.)


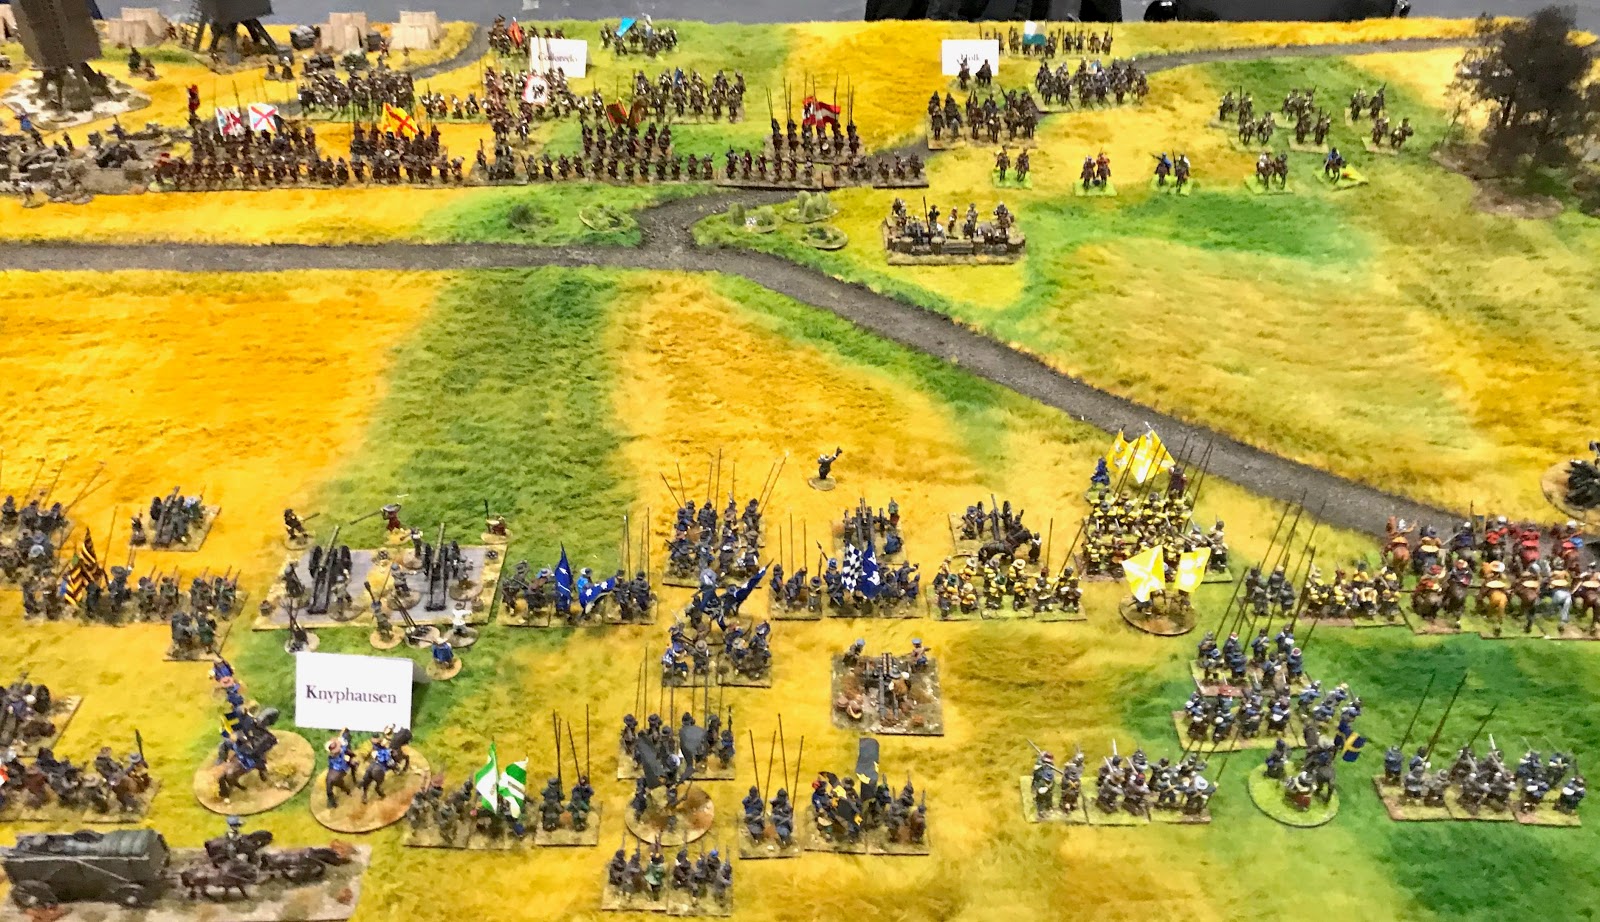
In the centre Knyphausen has six infantry brigades, all in their 3 squadron formation with light guns attached.  The front three brigades are the elite Yellow, Old Blue and Green brigades.  There is also the Swedish heavy artillery position. 


On the Swedish left Bernhard of Saxe-Weimar has little room to manoeuvre and has the defended gardens of Lutzen to deal with.


The game started with the Swedes taking the first turn.  Gustav had no doubt what was required and immediately charged forward with his cavalry.  In fact, so keen was he to get to grips with the Imperial cavalry opposite that he decided to leave behind his slower moving commanded shot while he chased away the skirmishing light horse defending the Imperial left.  The Croats were dealt with in fairly short order but they had done their job and delayed the Swedes for a little while.  

The Imperial commanders knew they were out numbered on their left and they decided to move the reserve cavalry from the centre over to bolster the left flank.  This had a decisive effect and Gustav’s attack was quickly bogged down.  All of the Imperial horse had been made Caracole troops which in Pike and Shotte means they can not countercharge enemy horse.  This allowed the Swedes to have a slight edge in initiative to reflect their aggressive cavalry tactics.  However, the Imperial cuirassiers were still very tough nuts to crack.  Units were lost on both sides. 


Meanwhile the Swedes ground forward in the centre.  There were moving in to a storm of fire from Imperial Muskets and artillery.  But they managed to give back pretty much as good as they got.  The command dice were not kind though and it was hard work for Knyphausen getting his brigades forward.  

The player taking the role of Gustav was well aware of the historical fate of the Swedish king at this battle.  Despite this he did risk Gustav in a melee in an attempt to break the Imperial line.  There was a collective sharp intake of breath as the dice were rolled for risk to the general in combat.  He survived, and won the melee.  After this Gustav was kept out of the fighting.


On the Imperial fourth turn they could roll to see if Pappenheim arrived.  A 5 or a 6 on a D6 was required and a 5 was duly rolled.  Pappenheim’s troops arrived and charged straight in to the fray on the Imperial left.  Just at this moment, Holk, who had been commanding the Imperial left, was killed in a melee.  Pappenheim had arrived in the nick of time.  


In the centre the Old Blue brigade were up to the Imperial line but the rest of the Swedish Brigades were still struggling to come up.  Both sides were losing units due to the concentrated firepower of close range muskets and guns.  (The grey smoke indicates units disordered by enemy fire.)  Frustrated by the Imperial defences Bernhard decided to demonstrate with his cavalry against the Imperial windmill battery. 


Bernhard also sent his cavalry to attack Wallenstein’s flank, but to no avail.  A storm of musket and carbine fire prevented his Saxon horse from making any impression.  Perhaps their hearts were not in it!  No such qualms for Bernhard’s lifeguards who continued to threaten the heavy guns, and suffered accordingly.  


The tide had now turned against Gustav and it was only the Swedish Commanded shot and support from the Yellow brigade that halted Pappenheim’s rampaging cavalry.  It seemed that a stalemate was being reached on the Swedish right, Imperial left.  The Imperial forces couldn’t break through the combined arms of the Swedes, and the Swedes had lost too many cavalry to push forward.  


Could the Swedish centre save the day?  The Swedish infantry brigades had finally made it to the Imperial battle line.  You can see here only a few reserves and the Swedish heavy guns left on the Swedish side. 


The Imperial commander in the centre, Colloredo, was not going to let the Swedes dictate this final phase of the battle, and as the Swedes approached, Colloredo marshalled his reserves and counter attacked.  Imperial pike blocks stormed forward in to the Swedish formations.  The Imperial troops had the best of the ensuing melees, but the couldn’t break the Swedes.  


With stalemates along the whole line of battle , and darkness falling, the two sides had to withdraw.  The Swedish attack had been stopped, so a marginal victory to the Imperial troops.  But Gustav had survived (as the god like finger points to in this picture!).  It would have been fascinating to fight a second day, but sadly the Excel centre wanted the hall back, and so we had to end it there.

This was the Friends of General Haig’s first Thirty Years War game, and so I was very pleased that all of the commanders had really enjoyed the game, and all were eager to play it again.  Both sides were sure they could pull it off next time.  I think this is a good sign that we have a well balanced game.  The rules worked well, and all the players felt we had the factors about right.  I am certainly really looking forward to getting these troops on the table again!

Until next time!