This blog post covers the first command bases for my Polish-Lithuanian Commonwealth army of the 1620s.
 |
| This 19th century romantic image, of the Muscovites leaders from the town of Pskov doing homage to the Polish King Stefan Batory, gives an inspiring image of Eastern European nobility in this period. |
When building previous armies I have often fallen in to the trap of getting all of the troops ready and then finding I have no generals to command them when I come to play the first game with the army. To prevent this I decided to jump in early this time with some command bases. There are plenty of images available to provide ideas and inspiration for Polish-Lithuanian leaders, and I’ve included some in this post.
 |
| A contemporary picture showing Polish-Lithuanian nobles at the wedding parade of Sigismund III Vasa. An excerpt from the Stockholm Roll (see main text for details] |
To provide figures for my command bases both Foundry and The Assault Group (TAG) have some nice Polish command packs. I have used some of these figures in my hussar units, but have also kept one or two for the generals and their followers. I typically build my command bases with a small vignette of figures on a round base; three figures on a larger base for the overall general, and two figures on a smaller base for subordinate commanders. I’m following this approach again for my Polish-Lithuanian army, that is recreating the army that fought in the battle of Dirschau in 1627. The following describes the first two command bases I’ve constructed.
Marcin Kazanowski
The first base is for one of the subordinate commanders at Dirschau, Marcin Kazanowski. He was a very experienced soldier and leader, and was in his mid sixties by the time of the battle of Dirschau in 1627. In a long military career he had fought against all of the Commonwealth’s enemies; Ottomans, Cossacks, Tartars, Muscovites and of course the Swedes. I thought that the old Hussar commander that I converted slightly to match the WRG cover (see my first Hussar post) would be ideal to represent him. I also found a picture of a hussar officer that looks like he may have been the inspiration for the WRG cover.
 |
| The WRG Renaissance Army List cover illustration. |
 |
| Perhaps the inspiration for the WRG illustration? |
The illustration above is taken from a very useful source for dress and equipment in this period. It is from a 16 metre long picture which shows the parade that took place to celebrate the marriage of King Sigismund III Vasa in 1605. (Link.) This contemporary picture (painted sometime in the early 1600s) is very useful as it shows Polish hussar and foot units marching in the parade, as well as all sorts of nobles, therefore giving some ideas for military attire, and what my generals might look like. A degree of caution is needed as the picture shows a parade and might not 100% represent what was worn on a battlefield, but it is a starting point.
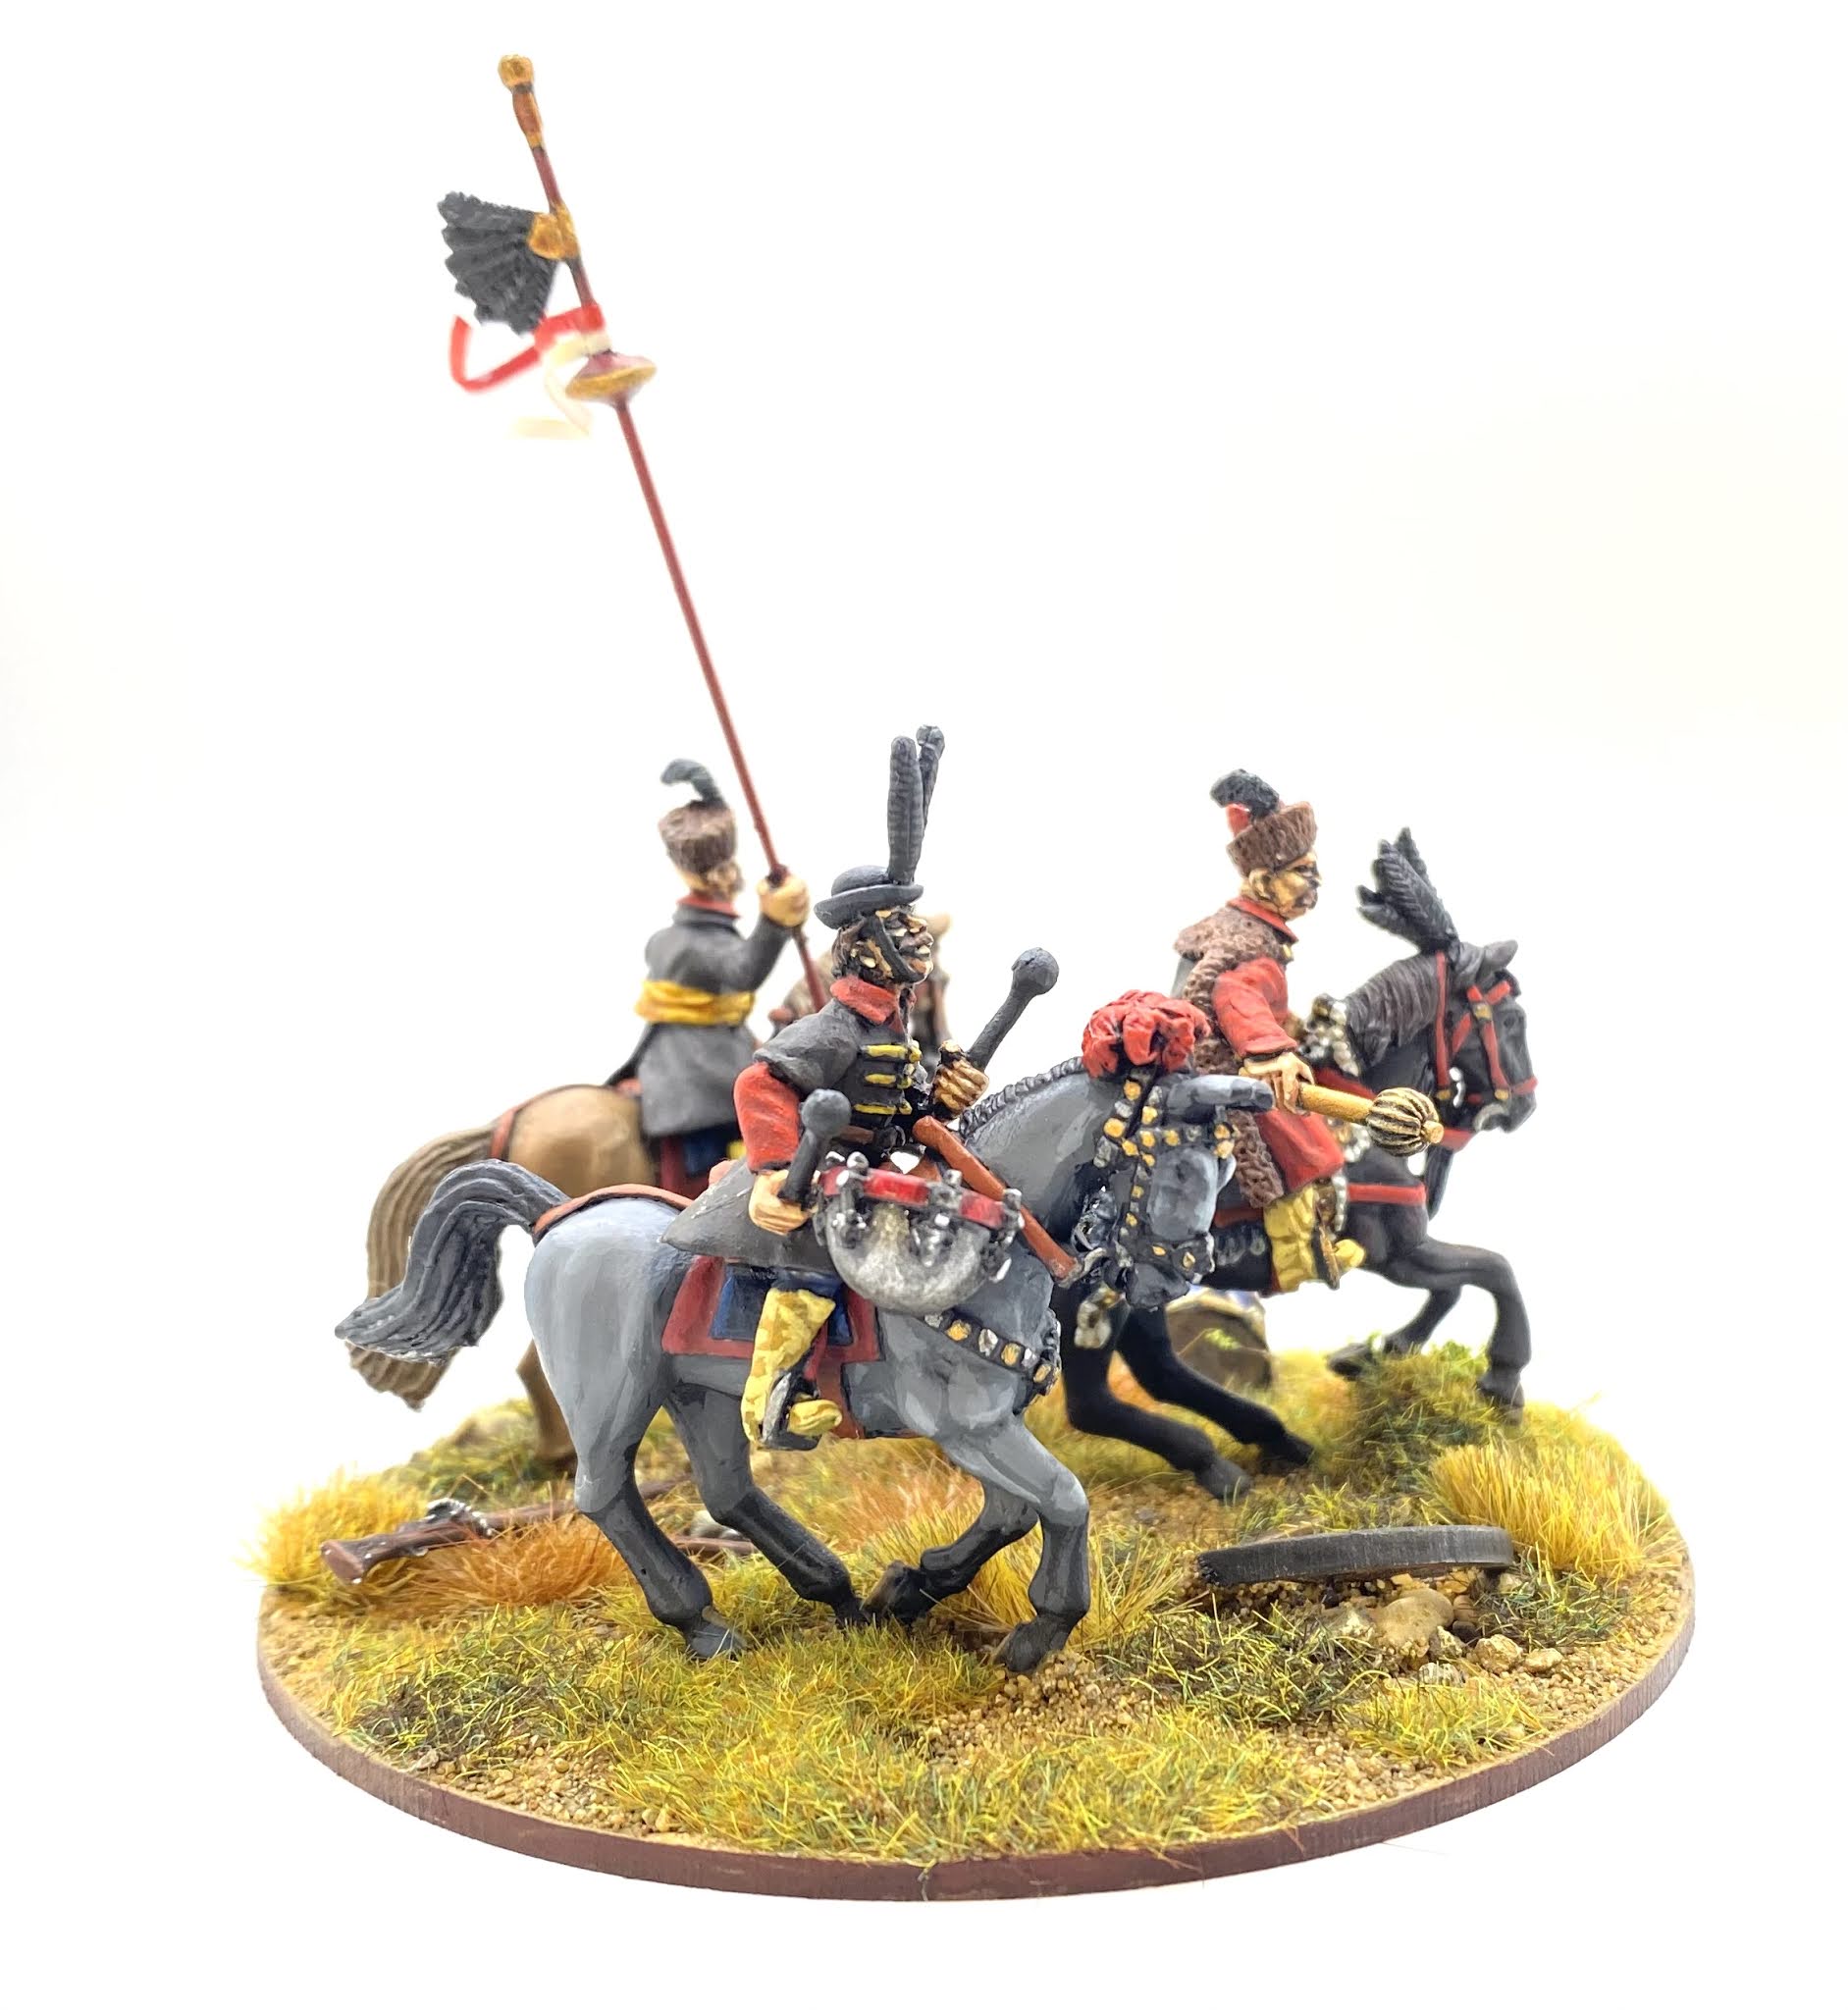
Next I needed a second figure for Kazanowski‘s base. Figure manufacturers seem to be very keen on producing mounted kettle-drummers for the Poles, and these do often feature on contemporary paintings, including the Stockholm Roll. I thought these would look a bit odd in the front rank of my charging hussar units, but would be a nice bit of ‘character’ to add to a command base.
 |
| Kettledrummer on the Stockholm Roll. |
My Foundry Kettledrummer, despite not having the drum banners (perhaps taken off prior to battle?), would fit perfectly for the this command base. To finish off the command base I had a rummage in my bits box for some ‘battlefield debris’. I think the challenge with this is to be subtle without any detail becoming totally lost. I’m never sure if I’ve got this right or not.
 |
| A selection of debris from my bits box to add to the command bases. |
 |
| Roughly placing the debris items to see how they’ll fit with the figures on the base. |
 |
| Marcin Kazanowski with his faithful kettle-drummer! |


Stanisław Koniecpolski
The second base is for the commander in chief at Dirschau, Stanisław Koniecpolski. At this time the Commonwealth had two overall army commanders, appointed by the Sejm (the Commomnwealth parliament of nobles). The most senior was the Crown Grand Hetman, and the junior post was the Field Hetman. In 1627 the Crown Grand Hetman position was vacant, and Stanisław Koniecpolski was the Field Hetman (he was promoted to Crown Grand Hetman in 1632). He had risen quickly to this exalted rank and was also a very experienced general.
TAG produce a great looking Hetman figure, holding a ceremonial mace or ‘bulawa’, that was a symbol of a Hetman’s position. I used this figure to represent Koniecpolski. I painted him to mainly match the outfit in this portrait, although I jazzed up his zupan (long, top coat) a bit.
 |
| Portrait of Hetman Stanisław Koniecpolski, painted around 1640. |
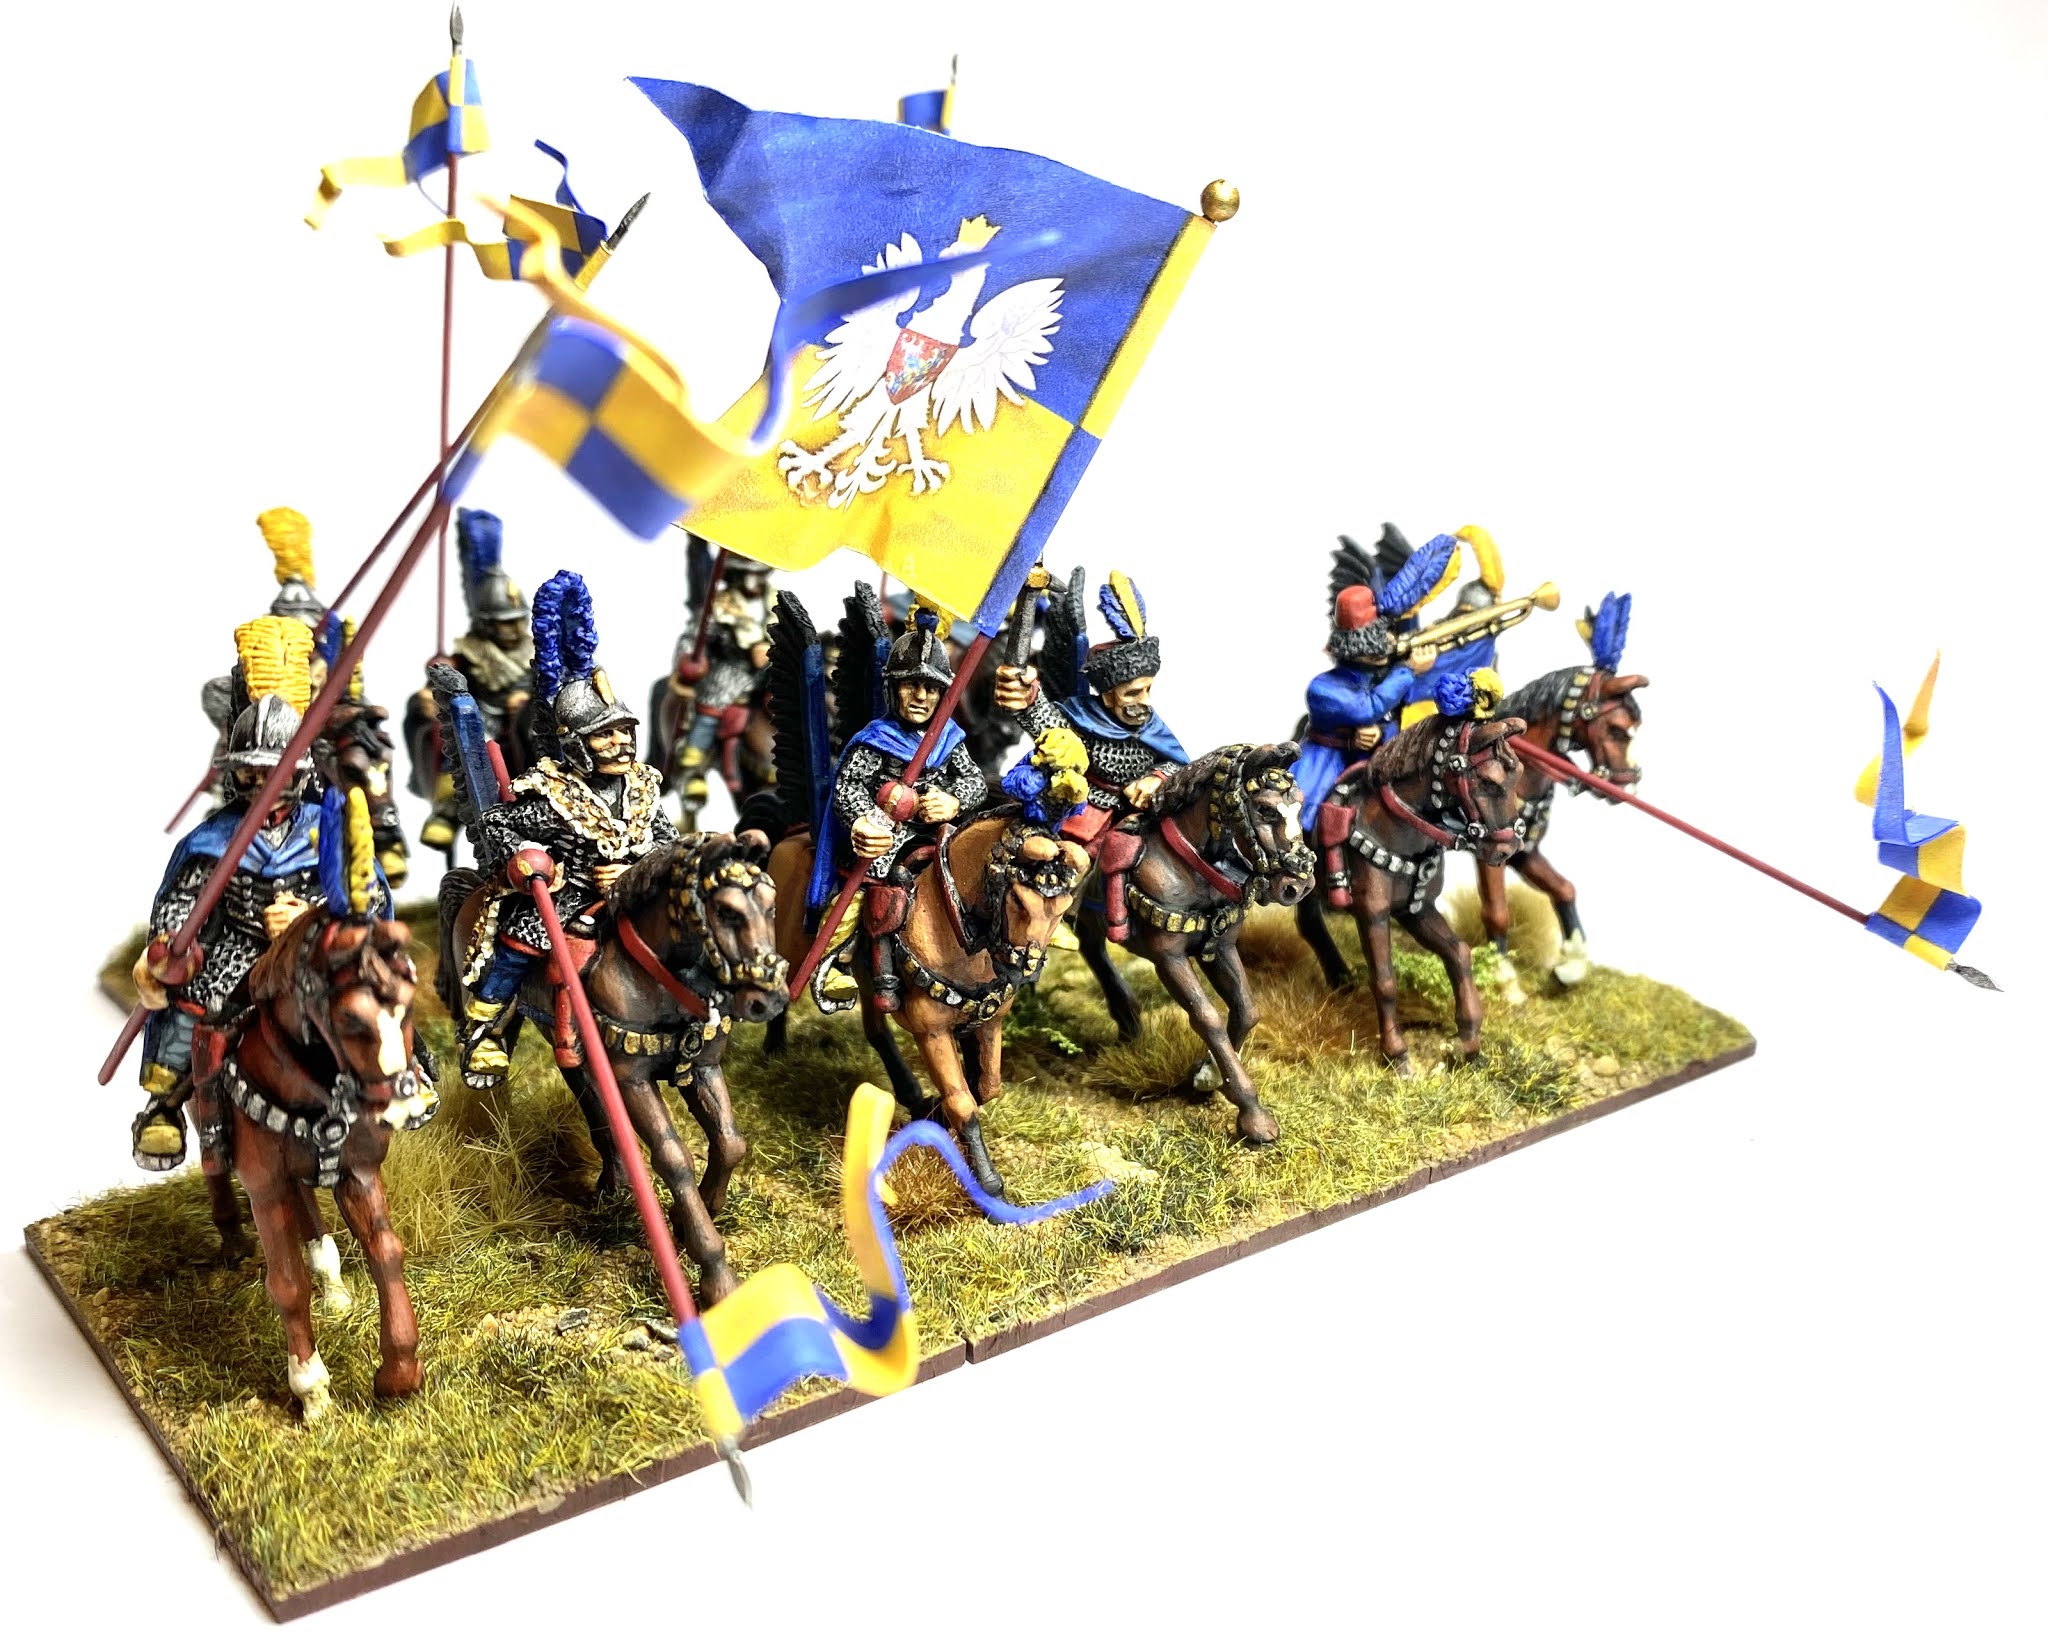
To accompany Stanisław Koniecpolski I thought of including a standard bearer on the command base. I have done this on other command bases before, especially when the historical general I’m representing has a known personal standard. I hadn’t seen this mentioned for Polish generals but was lucky enough to get a question answered by the super helpful, Michał Paradowski, the author of the recently released Despite Destruction, Misery and Privations. Michał explained that Polish generals in this period did not use flags, but the Hetman in command of the army would have a ‘Hetman’s Sign’ or ‘znak hetmański’ (see Wikipedia description here link.) This was only used by the overall, senior Hetman commanding in a campaign.


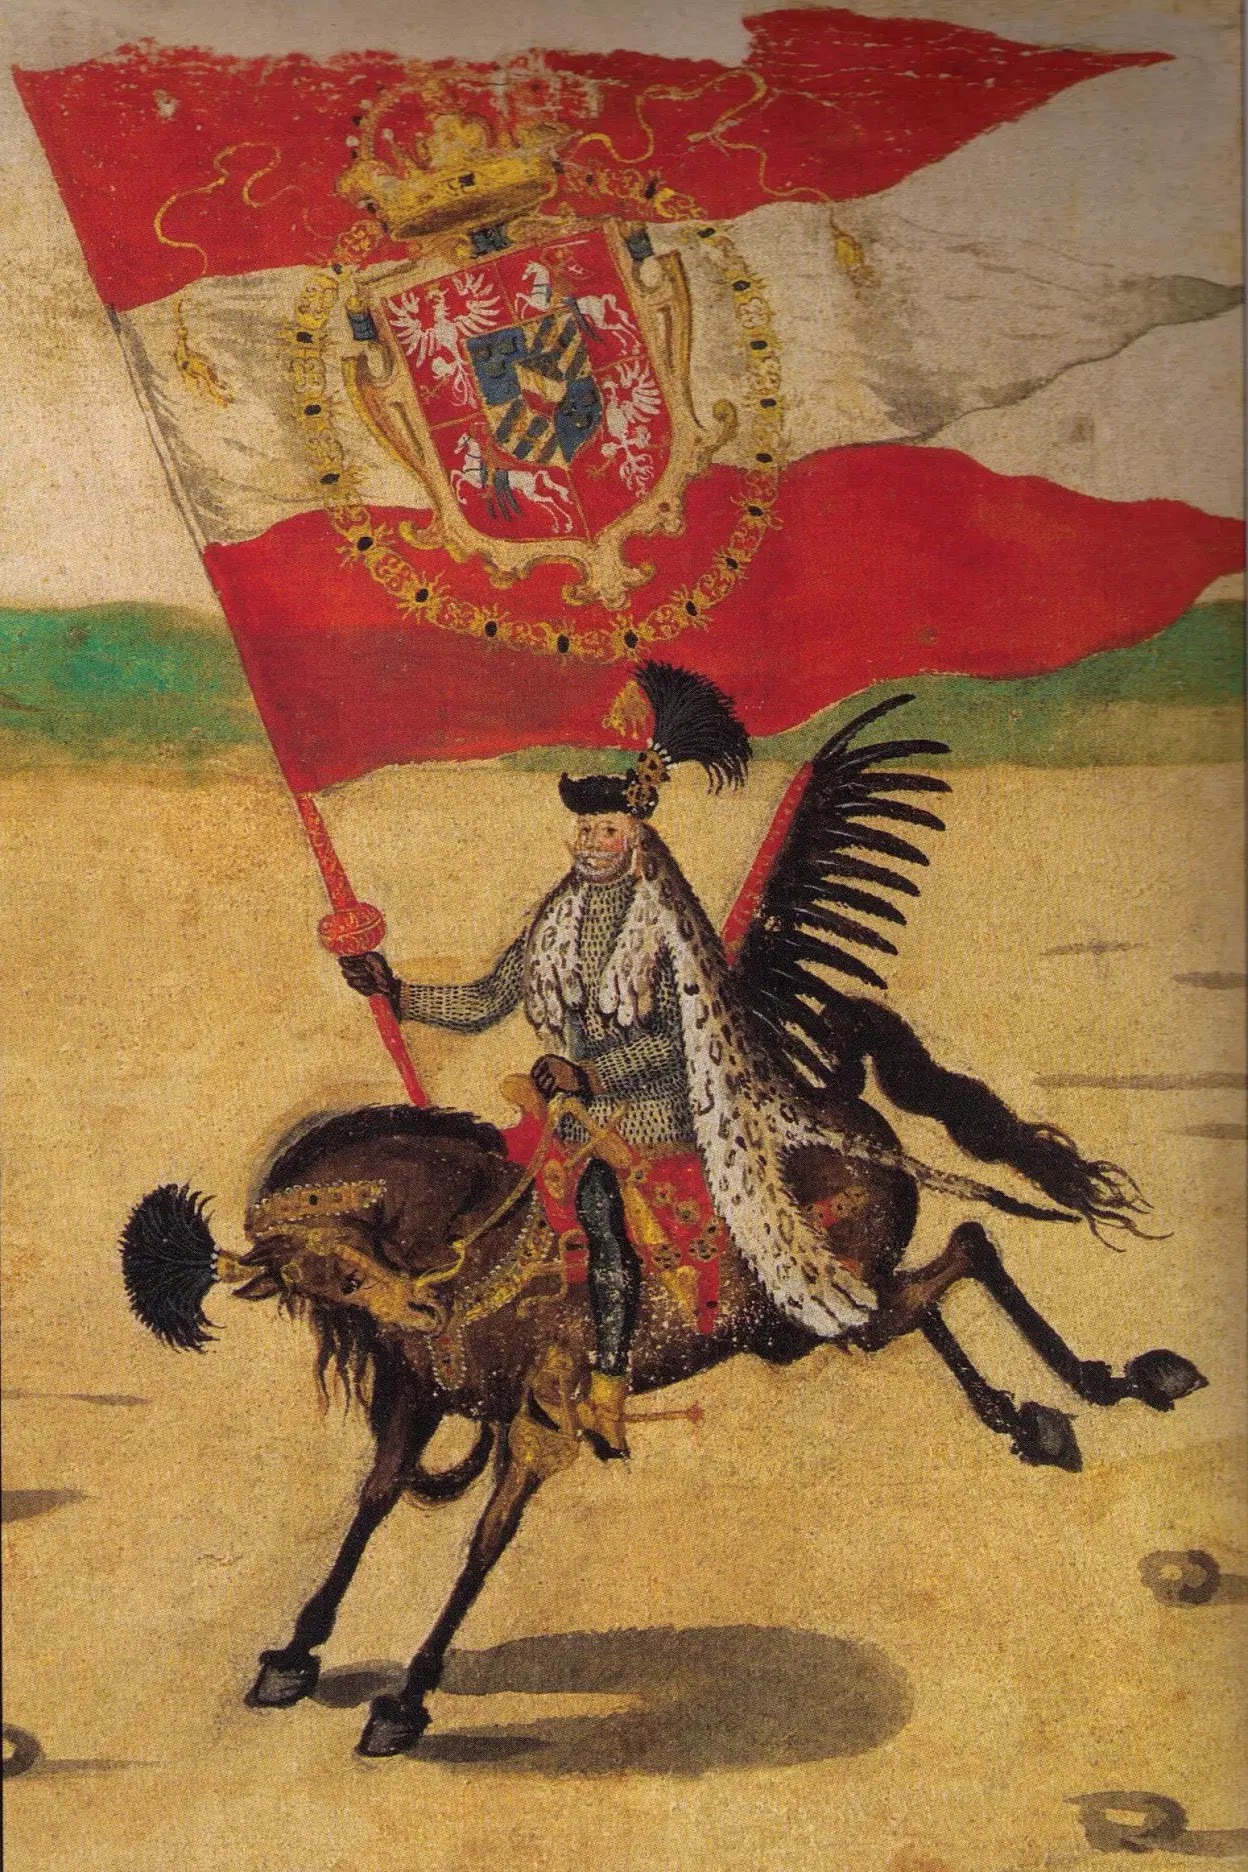
Above are a a couple of exerts from 19th century paintings that suggest what the Hetman’s sign might have looked like. These are the best I had to go on as I haven’t been able to find any more details of what exactly made up the Hetman’s sign. The sign is shown as a long spear or lance, featuring a small ‘wing’ of feathers, and a small disc below this. There may be streamers attached to the disc. Some pictures show a small sphere on the lance point, similar to what is used for some flags’ staves. (It seems that later on in this period the feathered wing was replaced with a horse-hair tail.)
I’ve not seen a Hetman’s Sign produced by a figure manufacturer yet. Based on the limited information the sign seemed fairly straightforward to scratch build. I decided to use a hussar lance as the basis for my Hetman’s sign. To make the disc I used a small piece of green stuff and moulded this on to the lance. For the feathers I used an off-cut from a hussar wing that seemed to match the illustrations above. This was filed to fit, and then super glued to the lance between the disc and the point. I then used some paper to make the streamers and glued these on to the lance just above the disc. Finally I glued a small bead to the lance point. I then painted up the model sign, with plenty of gold adornments.
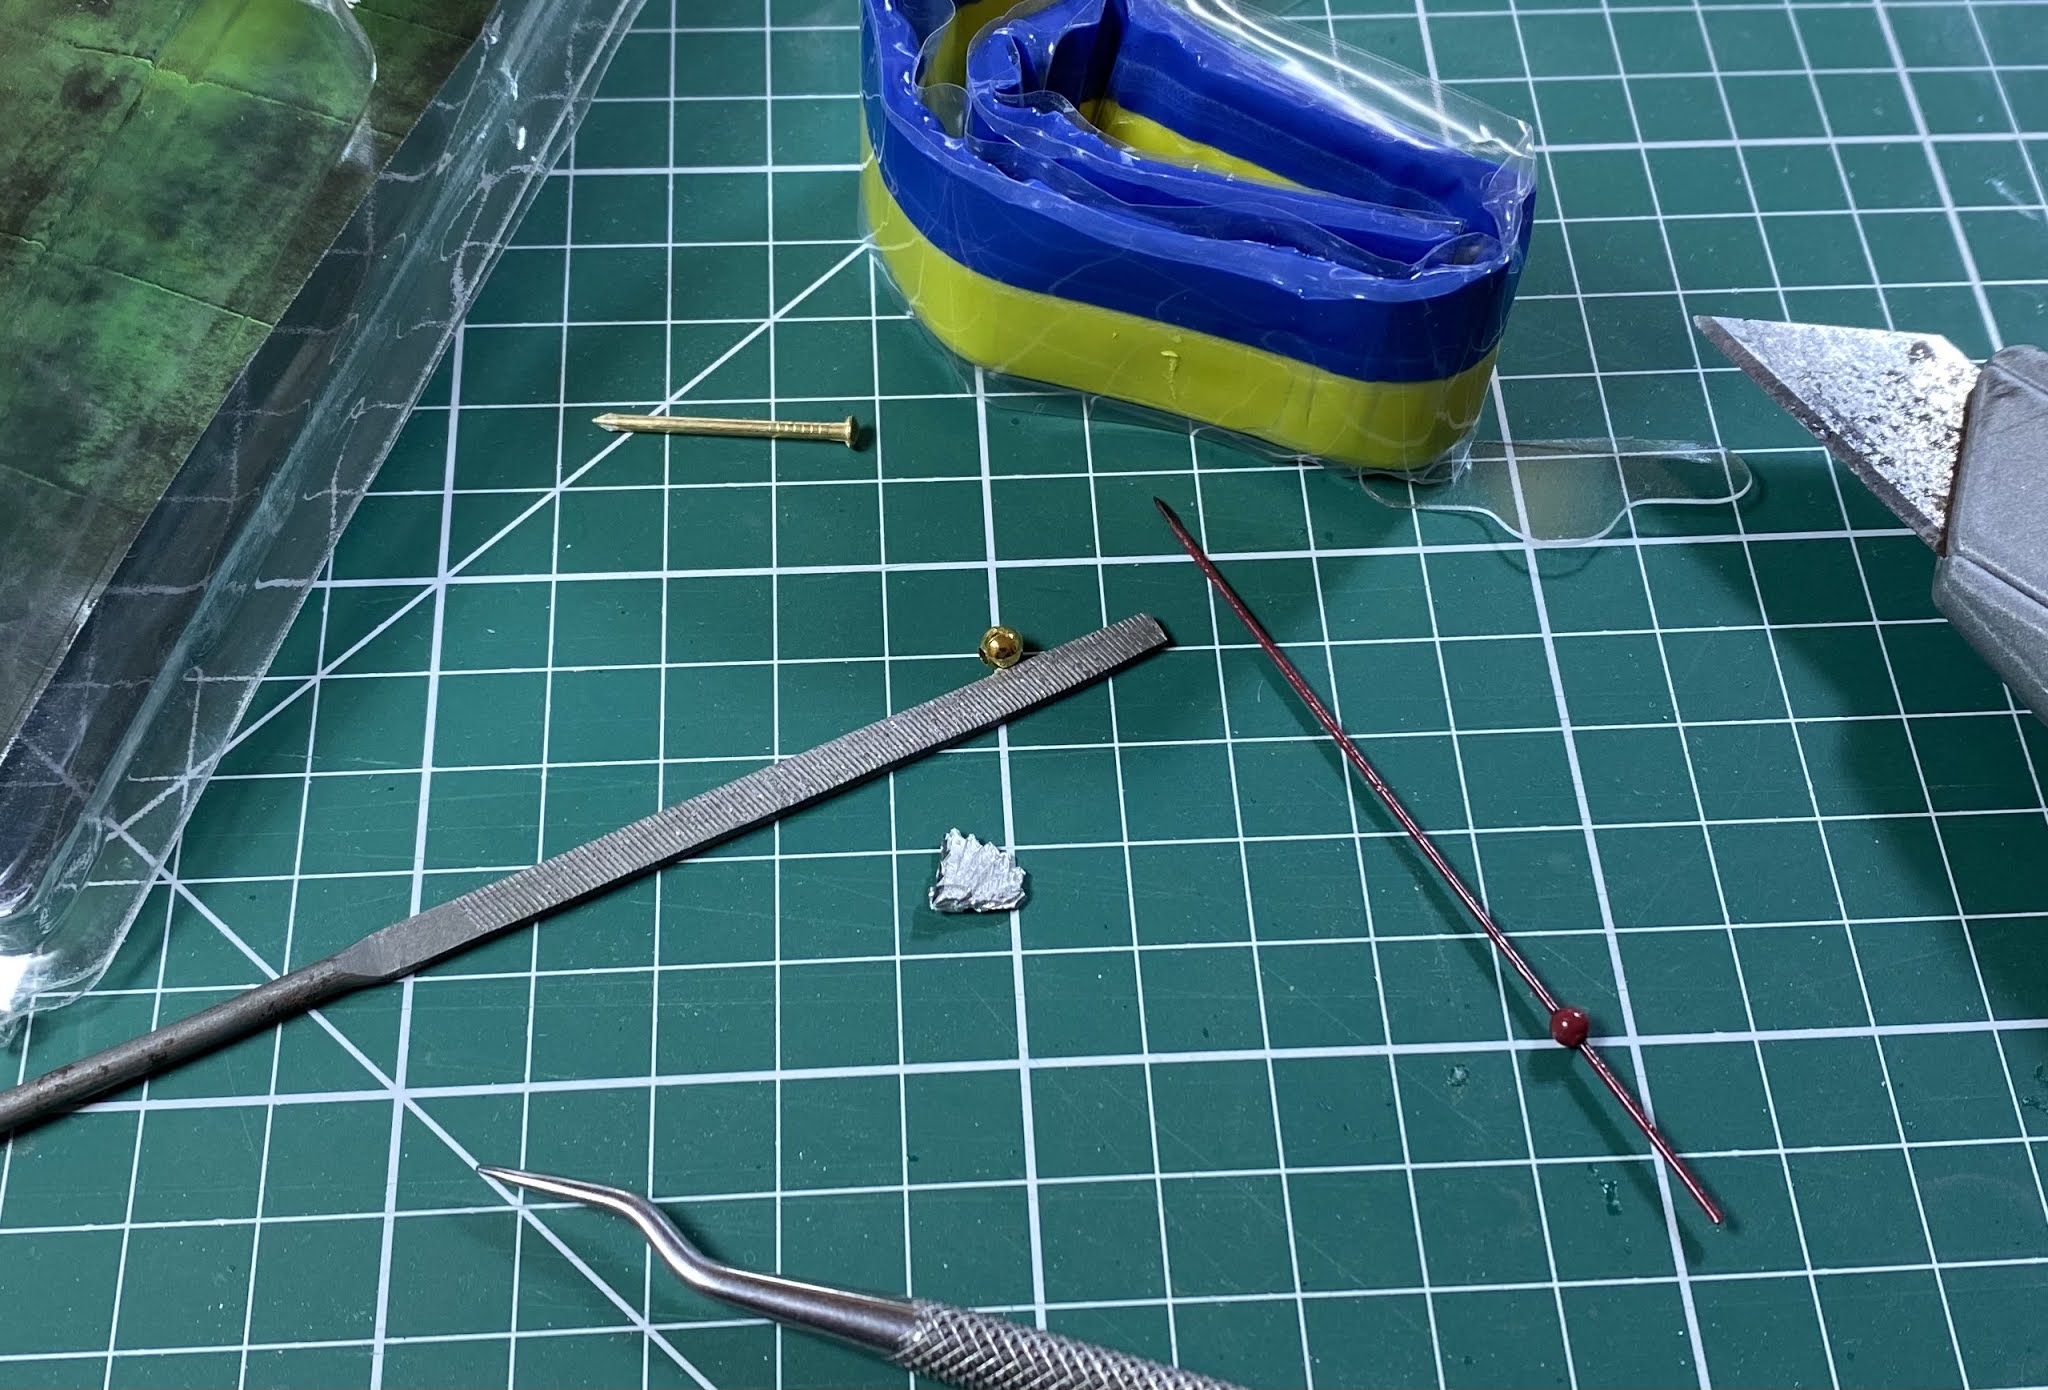 |
| Raw materials and tools to make a Hetman’s Sign. |
 |
| My interpretation of a Hetman’s Sign. |
The finished Hetman’s Sign will make a nice distinctive addition to Koniecpolski’s base.
 |
| The finished sign with added paper streamers. |
To accompany Koniecpolski, and a mounted figure carrying his Hetman’s sign, I have included another mounted kettle-drummer, this time from TAG. I went for very dark coats for Koniecpolski’s followers to match his cloak colour, and this hopefully helps the great man stand out more in his bright red zupan. With items of debris to add to this base in a similar way to the previous base I was done.
 |
| Field Hetman Stanisław Koniecpolski, carrying his buława, accompanied by his Hetman’s Sign and kettle-drummer, ready to lead the Polish-Lithuanian forces to battle. |


With these command bases done I can be sure that I’ll have generals ready to lead my Polish-Lithuanian forces to battle. I’ll need at least one more command base, so I will need to think of some more ideas for suitable figures.
The next items on the painting table for the Poles are a step down in the hierarchy from the mighty Husaria and noble commanders. Next up is some Foreign Infantry, and I’ll be using figures from a manufacturer that is completely new to me.
Until next time!
Andy @ FOGH