Wednesday 23 December 2020

Husaria - the Polish Hussars of the 17th Century (part 1)

This blog post describes the start of my 1620s Polish and Lithuanian Commonwealth army with the famous Polish ‘Winged’ Hussars. This post will cover: little bit of historical background, my purchase of some figures, and the preparation of the figures for painting.

Battle of Kircholm 1605, by Wojciech Kossak

First advanced the hussar squadron of the marshal himself, well armoured, and so imposing that any king might be proud of such troops. Only nobles of the mountains served in this squadron, chosen men of equal size; their armor was of bright squares inlaid with bronze, gorgets with the image of the Most Holy Lady of Chenstohova, round helmets with steel rims, crests on the top, and at the side wings of eagles and vultures, on their shoulders tiger and leopard skins, but on the officers wolf skins, according to custom.” From ‘The Deluge’ by Henryk Seinkiewicz

Polish ‘Winged’ Hussars must be the most stunning of troop types for Renaissance wargamers.  Armoured and lance armed, elite cavalry, they formed the core of Polish and Lithuanian Commonwealth armies for over two centuries.  With brightly coloured and flowing lance pennants, and with their iconic eagle feathered ‘wings’, these were the poster pin-up cavalry for me as a teenager.  When I started wargaming, in the 1970s and 80s, renaissance wargame rules used Winged Hussars on their covers, and even Games Workshop payed homage to them with their Warhammer Kislev Winged Lancers.

Games Workshop’s “Kislev Winged Lancers” a fantasy tribute to the Polish Hussars. 

Raising my own miniature units of Polish Hussars has been a wargaming ‘itch’ that has taken a long time for me to scratch. When I recently started my 28mm Thirty Years War (TYW) forces to refight Lutzen (1632) I was just thinking of the conflicts that played out in Western Europe.  However, researching Gustav Adolph’s Swedish army kept prompting me that he had ‘cut his teeth’ fighting the Poles before he came to Germany in 1630.  With Lutzen ‘refought’ I immediately started forming plans for a Polish army, including the glorious Hussars, that I could use as new enemies for my Swedish forces.

Hussar formation at the Battle of Klushino (1610), painting by Szymon Boguszowicz, 1620

The Polish Hussars were originally light cavalry, evolving in the 16th century from similarly equipped light horsemen in Hungary. As time went by their equipment got heavier and they replaced the heavily armoured Polish ‘knights’ as the main strike force of Polish armies.  The Hussars became the most important component of Polish armies, and the preeminent cavalry of Eastern Europe.  The Hussars’ equipment and horses were expensive, and their ranks were filled with Polish and Lithuanian nobles, and their retainers. 

“Of these horsmen, some are called Hussari, who are armed with long speares, a shield, a Carbine or short gunn, and two short swords, one by the horsmans syde, the other fastned vnder the left syde of his sadle.” Fynes Moryson describes the Polish cavalry in the 1590s.

Entry of the wedding procession of Sigismund III Vasa into Cracow (detail) 1605

There is a lot of superficial information available, especially on the internet, covering the Polish Hussars, which is great to get an overview and some historical eye-candy.  If you want to delve a bit deeper then luckily Osprey have an excellent volume, in their Warrior series, that covers them in some detail (https://ospreypublishing.com/polish-winged-hussar-1576-1775-pb).  There is also an even more detailed treatise available in Polish, ‘Husaria’ by Radoslaw Sikora, often available on Amazon (https://www.amazon.co.uk/dp/8324054685/ref=cm_sw_em_r_mt_dp_YI63FbDD4S0BQ).  These are both lovely books, and worth reading even if you only have a passing interest in the subject.  

When collecting an army I like to base it on a particular historical campaign, and may be also a particular battle.  This helps me define some parameters for the force, and gives me some focus to my research. As I wanted to use my TYW Swedish army as the opponent for the Poles, I decided on the campaign in Prussia in the late 1620s.  Between 1626 and 1629 Gustav Adolph, and his Swedish army, invaded the Polish territory of Prussia in an attempt to take control of Gdansk.  The battle in this campaign that tempted me most was Tczew (or Dirschau in German) in 1627, where there are large clashes of Polish and Swedish cavalry.  (I have a blog page with some ideas for those wanting to research 17th century Polish armies here link.)

Helion have just published a book specifically on the Polish army for this campaign against the Swedes.  It is called Despite Destruction, Misery and Privations and is written by Michał Paradowski.   I am sure this will become the standard work on this period for the Poles (https://www.helion.co.uk/military-history-books/despite-destruction-misery-and-privations-the-polish-army-in-prussia-during-the-war-against-sweden-1626-1629.php).

Helion’s new title on the Polish army in the 1620s.

While searching for a particular campaign and battle, I had already (perhaps impetuously!) ordered some figures.  I started with figures from Warlord (link), The Assault Group (link) and Foundry (link).  All of these are metals.  I already have lots of figures from their 17th century ranges in my TYW armies, and so I was hopeful that their Polish ranges would also mix together ok. 

My first excited purchases of Polish Winged Hussars - Warlord, TAG  and Foundry.

From reading the books above, my idea of what would look right for 1620s hussar units began to form:
  • Exact equipment would have varied to some degree in each company, or ‘banner’ of Hussars.  A Rotmistrz was responsible for the recruitment of each Hussar banner. The nobles recruited in to the Hussars were known as ‘companions’. Each companion brought a retinue of followers, who would have formed the rear ranks of the banner in battle. The companions lavished their wealth on luxurious equipment and also equipped their retainers. So, some variety in the figures used to represent my miniature banners, would feel right.     
  • The best equipped Hussars had back and breast plate armour (often with strips of plates), a helmet with nose guard and ‘lobster’ style neck guard, and chain mail sleeves with chain mail thigh protection.
  • The Hussars would wear cloaks, with the best equipped having animal pelts such as leopard, wolf, or even tiger.
  • The Hussars’ most striking piece of equipment was the ‘wings’ of vulture or eagle feathers.  However there is a lot of uncertainty about how these were shaped and worn, how they evolved over time, and whether they were worn in particular battles at all.  I have chosen to represent wings as attached to the rear of the saddles, and being worn singularly, sometimes in pairs, or not at all by the poorer Hussars.
  • The Hussars iconic weapon was the long lance. This was longer than the typical lance used in the west, and had a distinctive ball shaped guard above the grip.  The painted lances, with their long colourful pennons, were probably distinct for each banner of Hussars.
The Warlord Hussars (link) are in very dynamic poses.  There are available in boxes of eight figures, or packs of three random models.  The horses and riders are quite distinctive, and I don’t think they will mix in the same unit with the other ranges.  Their equipment makes them look better suited to the later 17th century, such as for the famous 1683 defence of Vienna against the Ottoman Turks. The shapes of the wings (bending forward) are also perhaps better suited to the late 17th century. (The wings would be fairly easy to prune back to a shape more suitable for the earlier 17th century.)

Polish Hussars from Warlord Games. Brass lances much appreciated! 

The Assault Group (link) are very nice models and have three different packs, each of three figures,  available; command, levelled lance and upright lance.  The armour and equipment looks fine for the 1620s (lots of chainmail for the arms etc.) and the wings are also perfect for the early 17th century.  The packs I received seemed to have been a bit mean with them wings, but TAG do sell the wings in separate packs if you need more. The lances seem a bit short, and I’m not keen on this bendy metal type.  

Polish Hussars from The Assault Group.

The Foundry (link) models are certainly the oldest sculpts of the three companies, as they look like the work of the fabulous Perry twins from when they sculpted Foundry figures. There are three Hussar packs, each of three figures; command, upright lance and levelled lance, and also a ‘general’ command pack of three figures.  The figures look fine for the 1620s with plenty of chainmail in evidence.  The wings are of the bent forward type and so I will be pruning these back to match the TAG wings.  You do get plenty of wings though.  The lances are, like  TAG, of the bendy metal variety and so I will replace these. Being quite old sculpts these are perhaps large  25mm rather than small 28mm.   

Foundry Polish Hussars and cavalry command.

The TAG and Foundry Hussars fitted this 1620s feel perfectly. The TAG and Foundry riders can also be mixed in the same units.  Their horses however don’t mix in the same unit so well, in my view.  On this basis I have decided to form my Hussars units in three ways:
  • Foundry horses, with a mix of Foundry and TAG riders.
  • TAG horses, with a mix of Foundry and TAG riders.
  • Warlord horse and riders. (The Warlord units will be slightly anachronistic, but they are just too nice to leave out!) 
With the research and planning done I got to work on the ‘filing and chipping’ of the metal figures.  I also needed to carry out some minor conversion to the figures to have the wings saddled mounted, rather then mounted on the riders’ backs.  Some green stuff modelling putty was used to make any repairs required to cloaks and animal skins.

Some simple conversion work to move the wings to be saddle mounted rather than than on the riders’ backs.

I have typically glued horse and rider together at this point, after cleanup.  I decided to paint the Hussars separately from their horses, and glue together after painting.  I primed / undercoated the figures with Halfords (a cheap UK car and bike parts supplier) black spray primer. I then realised that I didn’t have a method to hold the horseless riders for painting.  I came up with a perhaps slightly over-fiddly method.  I drilled a small hole with a pin vice in the groin of each rider (ouch!). I then put some 0.5mm metal rod in to some corks I had lying around, and then PVA glued the riders on to the rods. These were a bit wobbly and unsteady. I therefore glued UK 2 pence pieces under the corks and found some magnetic sheeting strips (UK 2p are magnetic) to put on my painting tray.  This works ok so far - but seems a right faff!  I had to number the riders and horses so that I could remember which rider was fitted to sit on which horse (they were not interchangeable after the chipping and conversion stage).


I also decided to leave the lances separate to the figures during painting.  This would make handling the figures easier, as the lances are a really long 80mm, and it also make it easier to attach the pennons while the lances are separate.  The Foundry and TAG figures come with white metal lances.  As mentioned above, I’m not a fan of these as they are very easy to bend during games, and then very difficult to great straight again. Warlord use brass rods with shaped points for their lances and so I copied this for the figures from TAG and Foundry. (Warlord also sell these brass lances separately as “Metal Pikes” - see link.) Warlord have some really nice white metal, shaped ‘balls’ to place on the lances as the hand guards in their box set.  For the other manufacturers’ figures I used some tiny beads I found at home. I primed the lances, all stuck in to a piece of cardboard, at the same time as the figures. 

Small beads added to brass 80mm ‘lances’.

As well as building Hussars to form the units in my Polish army, I also had a crack at making a figure from my wargaming history.  Anyone familiar with the Wargames Research Group (WRG) Renaissance wargames rules will recognise the illustration below on the left. This picture graced the front cover of the second version of the WRG army list book that came out in 1984 (no fancy full colour covers back in the 80s!).  I spent many, many hours perusing the lists in this book, and have a always liked this picture. I made the figure on the right by making a slight change to a Foundry Polish commander.  I added the horse crest (an off cut from an altered Hussar wing), changed the position of the horse wing, and cut down the wing.


The back cover of the WRG army lists described the front cover illustration as follows:


I am sure that this figure will make a fine addition to a Polish command stand.

In the next part of this series I will cover the painting of my first unit of Hussars. 

Until next time!

Andy @ FoGH


Friday 20 November 2020

Old Blue And Other Colours

These 2 brigades were of the flower of the Army: old souldiers of 7 or 8 yeeres service (the most of them) and whom the King had there placed, for that he most relied on them.” Williams Watts describing the Old Blue and Yellow Brigades at the Battle of Lutzen.

This blog post looks at my approach to representing the Swedish infantry brigades of the Thirty Years War, in partiocular those at Lutzen 1632, using the Pike and Shotte rule system from Warlord Games.

The Swedish ‘colour’ infantry brigades, with their elaborate ‘squadron’ formations, are for me an iconic part of the Swedish army in this period.  I want to be able to reflect these formations, and explore their tactics, in my miniature versions of these brigades.

Here is a brief background to the Swedish infantry brigades of the period. 

(The Osprey “The Army of Gustavus Adolphus: Infantry (Men-at-Arms)” by Richard Brzezinski is an excellent introduction to this topic.) 

As Gustav Adolph’s main field army evolved during the 1620s key infantry regiments became known by the colour of their flags as well as their colonels’ names; hence we get the Yellow Regiment, the Green regiment, the Red regiment and so on.  Regiments, which were mainly an administrative formation, were grouped in to brigades for battles.  The brigades were named after their senior Oberst (Colonel) who commanded the brigade, or more simply the senior regiment’s colour.  So you have the Yellow brigade, the Green brigade etc. (It is worth noting that the Swedish army was recruited from across Europe, and at Lutzen the majority were German, but also with many Scots, and other nationalities, as well as Swedes.)

Gustav Adolph experimented and evolved how these brigades were organised as well as the tactics and formations used on the battlefield.  On the battlefield a brigade was broken down in to units, of around 500 men, called squadrons. Regiment strengths varied so that a brigade may be made up of one strong regiment, or a number of smaller regiments, so that it had enough men to form the required number of squadrons.  Each squadron in the brigade was made up pike and musket armed troops, with the ideal ratio of muskets to pikes generally increasing over time.

This picture shows a simplified view of a three squadron brigade.  This assumes a ratio of one pike to one musket.  As time went on squadrons would have had less pike and/or more musket.  Surplus musketeers were formed in to a reserve within the brigade, or were detached from the brigade and became ‘commanded shot’ supporting the cavalry, or carrying out some other separate function.  Using the three squadron brigade as a model, and using the quite detailed information available on the strengths of brigades, with the ratio of musket to pike for the Swedish infantry at Lützen I set about planning my toy soldier version of the Swedish infantry.  (See Osprey Campaign #68 Lützen 1632, by Richard Brzezinski for more info.)

My Old Blue Brigade


Here is how I formed my version of the (Old) Blue Brigade.  This brigade was made up of a single regiment, the Old Blue regiment, that was one of Gustav Adolph’s oldest regiments, recruited mainly with Germans. The epitaph ‘old’ was used informally to distinguish the regiment from a more recently formed Blue regiment, that was sometimes called the New Blue regiment, or the Swedish regiment, as it was recruited from native Swedes. The Old Blue regiment served from 1624 and was finally disbanded in 1652. 

It seems likely that the regiment had blue uniforms as well as blue flags.  I chose to show the unit in a variety of shades of blue to reflect different issues of cloth being provided to the troops over time.  Uniforms for the Swedish infantry were at the whim of their colonel and the availability of cloth where ever the regiment was serving.  

Although quite a strong regiment, as it formed a brigade on its own, it was one of the smaller brigades at Lutzen. It also had a roughly one to one proportion of pikes to muskets.  I therefore form the brigade as three ‘small’ pike units, and three ‘small’ musket units.  Each squadron in the brigade is made up of one pike unit and one musket unit.  There is also a light gun model and crew to represent the three pounder guns that were integral to each regiment.  

In Pike and Shotte (P&S) units are classified in to three basic size categories: small, regular and large.  At the Friends of General Haig club we tend to use 8 figures in two ranks for small infantry units, 12 figures for regular, and 16 for large.  So for Lutzen this means that the Old Blue Brigade of around 1,100 men scales down in my miniature version of the brigade to roughly 50 figures, with each figure therefore representing about 20 men.

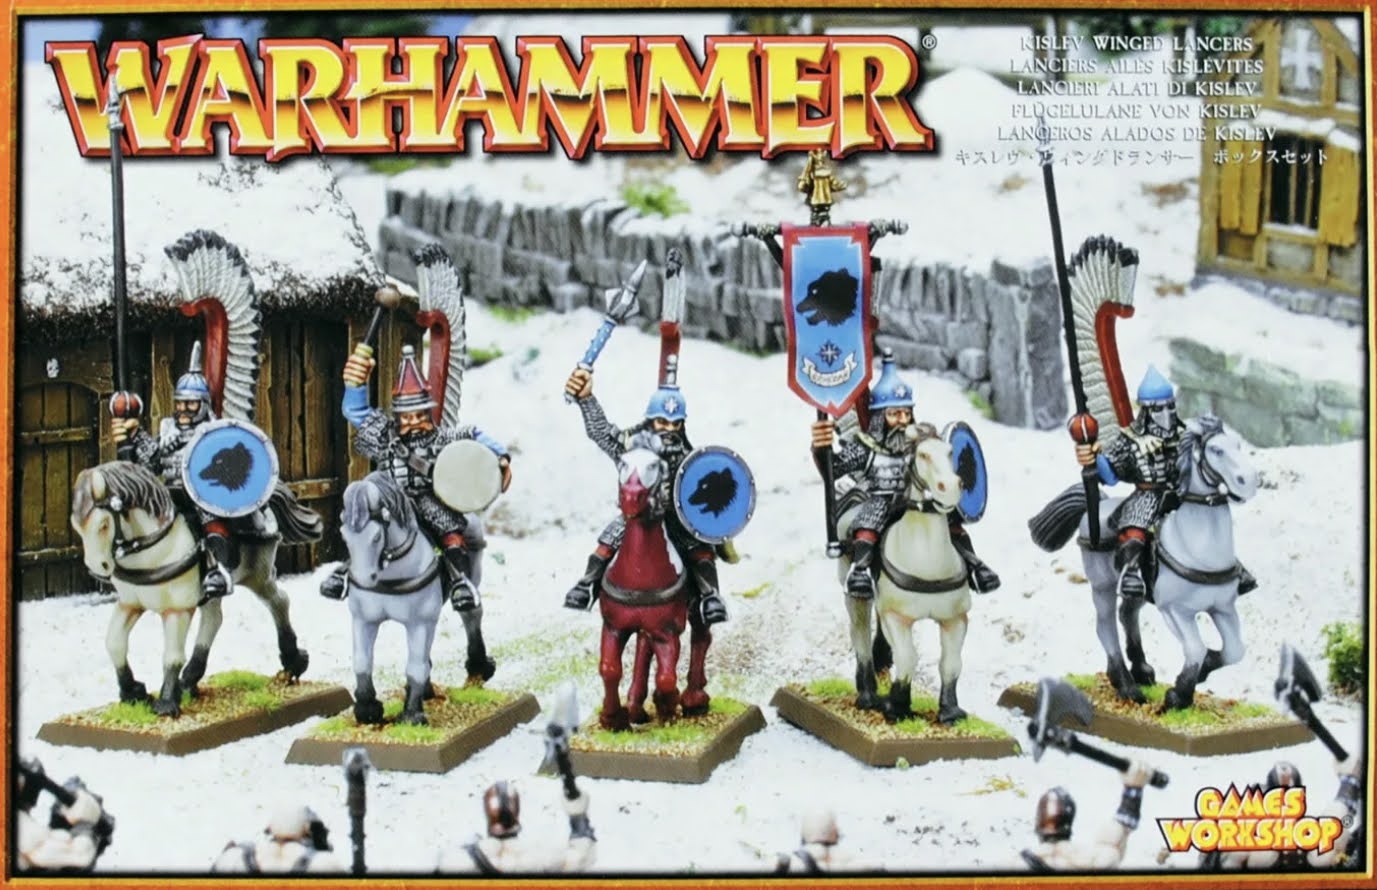
During the battle of Lutzen the Blue brigade were attacked and roughly handled by Imperial cuirassiers.  I therefore have the pike in the ‘charge for horse’ pose.  (A bit of a pain with the long pikes, but I think it looks great!). The pike are a mixture of Foundry and Warlord, and the musket mostly Warlord, with the odd Foundry or Perry officer mixed in.  The light gun is from Warlord.


To control this complex formation in P&S games each brigade has its own Commander, and so this circular command base represents Oberst Winckel, the regiment and brigade commander.  Winckel and one ensign are Foundry, and the other ensign Warlord. All flags from Flags of War.

To bolster his cavalry formations, Gustav Adolph deployed small units of muskets and light guns from his foot brigades, with the cavalry.  Such detached musketeers were known as “Commanded Shot”.  In P&S I use small units of musket with a light guns to represent these supports for the cavalry.  This unit of commanded shot represents men coming from the Blue Brigade.  This units is mostly Warlord.  I like the kneeling and standing figures showing a salvo being fired, and the helmeted figures representing those making some effort to protect themselves while fighting amidst the swirling cavalry melees. (All Swedish musketeers were meant to wear helmets but it seems that most did without what must have seemed an unnecessary encumbrance for most of the time during a campaign.) 

On the wargames table

Having a larger number of smaller units, compared to the more conventionally organised infantry (with a single pike block and two wings of musket), needs a better level of command, and the small units can be brittle.  However the Swedish brigades are very flexible, difficult to outflank, and can out manoeuvre more unwieldy opponents.  It produces a very interesting asymmetry between the Imperial and Swedish foot that can spice up a Pike and Shotte game.

To represent the more experienced of the Swedish brigades at Lutzen (such as the Old Blue and Yellow brigades) I have experimented with adding P&S special rules such Drilled, Stubborn, and Salvo.  Other brigades, which fielded more men than the Old Blue, will also have larger, and potentially more, component units.

The commanded shot and light guns supporting the cavalry can be effective, but seem to be often left behind by their commanders in wargames who, at Lutzen, are in a hurry to capitalise on the Imperial weakness in cavalry numbers early in the battle before they are reinforced.  

I would be interested in any other ideas people have for representing the Swedish brigades on the table top.

Until next time!

Andy @ FOGH 


Saturday 31 October 2020

Turning the Tables

 In this blog post I explain how I have tried to ‘turn-the-tables’ on 2020 and bring wargaming home!

The very thing that I have been missing - classic 28mm action on the table top.

Needing to ‘social distance during the pandemic must have affected every wargamer’s hobbying by now.  For me it has curtailed regular club gaming.  Actually playing the games may only be a small proportion of my overall hobby time but it is a pretty critical part.  I think a lot of my motivation to paint etc. comes from the thought of getting the miniatures on to the tabletop and playing games.  I have been missing tabletop action more and more as the months have gone by.  

I started thinking about the possibility of setting up a wargames table at home. My ideal would be a 8’ x 6’ surface.  I worked out that I could fit something of this size in our garage, previously used for rather disorganised storage.  Following agreement with the family, the garage was duly tidied up (including many trips to the council recycling centre!) and two workbench style tables purchased.  The tables I found are from Arbor Garden Solutions that I discovered while googling for tables.  

The delivered, flat pack, components.

Their extendable workbench (https://arborgardensolutions.co.uk/wooden-mdf-top-extendable.html) looked like it would provide the right combination of sturdiness, space, and adaptability.  I had no experience of this company, but the online reviews I could find looked promising, and so I jumped in and ordered two 8’ x 2’ work benches (with 1’ extending wings, and wheels).  They arrived in about a week (despite their website’s warning of potential Covid related delays) in their flat pack form.

All screws provided, but you’ll need something to screw them in with!

Arbor have some super useful videos showing how their products are put together. With these, and my very basic DIY skills, I was able to build the two workbenches in an hour or so.  (These are sturdy items and so I did need a hand to turn the finished tables the right way up!). With the extendable sections collapsed, there is still plenty of room to move around the tables.  The storage underneath the worktop surface was very helpful, and the wheels make the tables easy to move about if need be (as well as making the tables a bit taller, and therefor easier on the old back!).  

Table surrounded with the inevitable family ‘stuff’ that needed to be allowed for.

With the extendable sections up, and the two workbenches together, there is a very useful 2400mm x 2000mm flat surface. (Note that although advertised using Imperial ‘feet’, the workbenches are, I suppose, made from metric materials and therefore end up a bit bigger.)  The family all approve, and they are now all thinking of lots of other hobby related activities that they can also use this large table space for. All good, as it helps realise the final ‘business case’!

The extended surface.
Wings down, still a useful 8’ x 4’ 6” surface.

Half-term holiday at home provided the ideal opportunity to try out some games on the new ‘table’.  I have had my 28mm TYW Swedish and Imperial armies out, and played a couple of very enjoyable games, both solo and with the family. Being able to leave a game out and return to it at a later time is a great advantage.  I am also looking forward to being able to try out some other pike and shot rules systems, on my own, using full size armies.  This sort of activity is never a good use of time at the club, but will suit a home games table very well.  I may even be able to photograph a couple of battle reports for the blog.

Terrain and figures getting some use at home!

So, while I still look forward to returning to the fun of club gaming, I now have another outlet for tabletop gaming.


Until next time!

Andy @ FoGH.

Saturday 10 October 2020

The Guardsmen of the Amsterdam Kloveniersgilde (Nightwatch) - Part 4

In this blog post I give an update on my Nightwatch project.  (Part 1 is here link, Part 2 is here link, and Part 3 is here link.)  In this project I am paying homage to Rembrandt’s master piece, The Nightwatch, by converting and painting wargames figures to represent the characters portrayed in the painting.  The painting shows members of the militia company that protected Amsterdam District II, commanded by Captain Frans Banninck Cocq.


Basing


As well as getting the next batch of the militia ready for painting I have also come up with my planned basing approach for the figures.  I did consider building a single diorama model of the whole scene, but I still wanted to be able to use the miniatures for games - if I have to paint a figure then I want to play with it!  My preferred basing approach for single 28mm figures is the UK two pence piece (2p). These are a good size, are made of a material that attaches to magnetic sheets for easy storage, and is in fairly ready supply, judging by the “piggy banks” in my house, at least.  Normally I glue the figure to the 2p and then add sand and static grass to match my other multi based figures, representing troops out in the field.

An extract from the painting showing the paved ground.

For my Amsterdam militia I wanted bases that would match the painting.  In the painting the militia are show on a paved area, and this has a warm, ochre colour.  I tried a couple of ways of having a fairly flat basing area in to which I could then scribe the suggestion of paving slabs.  First was using green stuff.  This worked ok but was a lot slower than the second method which was just to use ordinary filler (spakle).  When the bases were dry / cured I then used a modelling saw and a craft blade to cut some lines on to each base the represent the joins in the paving slabs. You can see the two methods I tried in the picture below.

Craft blade and model saw are ideal tools to carve pavement slabs in to the filled bases.

Next step was to paint the textured bases.  I used Humbrol Dark Earth (Matt 29) as a base coat, with a wash of GW Agrax Earth Shade over that.  When the wash was dry I then dry brushed with the Dark Earth again, and then a further dry brush of Vallejo Ochre Brown.

Ordinary filler / spackle on the righthand two figures.

The photo above shows the finish on the two basing methods.  I prefer the finish of the ordinary filler / spackle own the right.  Its slightly rougher texture picks up the dry brushing better.  Successful basing test complete :) .

More Militia


I have also made some further conversions for the militiamen, with priming completed, and an initial dry brush, ready for painting. 

Elbert Willemsen

The next militiaman to be tackled is Elbert Willemsen. Elbert was from a long line of fishmongers and merchants, and continued the family tradition.  Despite his modest position in the picture Elbert must have  been successful in his chosen career as the city records suggest he amassed a small fortune by the time of his death in 1644.


No need for conversion this time as I have been able to use a Warlord figure from their Pike and Shotte range (in metal); in the Musketeer Marching pack. Elbert is shown with his musket shouldered and it looks like he’s holding his musket-rest as well, so this figures works out nicely.

Jan Pietersen Bronckhorst

Jan had worked his way up from humble beginnings, as a sheep-shearer, to being a wealthy merchant.  He appears to be another shield-bearer in the militia.  His role as shield-bearer was to guard the ensign, and he is shown with his sword drawn, carrying his shield.


The base for this conversion was an 1898 Miniatures armoured pikemen from their Thirty Years War range. He has had his right hand swapped for a hand from the spares box that is carrying a sword.  I have found shields from The Assault Group that are the right size and shape, and one of these will be added to the figure after painting. 

An Unknown Musketeer

The final figure this time in an unknown musketeer.  We can see his face, partly obscured, and he appears to have his musket shouldered. 


A marching musketeer from the Warlord plastic Pike and Shotte set seems to work well here.  I have modified the hat to match the figure in the picture, with a narrow-ish brim and a tall feather.

Next update on this project will hopefully have some more figures painted.

Until next time!

Andy @ FOGH

Saturday 3 October 2020

Croats and Cossacks

This blog post takes a look at my latest Thirty Years War Imperial units; Croat light horse.

My latest unit of Croats 

It is over a year since I finished my first unit of Croats (see here).  My latest units are a mixture of Warlord and The Assault Group (TAG) figures.  On this first unit the horses are all TAG and the rider are a mixture.  The flag is from Flags of War.

I now have three units of these light horse and so I've got enough Croat light horse for my Imperial force. These units will also see service as part of the new Polish army I am building for the war in Prussia during the 1620s.  The Polish 'Cossack' light cavalry had a very similar dress to the Imperial Croat light cavalry; not only were they all influenced by the Turkish and Hungarian models of dress favoured in Eastern Europe, but the term 'Croat' was used for all Imperial light horse whether their origin was Croatia, Hungary, Walachia, or Poland.  Indeed, some of the 'Croat' light horse at Lutzen were recorded as being Polish Cossacks.

The term Polish Cossack can be confusing in itself.  The Polish-Lithuanian Commonwealth referred to its own light cavalry as 'Cossacks', while 'Cossack' was also the term for the semi-independent people living in what is now the Ukraine and South Western Russia, who in this period typically fought on foot.  My Polish Cossacks will need a different cavalry standard, and also one or two men in mail armour and/or carrying a shield, just to add some Polish character to the units.


I've painted my Croat units with a mixture of colours representing their irregular nature and lack of uniform.  Based purely on wargamer’s fancy each unit has one predominate colour, that also matches the unit’s flag; in this case it is red.

The Croats are based on Warbases 2mm MDF 50mm by 60mm bases with a selection of static grasses on top of a mixture of sand, paint and PVA.


Here is the view of the Croats that a lot of my Swedish cavalry will be seeing - the sight of evading light horse, dashing out of harms way.


Here is a further unit of Croats that I finished a while ago.  These are themed in blue, and hopefully you can see the subtle shift in colours from the previous unit, while still presenting an irregular appearance. 


Another Flags of War cavalry cornet (cavalry unit flag) mounted on the ‘lance’ from the Warlord Pike and Shotte plastic cavalry box set.


These were fun units to paint.  I like painting cavalry, although doing the horses do slow me down. I like the poses of the riders with their variety of weapons and costumes.   They will be expected to do a fair amount of skirmishing and so I’ve made sure to have some of the figures with carbines. The spare carbines in the plastic Warlord Pike and Shotte cavalry box come in very handy here where the figure doesn’t come moulded with a carbine. 

I look forward to getting these new units on to the wargames table with my other Croats, and I’m sure my Swedish baggage is now extremely worried!  

My previous post on Croats for Lützen is here link.

Until next time!

Andy @ FoGH.