Showing posts with label Pike and Shotte. Show all posts

Sunday, 26 September 2021

Auldearn 1645 - The Game

Mac Colla, with his vanguard, trying to hold off the Covenanter’s surprise attack.

This blog post is a battle report for the Auldearn 1645 game that the Friends of General Haig played at the Warlord Games Open Day on the 25th September.  

You can see the previous Auldearn blog posts on:

Despite a cloudy start to the day the weather brightened up as we arrived at Warlord Games new HQ in Nottingham.  The Warlorders were as busy as bees getting everything ready for the start of the Open Day, and we were soon directed to our pitch.  We were allocated a space for the Auldearn game in a marquee in front of the building.  For this game we would be playing on a set of terrain boards that belongs to Warlord supremo, John Stallard.  John had it crafted by the talented Ernie Baker some years ago with the Auldearn battlefield in mind.

The board set up and ready to go!

On top of the board we added my terrain and two armies, as described in the previous blog posts (see links above), and before you could say “Irn Bru; brewed in Scotland from girders!” we were ready to go.

As a quick re-cap, the battle starts with Major General Hurry and his Covenanter force springing a surprise dawn attack on Montrose’s Royalists, who are camped in and around Auldearn; a small village less than 20 miles from Inverness in NE Scotland. 

The Covenanters form up ready to attack Auldearn, with only a scant few Royalists to hold them off.

Our game started with the Covenant force shaking itself out from column of march in to battalia formation for the attack.   To oppose them there is just a small Royalist vanguard, led by Montrose’s right-hand man, Alasdair MacDonald, better known as Mac Colla ‘The Devastator’.

The Covenanters had a brisk start and they made good progress over Garlic hill towards Auldearn.  The Covenanters knew that time was a critical factor, and that if they could break in to Auldearn, then they could hinder the rest of the Royalists from forming up to fight them. The Covenanters therefore threw themselves forward, with speed being of the essence.

Mac Colla knew that he had to hold up the Covenanters for as long as possible, to give Montrose enough time to rally the rest of the army, and reinforce him. Not wanting to engage in a firefight with the Covenanters superior numbers, Mac Colla decided that attack was the best form of defence, and led an immediate charge with his lifeguard in to the leading Covenanter regiment. The lead Covenant regiment reeled back from this onslaught, and Mac Colla also pulled back to rally his men for another charge.  

Mac Colla leads in his lifeguard again, while behind him, Gordon clansmen try to fend off Covenant horsemen

There was some confusion while the Covenanters tried to bring up supporting troops.  Hurry managed to bring up Drummond’s Horse on the Covenant right to threaten Mac Colla’s beleaguered troops.  Mac Colla then took a gamble; he charged again in to the Covenant foot with his lifeguard, and trusted to luck that his Gordon clansmen would hold off Drummond’s horse.

Some well timed shots from the Gordons slowed the attacking horsemen enough that their charge was held, and then, despite the fear with which the newly raised Gordons faced their first mounted attack, the horsemen were thrown back. 

To the rescue! The Irish Brigade marching out of Auldearn to join the battle.

Mac Colla’s charge was even more successful and some of the Covenanters were scattered by the impact of his lifeguard. However Mac Colla’s forces were tiring fast, and had to continue to fall back against the overwhelming numbers of the Covenanters.  It was with much relief that Mac Colla saw the first of the Royalist reinforcements marching out of the village, the doughty Irish Brigade.  

Covenant pikemen trying to develop another attack while Hurry tries to rally the Covenant horse.

The next Covenant regiment finally managed to push forward towards Mac Colla.  Their fresh musket fire tore in to the rallying Royalist vanguard. This was too much for the Gordon clansmen who ran for the shelter of the village. Despite Hurry’s pleas, Drummond’s horse would not rally to charge again, and finish off the remainder of Mac Colla’s force. 

The arrival of the Irish brigade, and the Covenanter’s continuing difficulty in bringing forward more troops, stabilised the position for the Royalists.  If only their own Royalist horse could arrive.  Suddenly the urgent sound of trumpets sounded from the Royalist left flank.  Could this be the Gordon Horse arriving in the nick of time?    

Well maybe it should have been, but something had gone awry.  Maybe it was patch of unexpected boggy ground, or may be some confusion in orders, but the Gordon Horse were delayed.  

The Earl of Seaforth’s levies moving forward against the Irish Brigade.

This gave the Covenanters a chance to recover their lines and prepare for the Royalists who were trying to flank their position. It also seems to have encouraged the Earl of Seaforth, on the Covenanter’s left wing, to push forward with his levies.  The Irish Brigade now had their hands full facing off a horde of Clansmen from the far North Western parts of Scotland, including the dread Lewis bowmen. Seaforth’s levies were supported by Halkett’s regular horsemen. 

Finally, the Royalist cavalry arrive.

The Gordon Horse finally galloped on to the field and found that the Covenanters had started to pull back from their approach.  Despite having lost some of the element of surprise, the Gordon Horse still put in a well timed charge and put Drummond’s Horse to flight.  Lord Gordon managed to rally his horsemen, and regrouped as the Strahbogie regiment, arrived from the village, marching up in support of their kinsmen. 

The wall of firepower waiting for Mac Colla’s last, desperate charge. 

Mac Colla’s lifeguard were worn out from their earlier heroics and so Mac Colla instead lead forward his remaining Gordon foot to try and keep up the pressure on the Covenanters.  This proved to be one charge too many.  The Gordon foot faltered in front of well timed volleys from the Covenant musketeers, and were finally routed. A wounded Mac Colla was last seen being dragged back to the village by the Gordons while he protested that “Just one more charge will see them off!”. 

Hurry, seeing Montrose in the front line, tries to lead his cavalry in a charge. 

On the Covenant left a fierce firefight now developed between the Irish Brigade and Seaforth’s troops. Montrose had to intervene personally to rally some of the Irish.  Hurry thought he saw an opportunity to catch the Marquis while he was rallying these troops in the frontline, but Halket’s horsemen refused to follow him in a charge on the Irishmen around Montrose. 

Covenant pikemen lead a charge into the Royalist line.

A lull in the fighting along the whole front line allowed the Covenanter to regroup and bring forward the last of their regular troops for another attack. Some well time volleys from the Covenant musketeers unsteadied the Royalists, and Hurry threw in his men at charge of pike to try and break the Royalist line. 

Lord Gordon leads his regiment of horse in to the flank of the Covenanters, supported by the Strathbogie foot.

The Covenant pike went in hard.  The Royalist foot bent, but didn’t break.  A fierce melee ensued and the Covenant officers urged on their pikemen sensing they were near to breaking through.  At this moment Lord Gordon put himself at the head of his regiment of horse, and bellowing “A Gordon! A Gordon!”, charged past the Strathbogie foot, and into the flank of the Covenanter’s attacking troops.  Some of the Strathbogie foot, perhaps being carried forward holding on to the stirrups of the Gordon horse, followed suit.

The Gordon Horse sweep though the Covenent flank.

The Covenant foot had no reply to this, and beset to their front, and now charged to their flank, started to fall back.  This last setback proved too much, and the Covenant army finally turned on their heals, broke, and ran for Inverness.

A Royalist victory; in the final turn of the game, just as we timed out at the end of the day!  It had been a hard fought, and exciting game all of the way through, with many twists and turns of fate.   Mac Colla’s early aggression was effective in holding up the Covenanters, but his troops were worn down very quickly and only the early arrival of the Irish Brigade saved them.  With the Irish Brigade and the Gordon Horse in the battle line for the Royalists, the Covenanters had a much harder battle on their hands. The Covenanters did manage to organise a final attack which was very close to being successful, but the final charge by the Gordon Horse, neatly recreating events in the real battle, finally broke the Covenant army.

The Pike & Shotte rules worked very well for us. The only issue we had was that we were reminded to not have too many special rules for your troops, as they are very easy to forget in the middle of a game!  One of the things that we really liked about rules was that they provided lulls in the battle, as well as reversals of fortunes, which are often found in actual battle accounts, but can be rare under some other rules.  

Many thanks to the Warlord crew for inviting us to the Open Day, and for looking after us during the day.  Also many thanks to John Stallard for lending us his beautiful terrain boards for the game, they set the game off very nicely.

Our pitch for the day.

A big thank you as well to all of those that came and talked to us during the day and said very nice things about how the game looked.  We had some help from a few people during the day who helped us play the game, but James gets the prize for having the worst dice throws; almost as bad as mine ;-) .


I hope that we were able to show people a little bit about how a game of Pike & Shotte works, and perhaps also inspired a few to try this period for their own games. 

Finally a big “cheers” to ‘Friends of General Haig’ Paul for playing the part of Montrose so well.


Alba gu bràth!

Andy @ Friends of General Haig


Sunday, 4 August 2019

The Bloody Clash At Lutzen - again!

"for had not our foote stoode like a wall, there had not a man of us come off alyve" 
Letter from George Fleetwood to his father, giving an account of the battle of Lutzen

Warlord Game Open Day - 20th July 2019

In a reprieve of the game at Salute this year, the Friends of General Haig (FOGH) put on the Lutzen 1632 game at this year’s Warlord Games Open Day.  This blog post is a description of the days action. 
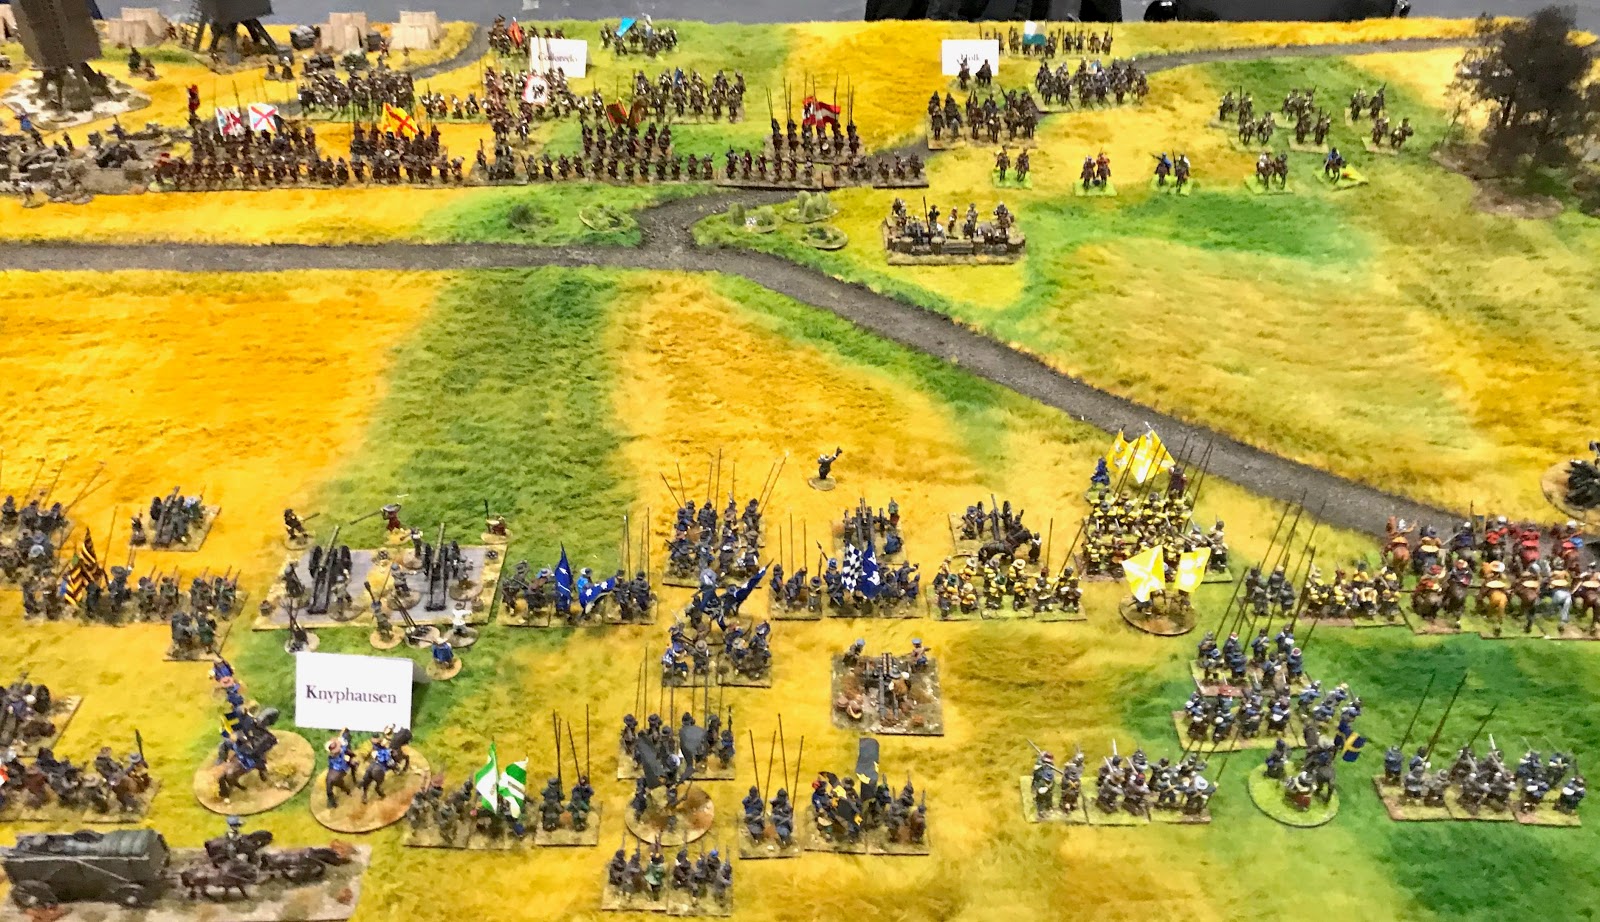
The game set up and ready to start.
It was a warm and sunny morning as three intrepid members of the FOGH arrived at Lenton Business Centre in Nottingham, also known as Warlord Games HQ.  We had a couple of hours until the start of the open day at 1000, and so we got on with unloading the figures, terrain and other paraphernalia for the Lutzen game.  The Warlord chaps had set up tables etc. in the Marcus Garvey hall already for all of the games, and so we were soon busy deploying figures for the game of Pike and Shotte.
Game under way - Swedish Green brigade attacking Imperial centre.
With the games set up we had just enough time for breakfast, and a pre game briefing.  We headed for the splendid on site caterers who were starting to turn out all sorts of hearty breakfast fare.  In the bacon butty queue we bumped in to Warlord supremo, John Stallard, and Black Powder author, Rick Priestly, mentally preparing themselves for the day’s first presentation session.

Breakfast consumed we agreed who was doing what for the game.  The plan was to run the game in a participation style, allowing visitors to the open day to investigate the world of Pike and Shotte by playing a turn or two, in between them checking all of the other cool things going on.  So we had one commander for the Imperial forces, one as the Swedish commander, and a third to umpire / generally talk to people.  This allowed us to keep the game going throughout the day, and also to ensure that any participating players had someone on hand to advise them on what was going on, and how the rules worked.  We had also cut down the forces slightly from the game at Salute to try and simplify the game for anybody joining in, and to ensure we got to a conclusion in the day.   We also set definite objectives for the day.  Gustav Adolph and the Swedish led Protestant alliance (hence ‘the Swedes’) needed to take Wallenstein’s two Imperial batteries to win the game.  If the Imperial forces held these at the end of the day then it was a defeat for the Swedes.

I have uploaded the Orders of Battle to Google Drive here.

We had various people join in and roll some dice through the day, and of course lots more who wanted to come and talk about the game, figures and terrain.  Dan from Wargames Illustrated popped by for a quick interview with video shoot.  Also Guy from Wargames Soldiers and Strategy, and Mel the Terrain Tutor, stopped by to take some photos.  It was great to talk to so many people about the battle and wargaming this period, including some people who had seen the game at Salute.

See the Wargames Illustrated coverage of the whole event here on YouTube, we start at 4:57.

See the Wargames, Soldiers and Strategy pictures of the game here on their Facebook page.

How did the game play?  


Well, it started in a similar way to the previous run out.  Gustav Adolph set off with the right wing cavalry to try and overwhelm the opposing Imperial left wing.  Before the arrival of the Imperial reinforcements, under Pappenheim, the Swedes have an advantage in numbers here.   Unfortunately, also as usual, the Swedish commanded shot were left behind as their mounted brethren hurried to chase off the Croat light horse.  Chasing the fleet of foot Croats led the Swedish cavalry to crash in to   the supporting Imperial Cuirassiers and Arquebusiers.
Gustav Adolph encouraging forward his horse and commanded shot.
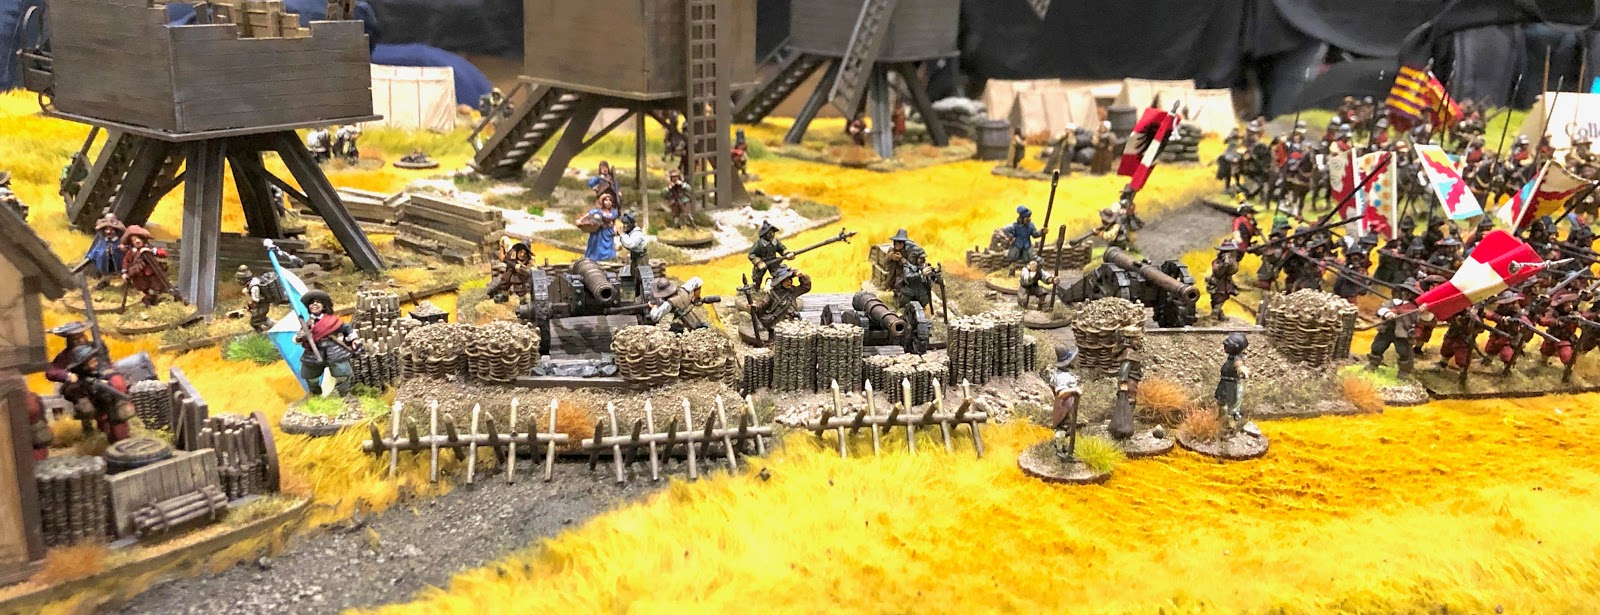
On the Swedish left wing it was a slower start and the Commanded shot here were sensibly detailed off to neutralise the Imperial commanded shot hiding in the gardens outside burning Lutzen.  This inactivity tempted forward the Imperial right wing Croats who started sniping at the Swedish horse, supported by long range fire from the Imperial ‘windmill’ artillery battery.
Lutzen on fire in the foreground, with the two armies stretched out in the background.  Imperial on the left, Swedish on the right.
Imperial Commanded shot in the gardens outside Lutzen under attack by Swedish commanded shot with a light gun.
In the centre the Swedish shifted two brigades, Old Blue and Duke Wilhelm’s, across to the right to support the right wing cavalry, and also to lead an assault on the smaller Imperial battery which sat at the junction of the Imperial left wing and centre.  Progress in the centre was general slow for the Swedes throughout the day.
Imperial 'small' battery on the left of the Imperial Centre.  Preparing for the Swedish onslaught.
The Imperial forces hunkered down to weather the initial storm of the Swedish attack, and waited for Pappenheim.
Imperial foot in the centre.
Despite having the advantage of numbers, command, and initiative, the Swedish right wing horse couldn’t break through the Imperial left wing opposite them, and started losing units to the ‘men in black’, the Imperial cuirassiers.   Knyphausen, who was the overall commander for the Swedish centre and reserve, brought across the single regiment of reserve horse to try and force a decision on the Swedish right.  It was nail biting stuff.  Wallenstein, Imperial Generalissimo, was anxiously looking behind for any sign of Pappenheim’s reinforcements.  Where had they got to?!
Imperial left wing under attack
Holk, commanding the Imperial left, was starting to withdraw his forces under the constant pressure from the Swedes when Pappenheim finally arrived.  Pappenheim, true to form, rode straight at the Swedish right flank, supported by the reinvigorated Holk.  A desperate see-saw clash of cavalry ensued between Gustav and Knyphausen, against Pappenheim and Holk.  The Swedish commanded shot were thrown in to the swirling melee to try and bring down the Imperial Cuirassiers with their musket and light gun fire.
Swedish right wing and Imperial left wing, reinforced by Pappenheim, heavily engaged.
At the same time Wilhelm’s and the Old Blue foot brigades were attacking the small Imperial battery and the supporting Imperial Infantry.  The Swedish attacks were somewhat uncoordinated but bravely undertaken.  Wilhelm’s foot stormed the smaller battery but just couldn’t dislodge the gunners.  The Old Blue brigade charged the Imperial foot but couldn’t make any impression.
Add Imperial 'small' battery under assault.
The Swedish left wing and centre were encouraged in to action seeing this bloody combat to their right.  The Swedish left wing cavalry threw themselves at the Imperial cavalry in the restricted area between Lutzen and the Windmill battery, while the Green brigade foot traded shots with the Imperial troops in the Miller’s house and the Windmill battery itself.  In the restricted space the Swedish cavalry couldn’t make the most of their numbers and casualties mounted as they hurled themselves at the Imperial defenders.
Swedish left wing pressing home their attack.
Swedish Green Brigade, supported by Thurn's brigade, assault the 'windmill' battery.
It was the Swedish right wing that broke first.  Pappenheim’s Cuirassiers had proved decisive routing two squadrons of Swedish horse before also riding down the now isolated Swedish commanded shot.  At the same time Wilhelm’s foot were finally repulsed from the small battery, and the Old Blue brigade had to also fall back.  The final straw was the Swedish left wing also breaking.  The Swedish centre accepted defeat and started to pull back.  The Imperial batteries were safe in Imperial hands, and so the game was declared an Imperial victory.  Students of history will be interested to know that Gustav and Pappenheim both survived the day (unlike the real battle in which they were killed)!
Imperial left wing victorious.
Imperial 'small' redoubt and left-centre victorious as Swedish Infantry are thrown back.
This turn of events was well timed as it was now the end of the Open Day and time to pack up, retire to one of Nottingham’s fine hostelries, and discuss the battle.  Although the Swedes had some unlucky melee dice, and also struggled with their command dice on occasions, the major problem had been trying to defeat the Imperial Cavalry without using their commanded shot to soften up the enemy first.  Similarly their infantry attacks had not been able to take advantage of their superior firepower and salvo firing.  The experience from the two big run throughs we have had of Lutzen (see here for Salute battle report) has shown us that Gustav’s war machine is powerful, but takes some expertise to use to full advantage.  Most importantly the game felt right for us, taking in to account the troops used, and how they were handled.  We had played through to a conclusion in a day, introduced some new people to big battles with Pike and Shotte, and had a great day.  Who could ask for more? :-)

We did manage to work in a few breaks to take a look at the other things going on at the Open Day.  There was an awesome Black Powder Crimea game next to us, with the Russians taking a battering form a combined British and French force.  There was an interesting French Indian War game, led by another of the FOGH, Pete Brown, who was demoing his new Black Powder supplement, Dark and Bloody Ground.  The British forces had lost the wagon train to the French and their Indian allies in each run through - what a disaster, but lots of fun!  I was very interested to see Black Seas in action with some lovely new Napoleonic ships.  The SPQR demo tables seemed busy all day with people trying out the new Ancient skirmish rules.    There was a lot to look at.  In the glass cabinets of forthcoming figures I loved the MASH unit available for the new Korean Bolt Action supplement.  They looked very familiar for some reason!

Warlord have produced a video reviewing the open day here (you can see us just behind John Stallard's left shoulder!).

To finish, many thanks to everyone at Warlord Games for looking after us on the day.  We had fun, and everyone we spoke to seemed to be really in to the games and wargaming in general.  There was a very positive ‘vibe’ about the whole event.  If you like Warlord Games’ products, or are interested in any of their games, then this event should definitely be in your plans for next year.  I wonder what will be on the table in 2020?

Until next time!

Andy from FOGH.

Saturday, 20 April 2019

Day of Battle


I’ve already written quite a few words about he day of Salute on the 6th April, but not yet actually written much about the Lutzen 1632 refight played out by the Friends of General Haig on the day.  This post therefore aims to correct this omission, and is the official battle report.

The order of battle has already been covered in a previous post here.

The troop rosters, set out for Warlord Games’ Pike and Shote, are also shared on Google drive here.

We followed the historical deployment as described in this picture.


We had divided each army into three commands.  We had six players and an umpire and so to start with we divided the commands among the six players.  As the day went on we allowed the players to have time off to go and see the rest of the show and so other commanders in the same army would take temporary control of their command.  The Imperial army had a fourth command (Pappenheim) which would arrive later and we decided to allow Wallenstein to command that in addition to his own command.


You can see it is a fairly cramped battle field, without much room for manoeuvre.  This was intentional, as the cramped conditions were all part of Wallenstein’s defence.  He knew that Gustav would try to outflank him and so he used the terrain to mitigate against this.  He also refused both flanks in an echelon formation, with some skirmishing Croats thrown forward to further protect each flank.


Wallenstein had the town of Lutzen burned to prevent the Swedes taking it and attacking through it.  He also used commanded shot to hold the gardens that surrounded the walls of the town.  The Imperial army also had two artillery redoubts, and had fortified the Miller’s house next to the Windmill battery.  The final Wallenstein touch was arming a group of camp followers to look like an infantry reserve on the left flank.


On the Imperial right we see the Windmill battery, the Miller’s House and the town of Lutzen.  There is little room for the Swedes to exploit their advantage in cavalry numbers here.  


They will need to take the gardens and the Miller’s house to allow they cavalry to move through the gap.  Wallenstein’s command here looks secure.


In the Imperial Centre we can see Colloredo has strength in depth, with cavalry units also mixed in the second line of the foot regiments.


The Imperial left under Holk looks the weakest position.  There is plenty of skirmishing light horse to try and slow down the Swedes.  Also some camp followers cowering at the back!


On the Swedish right we see Gustav Adolf II ready to attack the Imperial position. (In fact he is still waiting for his commanded shot and some more horse to deploy in this picture.)


In the centre Knyphausen has six infantry brigades, all in their 3 squadron formation with light guns attached.  The front three brigades are the elite Yellow, Old Blue and Green brigades.  There is also the Swedish heavy artillery position. 


On the Swedish left Bernhard of Saxe-Weimar has little room to manoeuvre and has the defended gardens of Lutzen to deal with.


The game started with the Swedes taking the first turn.  Gustav had no doubt what was required and immediately charged forward with his cavalry.  In fact, so keen was he to get to grips with the Imperial cavalry opposite that he decided to leave behind his slower moving commanded shot while he chased away the skirmishing light horse defending the Imperial left.  The Croats were dealt with in fairly short order but they had done their job and delayed the Swedes for a little while.  

The Imperial commanders knew they were out numbered on their left and they decided to move the reserve cavalry from the centre over to bolster the left flank.  This had a decisive effect and Gustav’s attack was quickly bogged down.  All of the Imperial horse had been made Caracole troops which in Pike and Shotte means they can not countercharge enemy horse.  This allowed the Swedes to have a slight edge in initiative to reflect their aggressive cavalry tactics.  However, the Imperial cuirassiers were still very tough nuts to crack.  Units were lost on both sides. 


Meanwhile the Swedes ground forward in the centre.  There were moving in to a storm of fire from Imperial Muskets and artillery.  But they managed to give back pretty much as good as they got.  The command dice were not kind though and it was hard work for Knyphausen getting his brigades forward.  

The player taking the role of Gustav was well aware of the historical fate of the Swedish king at this battle.  Despite this he did risk Gustav in a melee in an attempt to break the Imperial line.  There was a collective sharp intake of breath as the dice were rolled for risk to the general in combat.  He survived, and won the melee.  After this Gustav was kept out of the fighting.


On the Imperial fourth turn they could roll to see if Pappenheim arrived.  A 5 or a 6 on a D6 was required and a 5 was duly rolled.  Pappenheim’s troops arrived and charged straight in to the fray on the Imperial left.  Just at this moment, Holk, who had been commanding the Imperial left, was killed in a melee.  Pappenheim had arrived in the nick of time.  


In the centre the Old Blue brigade were up to the Imperial line but the rest of the Swedish Brigades were still struggling to come up.  Both sides were losing units due to the concentrated firepower of close range muskets and guns.  (The grey smoke indicates units disordered by enemy fire.)  Frustrated by the Imperial defences Bernhard decided to demonstrate with his cavalry against the Imperial windmill battery. 


Bernhard also sent his cavalry to attack Wallenstein’s flank, but to no avail.  A storm of musket and carbine fire prevented his Saxon horse from making any impression.  Perhaps their hearts were not in it!  No such qualms for Bernhard’s lifeguards who continued to threaten the heavy guns, and suffered accordingly.  


The tide had now turned against Gustav and it was only the Swedish Commanded shot and support from the Yellow brigade that halted Pappenheim’s rampaging cavalry.  It seemed that a stalemate was being reached on the Swedish right, Imperial left.  The Imperial forces couldn’t break through the combined arms of the Swedes, and the Swedes had lost too many cavalry to push forward.  


Could the Swedish centre save the day?  The Swedish infantry brigades had finally made it to the Imperial battle line.  You can see here only a few reserves and the Swedish heavy guns left on the Swedish side. 


The Imperial commander in the centre, Colloredo, was not going to let the Swedes dictate this final phase of the battle, and as the Swedes approached, Colloredo marshalled his reserves and counter attacked.  Imperial pike blocks stormed forward in to the Swedish formations.  The Imperial troops had the best of the ensuing melees, but the couldn’t break the Swedes.  


With stalemates along the whole line of battle , and darkness falling, the two sides had to withdraw.  The Swedish attack had been stopped, so a marginal victory to the Imperial troops.  But Gustav had survived (as the god like finger points to in this picture!).  It would have been fascinating to fight a second day, but sadly the Excel centre wanted the hall back, and so we had to end it there.

This was the Friends of General Haig’s first Thirty Years War game, and so I was very pleased that all of the commanders had really enjoyed the game, and all were eager to play it again.  Both sides were sure they could pull it off next time.  I think this is a good sign that we have a well balanced game.  The rules worked well, and all the players felt we had the factors about right.  I am certainly really looking forward to getting these troops on the table again!

Until next time!