Showing posts with label TYW. Show all posts

Sunday, 27 February 2022

Thirty Years War cavalry from 1898 Miniatures

In this blog post I look at the latest Thirty Years War (TYW) release from 1898 Miniatures; the Cavalry.  
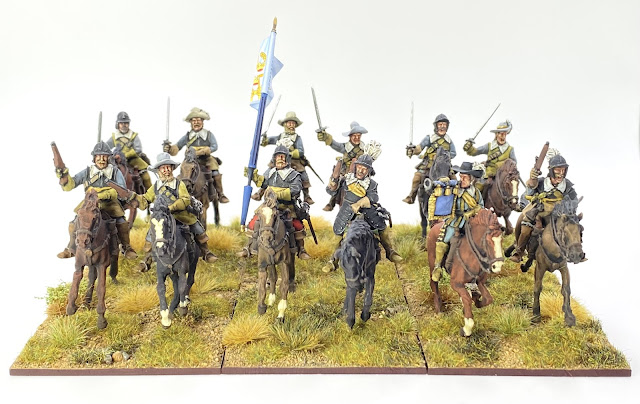
Thirty Years Wars Cavalry from 1898 Miniatures - 28mm

The post is broadly split in to three parts: a description of the figures, how I found preparing and painting them, and finally the first unit that I have built using the figures. 

The Figures. 

1898 released these cavalry at the end of 2021, adding to their existing range of infantry and generals for the period. There are nine packs in this release that include armoured and un-armoured riders, wearing helmets or broad brimmed, soft hats, holding pistols or swords, as well as a command pack. Each pack contains three different rider figures which means that you have a lot of variety available. There are three different horse sculpts across the rank and file packs, and the horses in the packs with pistol armed riders have one pistol missing from the saddle holsters which is a really nice touch. 
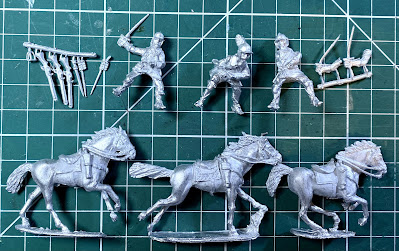
Contents of a typical cavalry pack

The command pack contains an officer, a trumpeter and a cornet / standard bearer. There are head options for the officer and cornet, and arm options for the officer as well.
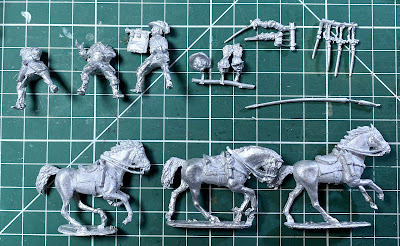
Contents of the command pack

Each pack includes separate scabbards and carbines to be glued on to the figures. For figures holding their sword the scabbards are empty, and for figures holding a pistol the scabbards have the sword sheathed. Another nice touch.

The riders fit on to the horses very easily with the saddle sculpted on to the horse rather than the rider. The horses themselves are well proportioned with the bridle and other tack nicely detailed on the models. The horses are in active poses either cantering or galloping. In addition to the riders’ animation, this will give a great impression of attacking cavalry.

The resulting figures represent the classic early to mid 17th century harquebusier type cavalry. The rider’s armour is mainly limited to back and breast plates, with the occasional figure having some arm protection as well. Helmets are either of the burgonet or single-barred Dutch pot variety although the helmeted packs include a tiny three-barred face plate that you could add to one of the figures to turn the helmet into a three-barred English pot.

They are modelled wearing a buff-coat although this could sleeved or sleeveless depending on how you paint them.  You could of course paint them as wearing riding coats and not buff coats if you choose. Many, but not all, have a scarf/sash, so necessary in a period when cavalrymen of this type looked very similar in all armies.

Figures wear leather gauntlets and have their swords suspended either from a cross belt or waist belt.  All of the figures have a cross belt on their right to which you attach the carbines. The figures have powder flasks hanging from this cross belt as well.

The figures retain the sculpting style of the infantry. Nicely sculpted, with lots of detail, and every figure has bags of character. I think they really look the part of figures for this period, and with the variety of different rider figures available, you can make a very varied looking mounted force.

Building and Painting

The figures come with minimal chipping and filing required. There are some tiny burrs from the casting process, and minor mould lines to be filed.  The metal is the softer style of white metal rather than the stiffer more brittle style of some manufacturers.  Some of the horses have only two contact points with the base and so are at risk of bending at the ankles if roughly handled. I haven’t had any accidents with horses actually breaking off the base, which I think is thanks to the more forgiving, bendy metal.  Where riders’ right arms were not positioned quite to my liking I was able to gently bend the arms in to slightly different poses. 

With at the very least a separate scabbard required to be added to every figure, there is some assembly required.  The scabbards can be a little fiddly and so super glue with a spay can activator is definitely your friend at this point. Some figures have a separate right arm that helps add further variety to units and these glue on quite easily.
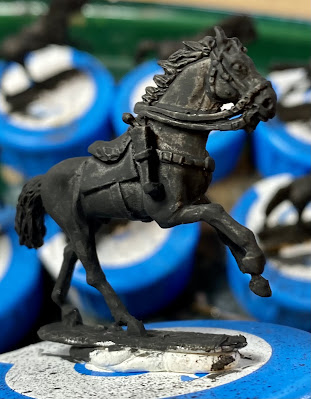
Primed horse figure

Once primed the figures are a joy to paint.  The detail is perhaps not as prominent as say a Bircorne or Bloody Miniature figure, but I didn’t have any trouble using my normal methods including washing and dry brushing.
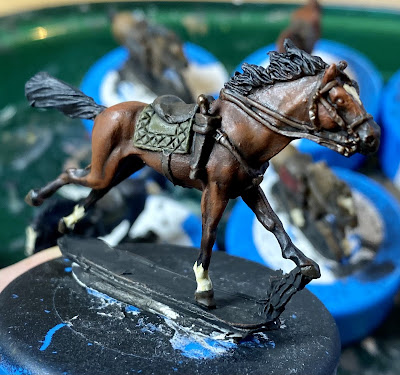
Horse following base coat, dry brush highlights, tack etc. painted, overall wash, and blaze/socks added.

My First Unit

With the style of the figures being quite animated and, to me aggressive looking, I thought they would  work really well as Gustav Adolph’s Swedish Cavalry.  From the late 1620s the Swedish cavalry were adopting a doctrine of being more aggressive and saving firepower to use in close quarter fighting.  Gustav Adolph issued orders that the first rank of cavalry should attack with pistols, that were to be fired just before impact, and the second and subsequent ranks were to attack with swords drawn.  

With the variety of pistol and sword armed figures available, I decided to have a front rank with pistols and a rear rank with swords. Swedish cavalry were often short of armour and so I had the front rank all armoured, and the rear rank mostly unarmoured.  
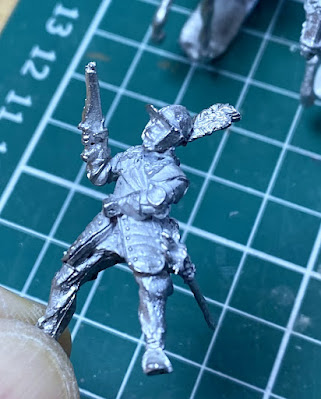
Officer with right arm, head and scabbarded sword glued in place.

As part of reducing his horseman’s reliance on firepower, Gustav Adolph also took carbines away from his cavalry units. This would mean I didn’t get to use the nice separate carbines provided for the figures, and also means that the right hand cross belts on the figures are unnecessary. However I can live with this slight oddity that I suspect the majority of people will never notice! 
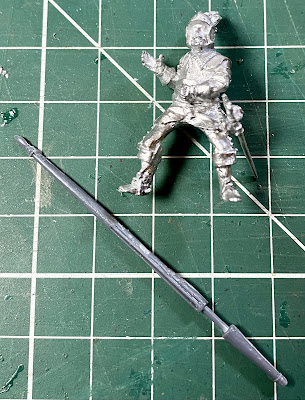
Cornet / standard bearer with Warlord plastic ‘lance’.

The cornet / standard bearer is provided with a white metal ‘fluted lance’ to carry a flag. I can never get on with white metal pole arms as I find them difficult to keep straight.  I therefore replaced this with a Warlord plastic fluted lance.  (There is one on every Warlord cavalry plastic sprue and so I have lots of spares!)

I painted the horsemen mostly in sleeveless buff coats and gave them varieties of  grey for coats and breeches. Sashes / scarves were painted yellow.  There doesn’t seem to be a clear sash colour for the Swedes at this time and so the choice was as much aesthetic as historical. Armour was painted black, and broad brimmed hats were mainly lighter greys that seem to have been favoured by the Swedes. 

The unit was finished with a cornet / flag from Mikhail Betski at MB Creation, a supplier I’ve only recently come across, who provides some really nice flags for this period. I used the colour of the flag to influence the colours for the trumpeter’s clothing as unit’s musicians were often expensively dressed by the unit’s officer as part of the military fashion of the time.  

In conclusion, I think the new 1898 TYW cavalry figures are a great addition to their range, and a great resource for all those collecting 28mm armies in this period. All of the 1898 figures have a particular style, but will still work well with other manufacturers. I’m really pleased with the unit I’ve built with them and I will be adding a few more in due course. 

The next figures on the table will be some Polish civilians and another general stand for the Poles. 

Until next time!

Andy @ The Friends of General Haig 

Saturday, 3 October 2020

Croats and Cossacks

This blog post takes a look at my latest Thirty Years War Imperial units; Croat light horse.

My latest unit of Croats 

It is over a year since I finished my first unit of Croats (see here).  My latest units are a mixture of Warlord and The Assault Group (TAG) figures.  On this first unit the horses are all TAG and the rider are a mixture.  The flag is from Flags of War.

I now have three units of these light horse and so I've got enough Croat light horse for my Imperial force. These units will also see service as part of the new Polish army I am building for the war in Prussia during the 1620s.  The Polish 'Cossack' light cavalry had a very similar dress to the Imperial Croat light cavalry; not only were they all influenced by the Turkish and Hungarian models of dress favoured in Eastern Europe, but the term 'Croat' was used for all Imperial light horse whether their origin was Croatia, Hungary, Walachia, or Poland.  Indeed, some of the 'Croat' light horse at Lutzen were recorded as being Polish Cossacks.

The term Polish Cossack can be confusing in itself.  The Polish-Lithuanian Commonwealth referred to its own light cavalry as 'Cossacks', while 'Cossack' was also the term for the semi-independent people living in what is now the Ukraine and South Western Russia, who in this period typically fought on foot.  My Polish Cossacks will need a different cavalry standard, and also one or two men in mail armour and/or carrying a shield, just to add some Polish character to the units.


I've painted my Croat units with a mixture of colours representing their irregular nature and lack of uniform.  Based purely on wargamer’s fancy each unit has one predominate colour, that also matches the unit’s flag; in this case it is red.

The Croats are based on Warbases 2mm MDF 50mm by 60mm bases with a selection of static grasses on top of a mixture of sand, paint and PVA.


Here is the view of the Croats that a lot of my Swedish cavalry will be seeing - the sight of evading light horse, dashing out of harms way.


Here is a further unit of Croats that I finished a while ago.  These are themed in blue, and hopefully you can see the subtle shift in colours from the previous unit, while still presenting an irregular appearance. 


Another Flags of War cavalry cornet (cavalry unit flag) mounted on the ‘lance’ from the Warlord Pike and Shotte plastic cavalry box set.


These were fun units to paint.  I like painting cavalry, although doing the horses do slow me down. I like the poses of the riders with their variety of weapons and costumes.   They will be expected to do a fair amount of skirmishing and so I’ve made sure to have some of the figures with carbines. The spare carbines in the plastic Warlord Pike and Shotte cavalry box come in very handy here where the figure doesn’t come moulded with a carbine. 

I look forward to getting these new units on to the wargames table with my other Croats, and I’m sure my Swedish baggage is now extremely worried!  

My previous post on Croats for Lützen is here link.

Until next time!

Andy @ FoGH.

Wednesday, 12 June 2019

We march for plunder!

"God save us from famine, plague and the Croats!"
German prayer during the Thirty Years War

This blog post describes the latest unit for my Thirty Years War collection, based on the armies at Lutzen, 1632; the Croats.

Surely the most colourful troops that fought during the Thirty Years War were the Imperial Croat cavalry.  These light horse men were recruited from the Imperial lands that bordered on the Ottoman Turkish empire. Originally made up of Croatians, as time went on their ranks were filled from many ethnic groups from the South East of the Empire, such as Hungarians, Wallachians, and even Cossacks.  All experienced in the frequent minor border clashes with the Turks.  What ever their origin, they became collectively know as the Croat horsemen, and became feared wherever the Imperial armies campaigned.

A Croat horseman
On the battlefield they were perhaps no match for heavier horse in a straight fight, but in scouting, plundering, and the general 'beating up of quarters' there were none better.  They had a fearsome reputation for plundering and were feared by the civilian population on both sides.  The Croats became the 'bogey men' of which parents warned their children, and contemporary pamphleteers horrified their readers


The Croats were classic light cavalry.  Unarmoured, and riding hardy but nimble ponies, they would skirmish with their carbines and pistols, before closing with their sabres when they had found an advantage, or sufficiently weakened an enemy.  They were famed for their canny ability to lay or avoid ambushes, after many years learning from the wily Turks and their Tartar allies.   Even rivers were no obstacle, as they were able to cross bodies of water thanks to their strong swimming mounts.


I have been looking forward to collecting and painting the Croats since I started this period.  They are something quite exotic compared to the more regular pistol armed horsemen of Central and Northern Europe.  Warlord Games make Croats for the Thirty Years War (here), and The Assault Group (TAG)  also have Croats (here) as well as covering Poles, Cossacks and Tartars that can be used for Croats.  Wargames Foundry have a set of Cossacks (here) in their Severn Years War range, including mounted Cossacks that I think also can work as Croats. They are riding really characterful ponies, and have a great range of poses.


This unit is made up of the Wargames Foundry figures, with the addition of a TAG Croat trumpeter.  They carry a banner of a shape peculiar to the Croats, made by Flags of War (here).  The figures reflect the typical clothing and equipment of the Croats; brighter shades of red, blue and green, the long eastern style of coat, sometimes worn as a cloak, often braided, knee boots, fur trimmed hats, curved sabres, pistols and carbines.  I think they look like a fearsome bunch, and my Swedish baggage train had better look out!

All of these figures were a real joy to paint.  This range from Foundry have real character, with each pack and figure named.  It was easy to imagine a story building around the unit and its piratical members as I painted the figures.  I can't wait to get them on to the battlefield so that they can start bringing some of those stories to life.

Until next time!

Andy @ FOGH.

Saturday, 20 April 2019

Day of Battle


I’ve already written quite a few words about he day of Salute on the 6th April, but not yet actually written much about the Lutzen 1632 refight played out by the Friends of General Haig on the day.  This post therefore aims to correct this omission, and is the official battle report.

The order of battle has already been covered in a previous post here.

The troop rosters, set out for Warlord Games’ Pike and Shote, are also shared on Google drive here.

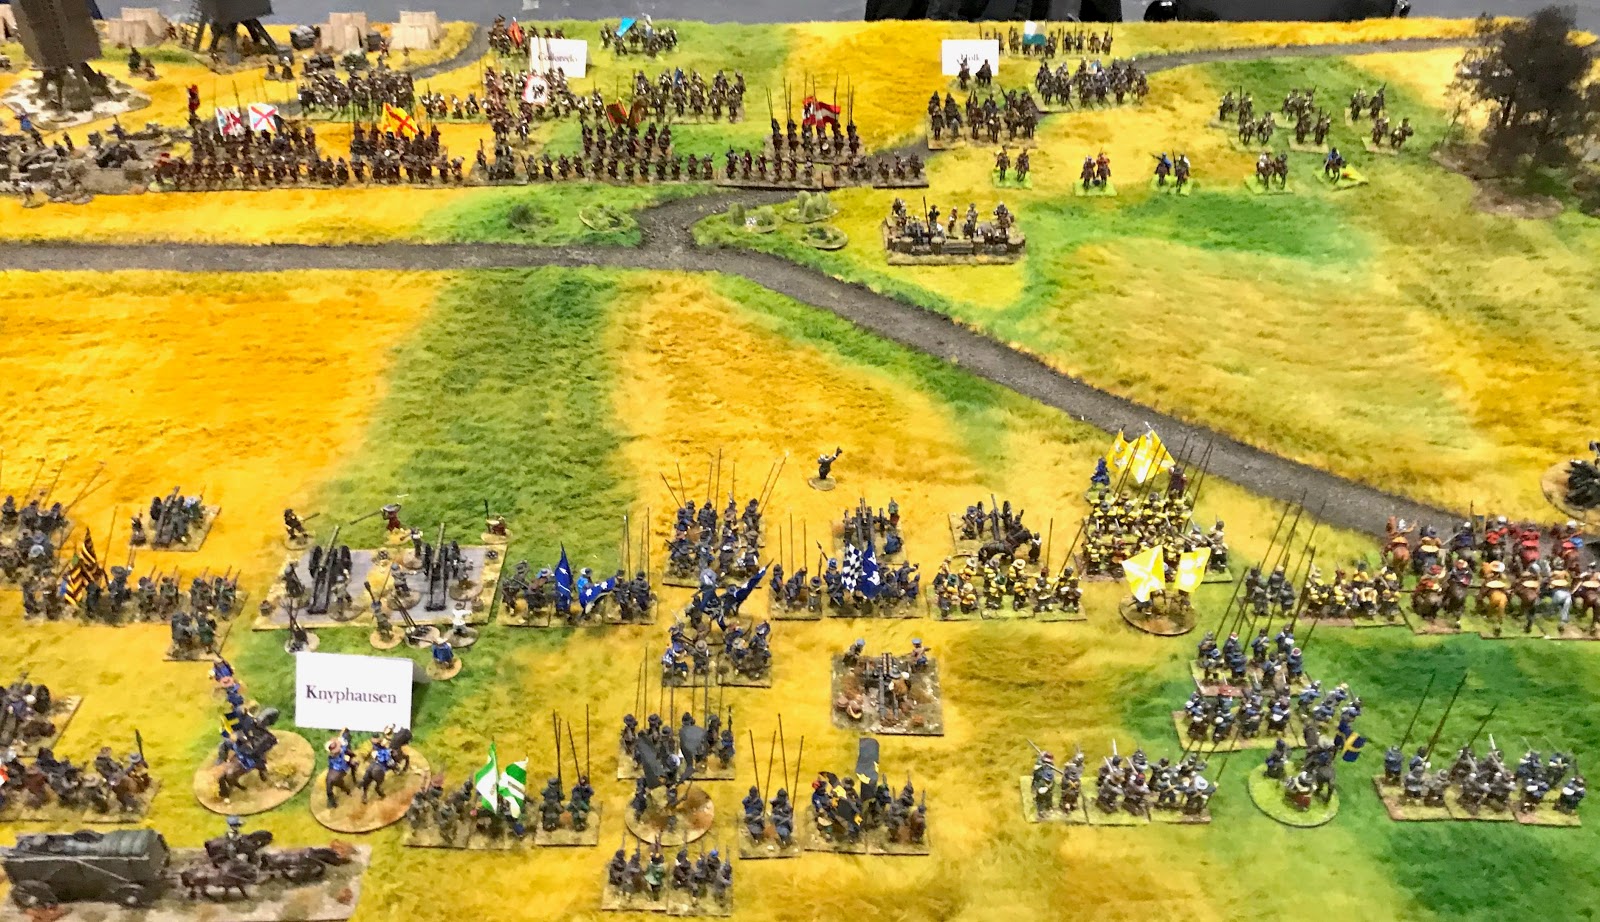
We followed the historical deployment as described in this picture.


We had divided each army into three commands.  We had six players and an umpire and so to start with we divided the commands among the six players.  As the day went on we allowed the players to have time off to go and see the rest of the show and so other commanders in the same army would take temporary control of their command.  The Imperial army had a fourth command (Pappenheim) which would arrive later and we decided to allow Wallenstein to command that in addition to his own command.


You can see it is a fairly cramped battle field, without much room for manoeuvre.  This was intentional, as the cramped conditions were all part of Wallenstein’s defence.  He knew that Gustav would try to outflank him and so he used the terrain to mitigate against this.  He also refused both flanks in an echelon formation, with some skirmishing Croats thrown forward to further protect each flank.


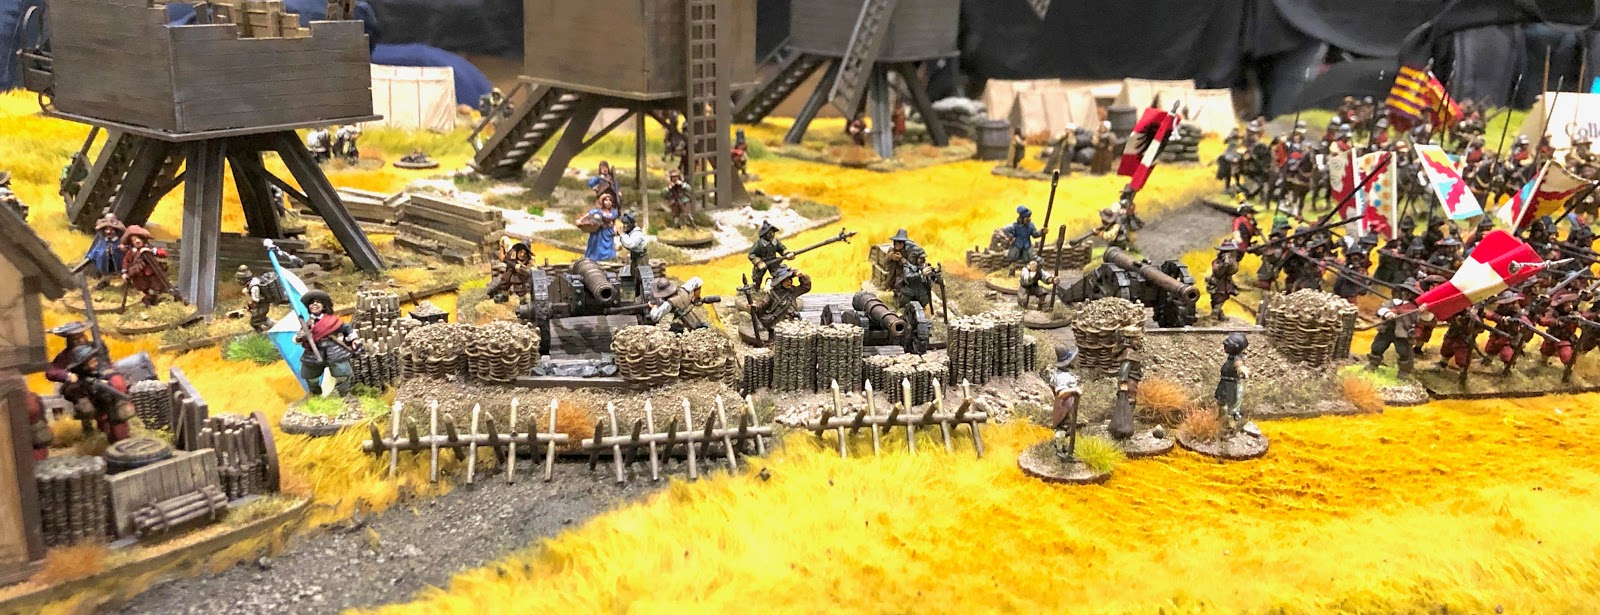
Wallenstein had the town of Lutzen burned to prevent the Swedes taking it and attacking through it.  He also used commanded shot to hold the gardens that surrounded the walls of the town.  The Imperial army also had two artillery redoubts, and had fortified the Miller’s house next to the Windmill battery.  The final Wallenstein touch was arming a group of camp followers to look like an infantry reserve on the left flank.


On the Imperial right we see the Windmill battery, the Miller’s House and the town of Lutzen.  There is little room for the Swedes to exploit their advantage in cavalry numbers here.  


They will need to take the gardens and the Miller’s house to allow they cavalry to move through the gap.  Wallenstein’s command here looks secure.


In the Imperial Centre we can see Colloredo has strength in depth, with cavalry units also mixed in the second line of the foot regiments.


The Imperial left under Holk looks the weakest position.  There is plenty of skirmishing light horse to try and slow down the Swedes.  Also some camp followers cowering at the back!


On the Swedish right we see Gustav Adolf II ready to attack the Imperial position. (In fact he is still waiting for his commanded shot and some more horse to deploy in this picture.)


In the centre Knyphausen has six infantry brigades, all in their 3 squadron formation with light guns attached.  The front three brigades are the elite Yellow, Old Blue and Green brigades.  There is also the Swedish heavy artillery position. 


On the Swedish left Bernhard of Saxe-Weimar has little room to manoeuvre and has the defended gardens of Lutzen to deal with.


The game started with the Swedes taking the first turn.  Gustav had no doubt what was required and immediately charged forward with his cavalry.  In fact, so keen was he to get to grips with the Imperial cavalry opposite that he decided to leave behind his slower moving commanded shot while he chased away the skirmishing light horse defending the Imperial left.  The Croats were dealt with in fairly short order but they had done their job and delayed the Swedes for a little while.  

The Imperial commanders knew they were out numbered on their left and they decided to move the reserve cavalry from the centre over to bolster the left flank.  This had a decisive effect and Gustav’s attack was quickly bogged down.  All of the Imperial horse had been made Caracole troops which in Pike and Shotte means they can not countercharge enemy horse.  This allowed the Swedes to have a slight edge in initiative to reflect their aggressive cavalry tactics.  However, the Imperial cuirassiers were still very tough nuts to crack.  Units were lost on both sides. 


Meanwhile the Swedes ground forward in the centre.  There were moving in to a storm of fire from Imperial Muskets and artillery.  But they managed to give back pretty much as good as they got.  The command dice were not kind though and it was hard work for Knyphausen getting his brigades forward.  

The player taking the role of Gustav was well aware of the historical fate of the Swedish king at this battle.  Despite this he did risk Gustav in a melee in an attempt to break the Imperial line.  There was a collective sharp intake of breath as the dice were rolled for risk to the general in combat.  He survived, and won the melee.  After this Gustav was kept out of the fighting.


On the Imperial fourth turn they could roll to see if Pappenheim arrived.  A 5 or a 6 on a D6 was required and a 5 was duly rolled.  Pappenheim’s troops arrived and charged straight in to the fray on the Imperial left.  Just at this moment, Holk, who had been commanding the Imperial left, was killed in a melee.  Pappenheim had arrived in the nick of time.  


In the centre the Old Blue brigade were up to the Imperial line but the rest of the Swedish Brigades were still struggling to come up.  Both sides were losing units due to the concentrated firepower of close range muskets and guns.  (The grey smoke indicates units disordered by enemy fire.)  Frustrated by the Imperial defences Bernhard decided to demonstrate with his cavalry against the Imperial windmill battery. 


Bernhard also sent his cavalry to attack Wallenstein’s flank, but to no avail.  A storm of musket and carbine fire prevented his Saxon horse from making any impression.  Perhaps their hearts were not in it!  No such qualms for Bernhard’s lifeguards who continued to threaten the heavy guns, and suffered accordingly.  


The tide had now turned against Gustav and it was only the Swedish Commanded shot and support from the Yellow brigade that halted Pappenheim’s rampaging cavalry.  It seemed that a stalemate was being reached on the Swedish right, Imperial left.  The Imperial forces couldn’t break through the combined arms of the Swedes, and the Swedes had lost too many cavalry to push forward.  


Could the Swedish centre save the day?  The Swedish infantry brigades had finally made it to the Imperial battle line.  You can see here only a few reserves and the Swedish heavy guns left on the Swedish side. 


The Imperial commander in the centre, Colloredo, was not going to let the Swedes dictate this final phase of the battle, and as the Swedes approached, Colloredo marshalled his reserves and counter attacked.  Imperial pike blocks stormed forward in to the Swedish formations.  The Imperial troops had the best of the ensuing melees, but the couldn’t break the Swedes.  


With stalemates along the whole line of battle , and darkness falling, the two sides had to withdraw.  The Swedish attack had been stopped, so a marginal victory to the Imperial troops.  But Gustav had survived (as the god like finger points to in this picture!).  It would have been fascinating to fight a second day, but sadly the Excel centre wanted the hall back, and so we had to end it there.

This was the Friends of General Haig’s first Thirty Years War game, and so I was very pleased that all of the commanders had really enjoyed the game, and all were eager to play it again.  Both sides were sure they could pull it off next time.  I think this is a good sign that we have a well balanced game.  The rules worked well, and all the players felt we had the factors about right.  I am certainly really looking forward to getting these troops on the table again!

Until next time!

Sunday, 6 January 2019

The Swedes Are Off The Blocks


Well, Germans I suppose, rather than Swedes, but these guys are the first of my figures off the production line for the Swedish / Protestant army.  I am starting with the Old Blue and Green Brigades for the Protestant foot.

The guys in blue on the left are: Oberst Hans Georg aus dem Winckel and ensigns from Winckel's (Old) Blue Regiment.

The guys on the right are: Oberst Georg Wulf von Wildensteinand ensigns from Obstit Johann Winckler's regiment in the Green Brigade.

The guys in the background are Ensigns for Leslie's Scots Regiment in the Green Brigade.

Figures are a mixture of Warlord, Foundry and Perry.  Colours from Flags of War.

Next up for me will be the troops for these brigades.

In The Beginning


This blog will trace the journey of a band of intrepid wargamers as they prepare to recreate the battle of Lützen at the wargames extravaganza known as Salute 2019.

Why the Via Regia?

The Via Regia, or ‘Royal Road’, was an important route travelling East-West through Central Europe.  This was an important route for trade from the medieval period onward, and inevitably was also an important route for war.  Many famous battles were fought along it, with one being the battle of Lützen in 1632, part of the Thirty Years War.

We hope you will join us on our virtual journey, along the Via Regia, to Lützen!

We will be sharing regular updates on the progress of our preparations.  We would love to hear your thoughts and suggestions so please feel free to add a comment below.