
Contrast Paint
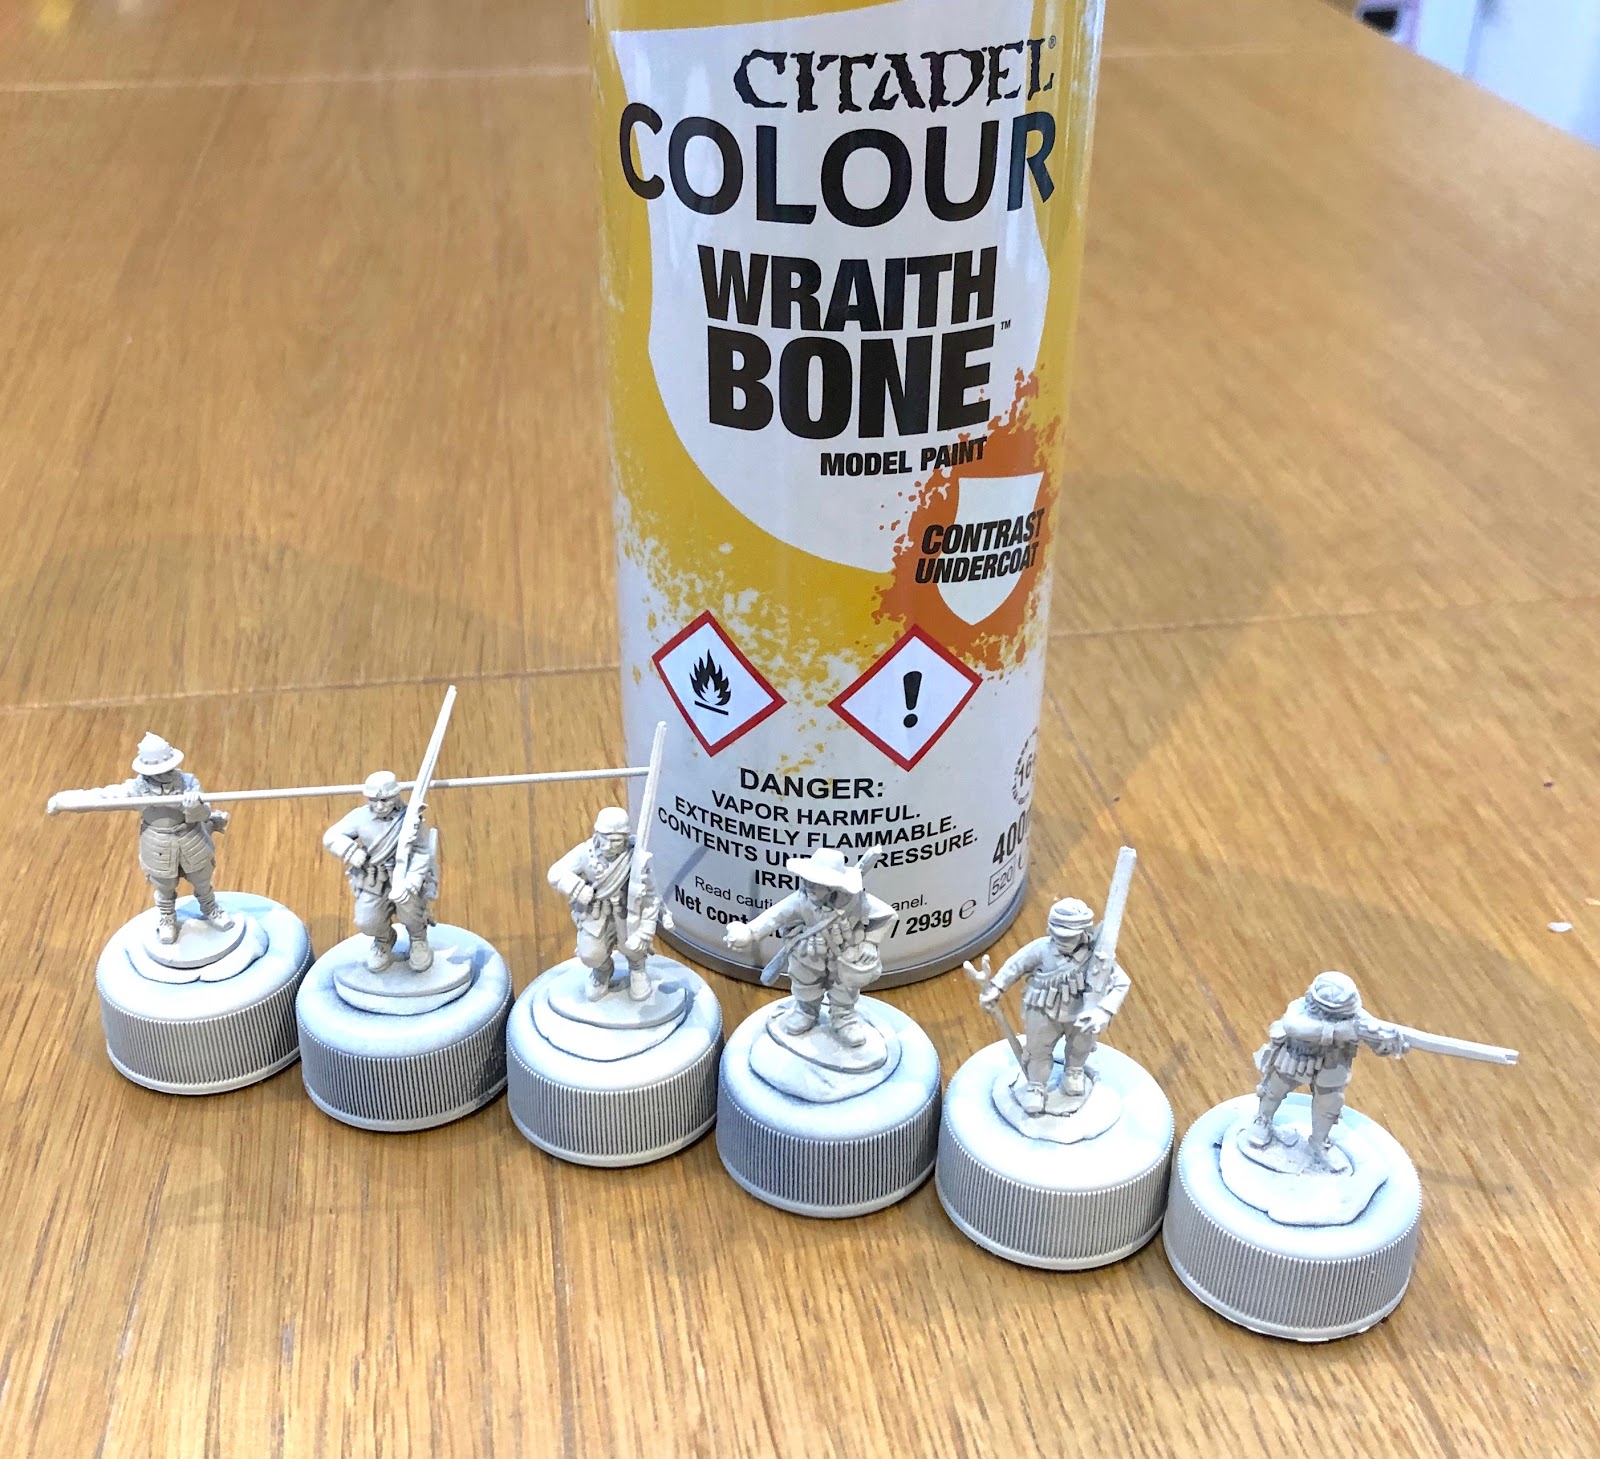
Games Workshop remains a behemoth in the wargames industry and so their 2019 release of a new wonder paint has been on every conceivable wargames media channel. Even I, who has only just discovered acrylics, was intrigued. I decided to buy a few select colours and try them out. I also bought a spray can of the special primer recommended by GW for us with the Contrast paint. As I'm sure you will have already seen these new paints are designed to provide a base colour and initial shade by replicating a heavy wash over a light undercoat. I had two hopes. First was that these paints would provide a means to paint a lot of yellow uniformed troops for the Swedish Yellow Brigade which is planned. Secondly, that these paints would speed up painting the horses for the many cavalry units planned.
I prepared a cross section of spare figures from the lead pile. Mounted and foot figures, using plastic and metals.
 |
| Warlord Pike and Shotte 28mm cavalry from their plastic box set. |
 |
| 28mm Pike and Shote infantry from (left to right): Avanpost, Warlord plastic (x2), Warlord metal and Perry metal (x2). |
 |
| Undercoated with GW Wraith Bone primer. |
 |
| Undercoated with GW Wraith Bone primer. |
 |
| Just primer in the back rank, and primer washed with GW Agrax Earthshade in the front rank. |
I had seen a YouTube video by a very good painter (see Sonic Sledgehammer Studio) where he had tried giving figures a wash of dark brown (GW Agrax Earthsahde) after priming and before base coats. I decided to give this a go on some of the figures.
Then I was ready to start slopping on a heavy coat (as advised by GW) of the Contrast paints. I must admit that I found this bit very hard! It is a completely different approach to starting dark and building up to the light that I normally do with black undercoated figures. I had also forgotten how much more difficult it is when you can't just miss a tricky-to-get-to bit and leave it black / primer coloured.
I was disappointed by the effect that I could get to with the horses. I couldn't get the paint to work so well on the broader surfaces of a 28mm horse. It also feels like the paint requires you to get it right first time. A second coat will often over darken and loose any shading effect. I found the pre washed figures easier to work with, and I like the slightly more dingy look (see the left hand of each of the two sets musketeers below for the pre-washed figures.) In most cases I was left wanting to do a further highlight to get to the level of contrast I wanted to get to.
 |
| "Table Ready" |
The verdict. I don't expect to change my basic approach because of these new paints. I am going to stick with black undercoating and regular paint built up in layers. However, just this very small experiment has got me to relook at my basic approach. These new paints have resulted in me looking at a lot of other people's work and approaches, and reading a lot of paint / painting reviews. So, while I was at first a bit disappointed that I hadn't discovered a quick route to painting Nirvana, I have come away with some smaller improvements to my approach due to the research:
- The near white undercoat does make looking at what you've got to paint so much easier. I saw a lot of people talking about "zenithal highlighting" which seemed an interesting compromise between black and white undercoats. I then read (on Twitter) Matt from Glenbrook Games writing about an approach he uses with an initial Vallejo Flat Brown dry brush over a black undercoat. I have now used this a couple of times and it is great at showing the details on the figure, and for the very brown 17th century, getting figures closer to their table ready state. Thanks, Matt!
- You don't have to use the Contrast paints over white, just over lighter colours. The black (Black Templar) when thinned a bit is great for black horses and black armour, when used over brown or steel.
- I can get really good reds and yellows when starting over lighter colours. I always struggle with these two colours with a black undercoat. Even though I still don't use a whole white undercoat, I have started to do a base coat for these colours on the figure with a pale colour first. Then adding the red or yellow.
- The Contrast paints are a useful addition to the painters arsenal. I am sure that I will find more uses over the coming months.
In closing on Contrast paints, I must say that several of my gaming buddies have had absolutely stunning results with the paints, and knocked out vast quantities of table ready figures in accelerated timescales. Just like everything else, it is horses for courses. I would recommend people have a play with a pot or two. A bit of experimenting can throw up some interesting results, even if its not what you were expecting!
New Fur
My next big project is looking at the Battle of Dirschau 1627 between the Swedes and the Poles. It has an interesting battlefield with, amongst other things, a lot of small streams and marshes. I am looking at doing another teddy-bear fur mat for the terrain, but I haven't tackled streams and marsh yet. I have some off-cuts from my last foray into fur and so I decided to experiment.
 |
| Antelope Brown short faux-fur. |
Early stages were straightforward and followed my earlier approach (see earlier post, Fun With Fur). My cheapo Amazon dog trimmer does sterling work on shaving all the way down to the backing material for the roads / streams etc., or just a light trim with the depth guards on. Sharpie marker is a handy way to draw out designs before shaving.
 |
| A messy outdoor job. |
Lots of combing required to get rid of shaved fur and a job best done outdoors. Small scissors are useful for making more subtle trims to the mat. Here I was trying to represent a marshy area
 |
| Careful snipping. |
My last mat was coloured using a range of acrylic paints I had around the house: house paints, children's paints, and artists paints. This works ok, but it requires an awful lot of combing to stop the fur getting matted by the paint. I decided to try some alternatives. First of all inks. My logic was that these shouldn't clog in the same way as the thicker paint, but should still dye the fur. I tried Windsor and Newton inks, some other artist inks (one in a handy spray applicator!), and normal model washes / inks. These all worked in a similar way. Not as opaque / strong colours as the paint, and you couldn't lighten a dark fur with this approach, but much less clogging.
 |
| Paint below the stream and inks above the stream. |
After some internet investigation on the dress making, and teddy bear making, forums, I discovered there is such a thing as "Material Paint". It is typically used to change the colour of all sorts of sewn material. This still seems to be water based and acrylic, so I'm not sure what the difference is to, say, house paint. This stuff was great in that it didn't clog like the other paint, and covered better than the ink. A result! It is more expensive than house paint, and not as easily available. Full scale trials are planned for the future.
I then need to work out the streams and other wet bits. I want to build these in to the mat in the same way that I have for the roads. The roads I did previously were a mixture of paint, sand a PVA applied to the bits of the matt shaved down to the backing material. When dry this was dry brushed, and remained flexible enough to roll the mat up. For the wet areas I want something that I can apply to the backing material, and will give a smooth surface that will be painted and take a coat of gloss varnish or similar. After studying many Terrain Tutor videos I have been experimenting with decorators caulk, both neat for the streams, and with added sand for the roads.
 |
| Filler, glue, paint and sand. |
Results so far suggest that I stick with the original approach for there roads, and that the neat decorators caulk will be best for streams, and wet areas of marsh. I also think the marshy bits need more open areas of water, rather than the polka dot effect I have ended up with here.
 |
| Sand, paint, glue and filler |
So, still some way to go on the fur experiments. I have sourced some new fur material so that I can start in green this time. I have bought two 7' x 5' fur mats from Killing Fields, supplied in the UK by Company D Miniatures. You can see Pappenheim and escort having a test ride across the new fur below.
 |
| Killing Field's Fur Mat. |
Project Research - Dirschau / Tczew 1627
My next big 17th century project is going to be refighting the battle of Dirsahau (to the Swedes/Germans) and Tczew (to the Poles) which took place in 1627. I have done a sweep of the internet material available, and picked up some books to start reading about the battle. I have amassed so much material so far that I have started a separate page on the blog (here) to record all of the material. Partly this is in case it is useful to anyone else, and also to help me remember what I have already found!
The page linked to above explains why I have chosen this battle, but in summary, I chose Dirschau / Tczew 1627 as it seemed to have the most interesting forces and terrain of the late 1620s battles, and it also had Gustav Adolf, and the top Polish general of the period Stanisław Koniecpolski, in command of their respective armies. I think this is an interesting period to look at as it is Gustav Adolf and the Swedish army evolving, and developing tactics, that will provide so decisive when translated to the main German theatre of war.
Broadly the project will fall in to these streams of activity.
- Making the battlefield in teddy-bear fur, with integrated streams, roads and marshes.
- Large Swedish camp behind extensive earthworks, and the walled town of Dirschau/Tczew.
- Polish camp, and several small Polish villages.
- Increase my existing Swedish forces with more cavalry, and for the foot, the Yellow Regiment.
- A whole new Polish force, with a good helping of Winged Hussars, of course!
You will therefore see that I have plenty to be getting on with! I hope to share the progress on the blog here. I may allow myself an out of period distraction at some point, but at the moment the painting table has artillery limbers on it, and next in the queue is more Croats.
Until next time!
Andy @ FOGH.


