Showing posts with label artillery. Show all posts

Saturday, 27 March 2021

Avanpost - a mini review

This blog post covers my experience with the Thirty Years Wars (TYW) figures from Avanpost Historical Miniatures.

28mm figures from Avanpost Miniatures - more details below.

I first became aware of this company a couple of years ago from posts on the Lead Adventure Forum (link), and I was instantly blown away by the quality of their figures. They are superbly detailed and lifelike.  I immediately ordered a few figures to see what they were like in the hand, and I wasn’t disappointed.

Avanpost are a Russian manufacturer and don’t have a traditional website/shop. They use a Facebook group to advertise their ranges (link).  You can also buy them through Mezzer’s Miniatures (link), a UK distributor. They have two main 28mm ranges; Napoleonic (French & Russian) and Thirty Years War (TYW). They also produce a range of really lovely 75mm models for collectors and painters. Their full ranges are available in cast resin, and most of the 28mm ranges are also available in metal. They are on the small side of 28mm and fit perfectly with Perry Miniatures ECW range. I have mixed them in happily with TAG and Warlord as well. However they might seem a bit incongruous in the same unit with Bicorne or Renegade which are at the bigger end of 28mm.

Most of the figures require some assembly, such as adding arms and sword scabbards.  I assume they are designed like this to make the casting process easier. The figures I received have needed little cleanup and fitted together very easily, whether metal or resin, with small dabs of super-glue. 

I have only purchased figures from their TYW range so far.  Unusually nowadays, the figures are sold individually which is a real boon when you are trying to find that extra drummer figure, or officer, for example. They cover pike and musket armed troops in a wide variety of classic poses. They also cover artillery (guns and crew), dragoons, harquebusiers, and cuirassiers, with command figures for all types.  The TYW range is pitched at the first half of the 17th century and would work equally well for the Wars of the Three Kingdoms (ECW). 

Avanpost figures straight form the packet - resin on the left and metal on the right.

Here are a couple of figures as they arrived from Mezzer’s Minis.  On the left is a resin wounded horse and dismounted cavalryman (an unusual and perhaps unique to Avanpost set!), and on the right a metal sergeant with halberd.  The separate pieces were easy to snip from the sprues, and to tidy up with craft knife and file before assembling with superglue. 

Avanpost wounded horse on a Charlie Foxtrot - dial / counter base

Here is the wounded horse after construction.  This is on a Charlie Foxtrot ‘dial counter’ base and will be used. as stamina / wound counter in Pike & Shotte games.

Avanpost sergeant in metal

Here is the sergeant after construction.  I intend to swap his halberd for a standard and he’ll join some of his colleagues on a foot command base.

Avanpost resin and metal figures - front view

rear view

Here are a group of resin and metal foot figures after construction. Hopefully the picture shows the fabulous level of detail in these figures, both resin and metal.


Here is a completed command base using figures from the previous picture. The figures were a joy to paint.  (One caution would be that the figures, both metal and resin, could do with a quick wash in warm soapy water before priming. )

The flags are from another supplier new to me, Adolfo Ramos (link), who is based in Spain. These are really nice flags, and there is a lot of flexibility available when ordering to choose the size of flag you want, and also to have them mounted with cords etc. I chose this ‘full service’ option for these two and was very pleased with the result.
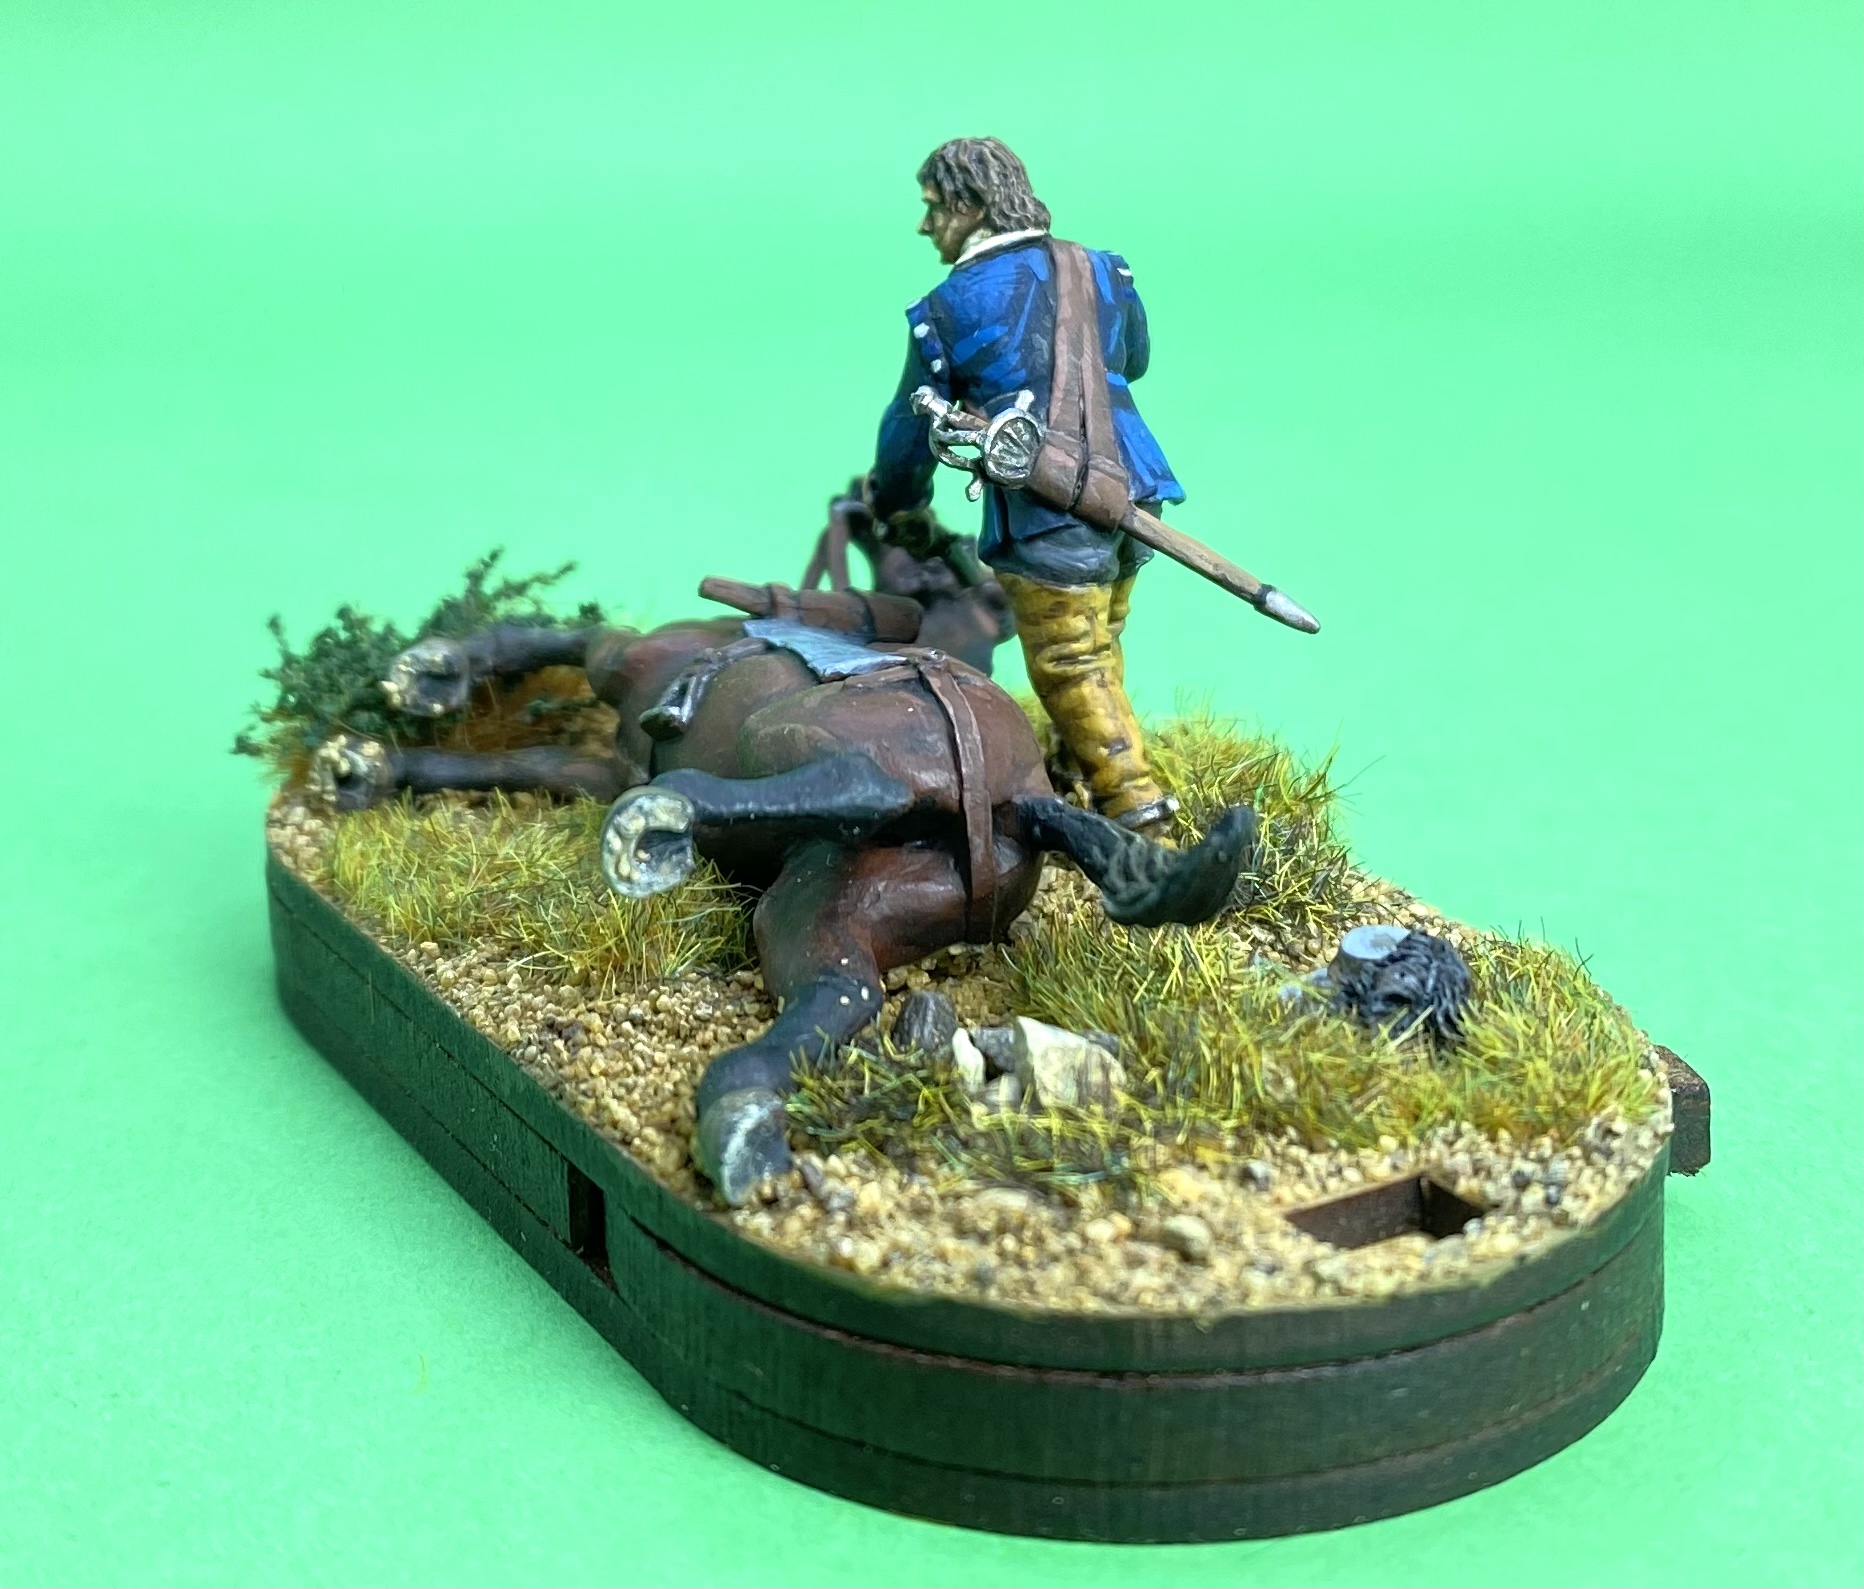


Above is the completed mini diorama for the stamina counter base.  I realise this is perhaps a rather morbid scene, but it’s a good reminder of how horses suffered in this period of warfare. I’m glad that Avanpost chose to include this in their collection so we don’t forget this point.

I have also purchased an artillery piece from Avanpost.  The gun carriage is in resin and you can choose to have the gun barrel in either resin, or beautifully turned brass! These brass gun barrels are little works of art.  I will probably paint over this, but it does provide the option of just weathering the bare metal for you finished model.
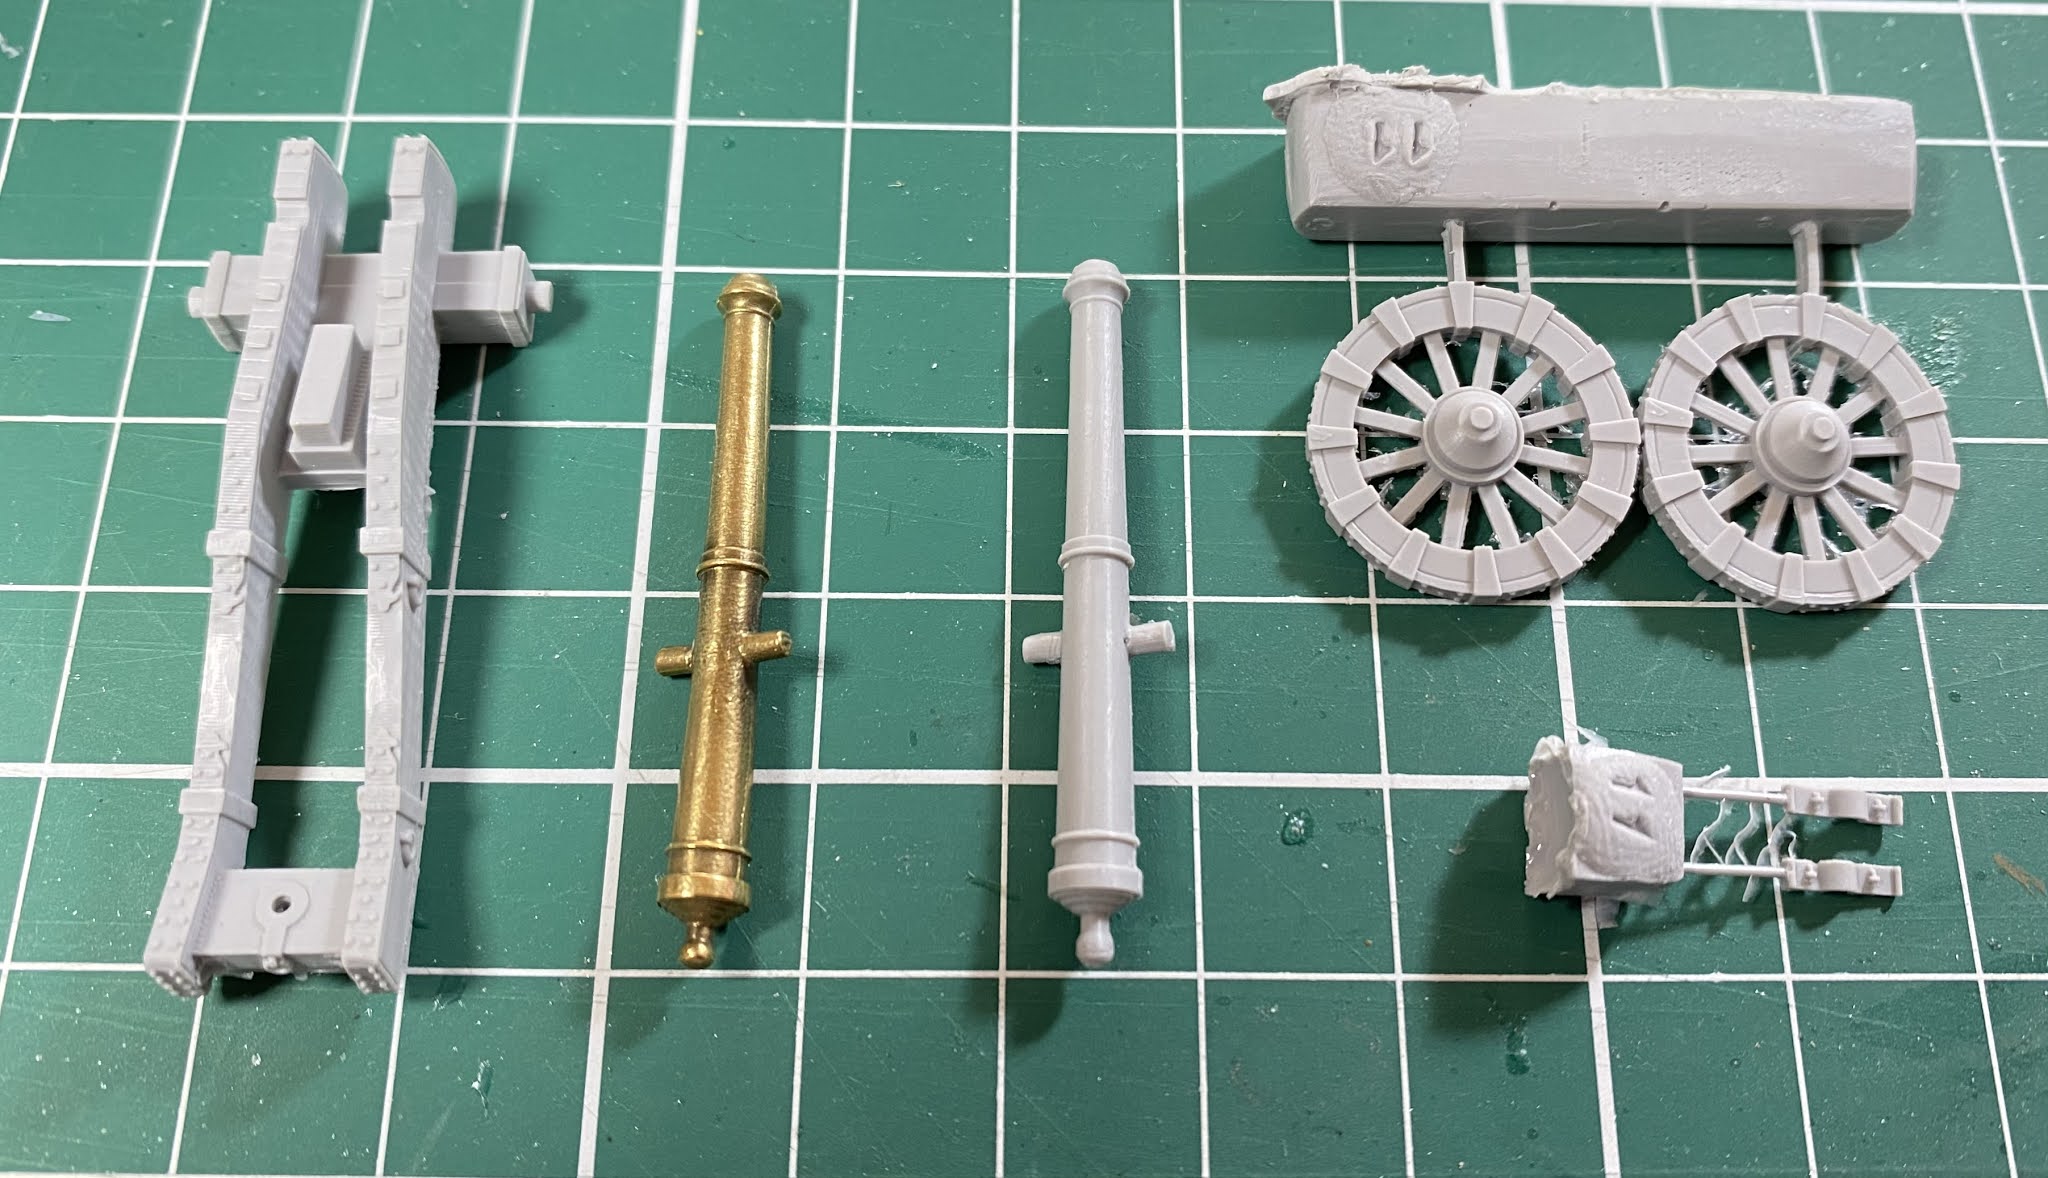
Avanpost artillery piece, with optional brass barrel included. I will use this as a light, regimental gun.

I have just two cautions that you should consider with the Avanpost figures. Firstly is that the resin is reasonably delicate and so when there are small parts that stick out on the resin figures I have found them prone to breaking when not carefully handled.  For example, the scabbards are very fine items, and a couple of times, when I have carelessly picked up a resin figure, I have broken their scabbards.  These are fairly easy to repair, but if you expect to be rough with your figures you should beware of this.  

The second item is, I suppose, both a plus and a minus.  Wargames figures from other manufacturers have traditionally been sculpted with parts of the figure slightly exaggerated; for example heads, hands and weapons.  This has been partly to do with what we think looks good, and partly to do with traditional sculpting and casting methods.   The Avanpost figures, on the other hand, seem to be very accurately sculpted from a scale model point of view, and this is apart of their appeal.  This scale accuracy includes their equipment and this means that when you compare an Avanpost figure to say, a Perry or Warlord figure, the Avanpost figures’ muskets appear to be much finer and smaller than those on other manufacturers’ figures.  Variety in figure height is ok by me (real people are different heights) but differences in equipment scale can be incongruous. For example, I would be nervous of fielding Avanpost musketeers with musketeers from other manufacturers in the same unit because of the different musket sizes.  I know that actual 17th century muskets did vary in size, but there is only so much difference my eye will accept. I would suggest you get a sample of two to compare with other figures to check for yourself. 

In summary, Avanpost offer a range of beautifully sculpted miniatures, some of which are unique to this period.  If you are interesting in playing games in the first half of the 17th century then I’m sure there is a space in your forces for some of these miniatures!  The range is still expanding with the recent release (in resin) of sword and buckler armed infantry. 

The final pictures show the command base with an also newly completed 1898 unit of musketeers.

An Avanpost command group leading a unit of 1898 Miniatures musketeers.

A “wargamer’s” eye view!

Until next time! 

Andy @ The Friends of General Haig (FoGH)

Tuesday, 29 October 2019

Limbering Up


“Victory is the beautiful bright-coloured flower.  Transport is the stem without which it could never have blossomed.”  Winston S. Churchill 

In this blog post I discuss the latest figures that I have completed.  Perhaps not the most glamorous of units, but I think a great addition to any 17th century wargames table; artillery limbers.

These limbers, with their teams of horses and drivers, having been sitting in the paining queue for a very long time.  They have always taken sending priority to the flashy horse and foot units.  With no desperate gaming deadlines looming I have finally got around to giving them the attention they deserve.

Limbers are something that I think many of us justifiably ignore for the Pike and Shot period.  Bigger guns tended to be set in fixed positions before the start of a battle, and stayed there for the duration.  They might be assaulted and change hands, even changing hands multiple times, but they were not typically moved from place to place during a battle.  The light guns, such as the 3 and 4 pounders, were sometimes moved with the infantry formations, but this was usually a case of man handling them.


So, what is the point of investing in limbers?  Well, there were a few reasons for me.  Probably the first reason is that they make nice dioramas for the artillery position which I think is sometimes at risk of looking a bit bare.  There was a huge amount of paraphernalia involved in running 17th century artillery batteries, and a few limbers help it look a bit busier, along with other carts, equipment, train guards, etc.

Secondly there are a few battles where one army still needed to pull their heavy guns in to position at the start of the battle. Lützen 1632 is a great example of this.  Wallenstein had set up a position for his army, and Gustav Adolf had to manoeuvre his army to meet it.  As part of this, the Swedish heavy 24 pounders were towed on to the battle field and set up just as battle was starting.  If you want to game deployment activity like this then it looks a lot better to have some proper tows for your guns.

Finally, it gives you some great options for smaller actions.  Now, as well as the baggage carts and pack mules being involved in an ambush, I can add a limbered gun or two.  Perhaps a tasty prize for the ambushers, or perhaps a nasty surprise if the gunners are on top of their game and can get the gun in to action in double quick time.


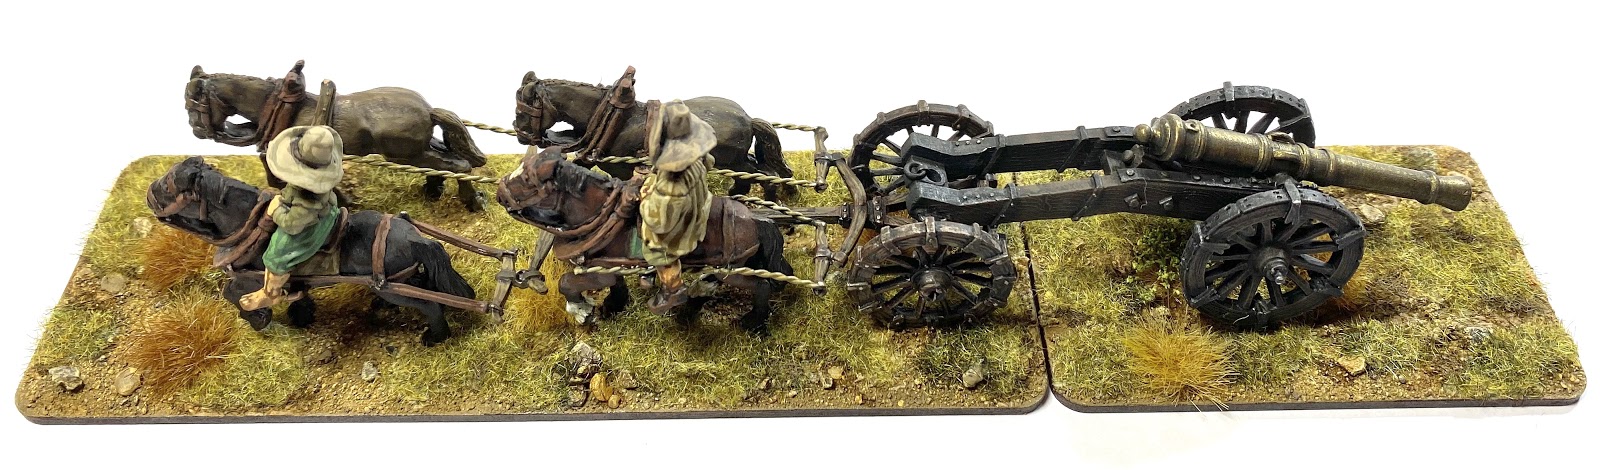
There are two different manufacturers limbers in this set-up.  I have two three horse limbers which are relatively new out from Warlord Games (link), and a four horse limber from Wargames Foundry (link).

Wargames Foundry's Four Horse Limber towing a Warfare Miniatures Field Piece

The Foundry limber is in actual fact a bit of a Frankenstein’s monster.  If I look back at my black and white Foundry English Civil War catalogue from the early 90s with its hand drawn figure illustrations by the famous Twins (a now treasured possession!)   I can see that originally there was a three horse limber with a rider and a figure on foot.  What Foundry sell now is a four horse limber, with two riders, and the limber it self looks like it has a separate origin.  The traces etc. included also need a bit of imaginative modelling to work out what to use and what to put where.


I spent some time studying Wagner’s Weapons and Warfare, with its lovely examples of cart and limber team hitching, to work out possible ways to hitch up this particular limber.  In the end I had to make some of the traces myself and I used some wound fuse wire for this job.  The eagle eyed will see the two front horses are hitched with slightly different traces, but I think this works as I’m sure there was a lot of ‘make do and mend’ in a typical artillery train.


Warlord Games Three Horse Pike and Shotte Limber, towing a Warlord Games Saker.

The Warlord limbers were more straight forward to work out.  They have a nicely completed example on their website which I used as a guide, and they seem to have used one of the Wagner illustrations as a pattern for their set-up which is also very nice to see.  I couldn’t resist a head swap for the one of the Warlord riders using a spare head from the bits box.  (I find it very difficult to accept duplicate figures in units!)


For all of the limbers I dry fitted everything together but, although I glued the riders to the horses, and the wheels to the limbers, I left everything else separate for painting.

After my earlier experiments with white undercoats and GW Contrast paint it was very nice to be back with black undercoat and my regular Vallejos.  I did use  a technique, new to me, copied from Matt at Glenbrook Games (link).  After their black undercoat was dry and set, I gave the horse and riders a heavy dry brush of Vallejo Flat Brown.  Just as Matt promised, this highlighted the details and also provided a first coat for a lot of the dingy brown accoutrements so common on 17th century figures.

With everything painted and varnished it them came to the part I was probably looking forward to least.  Glueing the things together.  Although I grew up with Airfix kits, I am not a great modeller.  I found this process very fiddly.  Much supergluing of tiny metal parts to fingers, followed by bad language, ensued.  Eventually I got the blasted things together and then had to work out the basing.  


At first I was intent on making the bases long enough so I could add a towed artillery piece behind the limber and it would sit on the same base.  Much discussion with long term gaming buddies followed.  If the limbers are going to spend most of their time ‘unhitched’ then the portion of empty base could look a bit ‘weird’ was the group-think decision.  However, when being towed it also looked odd to me if the artillery piece was not on a base.  I went for a good old compromise.  A separate small base that could be added when a gun was being towed, and taken away when the gun is unlimbered.  I’m sure this will seems like madness to many, but I like the look of it, and it works for different situations.

It wasn’t until I had the nearly finished painting that I realised I had nothing of a suitable base size in my Warbases ‘collection’ (a RUB 4L box brimming with mdf goodness).  I made a guess-timate of a length that would work for all three limbers at 150mm, and went for 50mm width which matches by cavalry bases and would therefore work for my roads etc.  Most of my baggage type things are on round or oval bases to differentiate them from the fighting units.  I thought these round cornered bases offered by Warbases (link) were a good look for the limbers.  (They were kind enough to make a special order for me as 150x50mm is not one of their standard sizes.)  The additional bits are 80x50mm.


There you have it.  A long term wargaming itch finally scratched, and I have some nice limbers for my artillery train.  Now I want some limbers pulled by oxen for a different look - there is always something else!  :-)

Until next time!

Andy @ FOGH.

Friday, 15 March 2019

Dress Rehearsal

With the miniature battlefield complete (see previous post on Fun With Fur) we had the opportunity to get the toy soldiers out and check if and how the troops etc. fitted with the terrain.  A wargame ‘dress rehearsal’ was therefore arranged.

We gathered at one of our regular club Saturday meets and started the set up. The foundations of the battlefield are a set of 600mm x 600mm foam modules, 5 modules by 3. Over the top of the modules the teddy bear fur surface was unrolled. All good so far!


First of all we added the 3 windmills. One still to be painted!  Now, this is where figure / terrain scale and ground scale clash badly. The model windmills will take up far more room that the actual windmills did. I think we can live with this, and we may need to shuffle them around during the game as they shouldn’t interrupt troop movement unduly.  With the windmills down we could now add the windmill artillery battery, and also the miller’s house.


We then got down to discussing the town of Lutzen. Only the gardens surrounding the town walls were part of the battlefield as the Imperial forces set fire to the town itself so they didn’t need to defend all of it. We therefore planned to only represent a small part of the town and the surrounding garden. Bruce, who was building the town and garden bits, was keen try out his measurements on the final battle-rug.   After detailed pictures and measurements we’re taken we used some of my fields to stand in for gardens during the dress rehearsal.


Next we needed the smaller Imperial battery, on the Imperial left flank.   We used some resin fortifications to represent this. (I have subsequently built something custom for this!). Finally there is a pond and small wood on the Imperial extreme left flank. I have built a Charlie Foxtrot pond and already have some suitable winter trees (ie no foliage).


With the basic terrain down we could start deploying the troops. All three of us who are providing the figures still have units to complete (paint faster, Bruce!) and so we had brought stand-ins for some units to ensure we could see a full picture. (Not sure my Covenant cavalry would have been entirely happy about playing the part of the Imperial Croat light horse!).  We had a detailed order of battle to use (see future post) but there was plenty of shuffling around required.  We have used the Osprey Lutzen campaign book, cross referenced with the Schürger thesis to develop our initial deployment.


With the troops on the table we could then focus on the ‘fluff’; the camp, camp followers, vignettes, and scatter terrain.  There is not much room behind the Swedish deployment, but not a huge issue as the Swedish army has marched some way from its camp to confront the Imperial army so most camp stuff will be on the Imperial side.

We then spent some minutes just taking it all in.  Our new table full of toy soldiers, many of them taking the field for the first time.   “Do you think you’ll get it all finished in time?” was a common remark from our fellow club members. Oh yea of little faith!

I’d have been happy at this point to just sit and look at it all, but a concerned discussion had started. “The Swedes will never make it forward; look at all of the Imperial Guns!”  I thought that, despite looking scary, the Pike Shotte rules have a good balance on big guns, and it’s not like trying to charge in to the teeth of Napoleonic Guard 12 pounder batteries. We decided to play through a few moves of the Swedish and Allied Infantry marching to contact to test my theory.


We split into to two teams, and got out the dice and rulers. Exciting!  Just the Infantry to fight.  We quickly learnt our first important lesson. You can’t roll dice on teddy bear fur!  Dice rolling trays were going to be required. Various notes were scribbled and play continued rolling dice on box lids.  We played 4 or 5 turns. Although a niggling annoyance at long range, the Imperial guns didn’t stop the Protestant tide. The small Imperial battery was smartly taken by the Yellow brigade (point to note, Imperial left wing cavalry commander!). The old Blue and Green brigades came on and fierce fire fights developed around the miller’s house and Windmill battery.

We called time (had to put the toys away again) but were heartened that the first few turns had felt just right for us.  Back to the paint brushes everyone!

Until next time.