Tuesday, 16 July 2019

The Fury of Lions

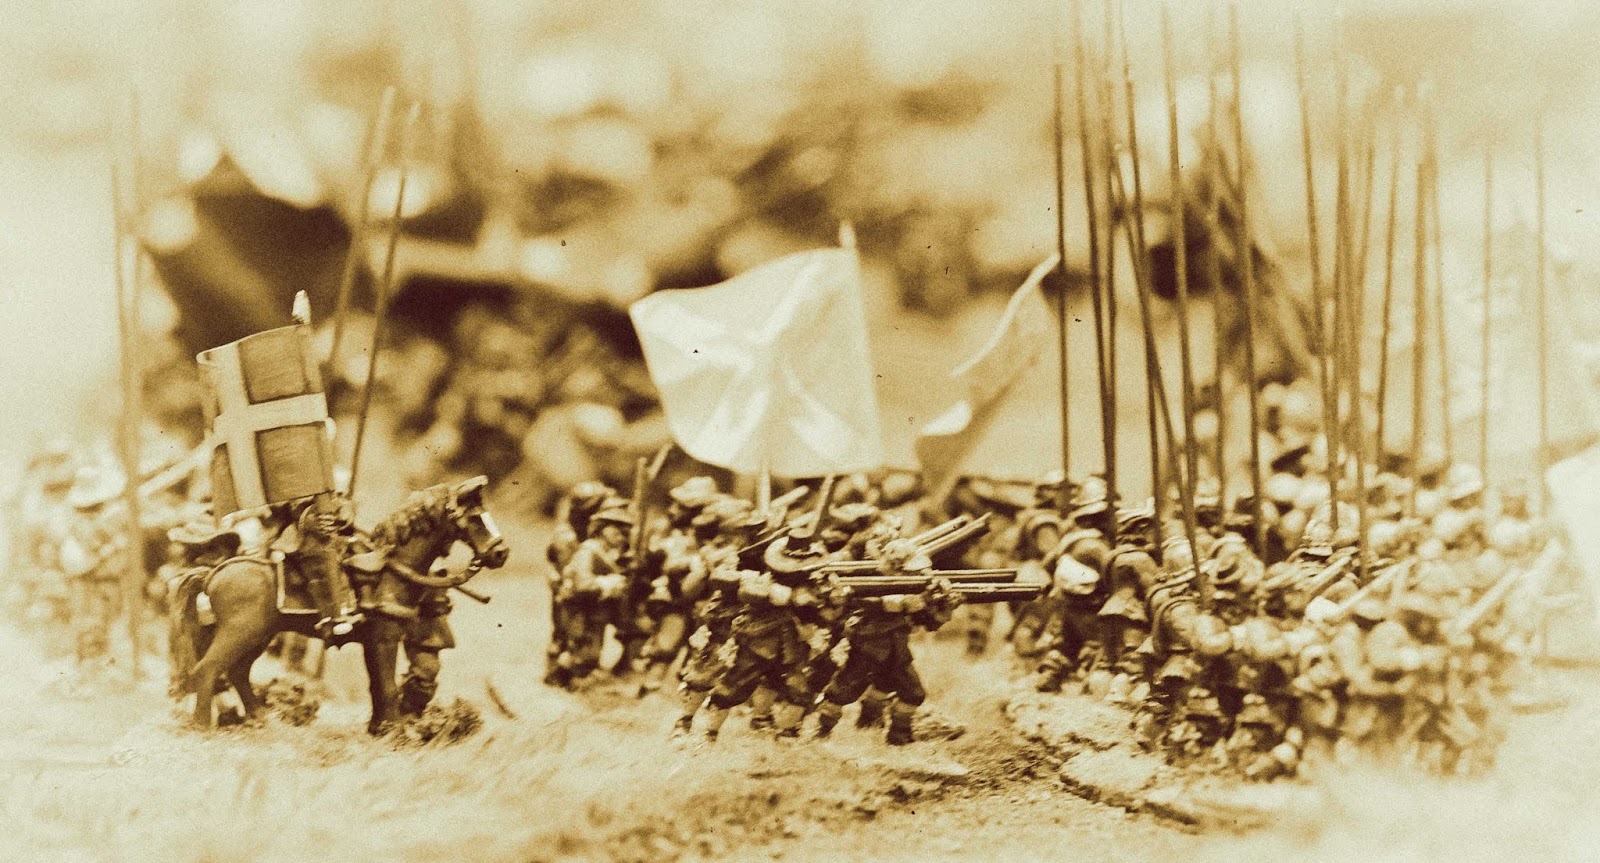
"With the fury of lions the Upland, Smaland, Finland, East and West Gothland regiments rushed a second time upon the left wing of the enemy ..." from Friedrich Schiller's History of the Thirty Years War.

This passage from Schiller's history describes the second, revenge attack, supposedly mounted by the Swedish right wing of cavalry at Lutzen following the death of King Gustav Adolf.  The King's cavalry were certainly his main strike force, intended to defeat the opposing enemy cavalry before turning in on the now undefended flank of the enemy infantry.  


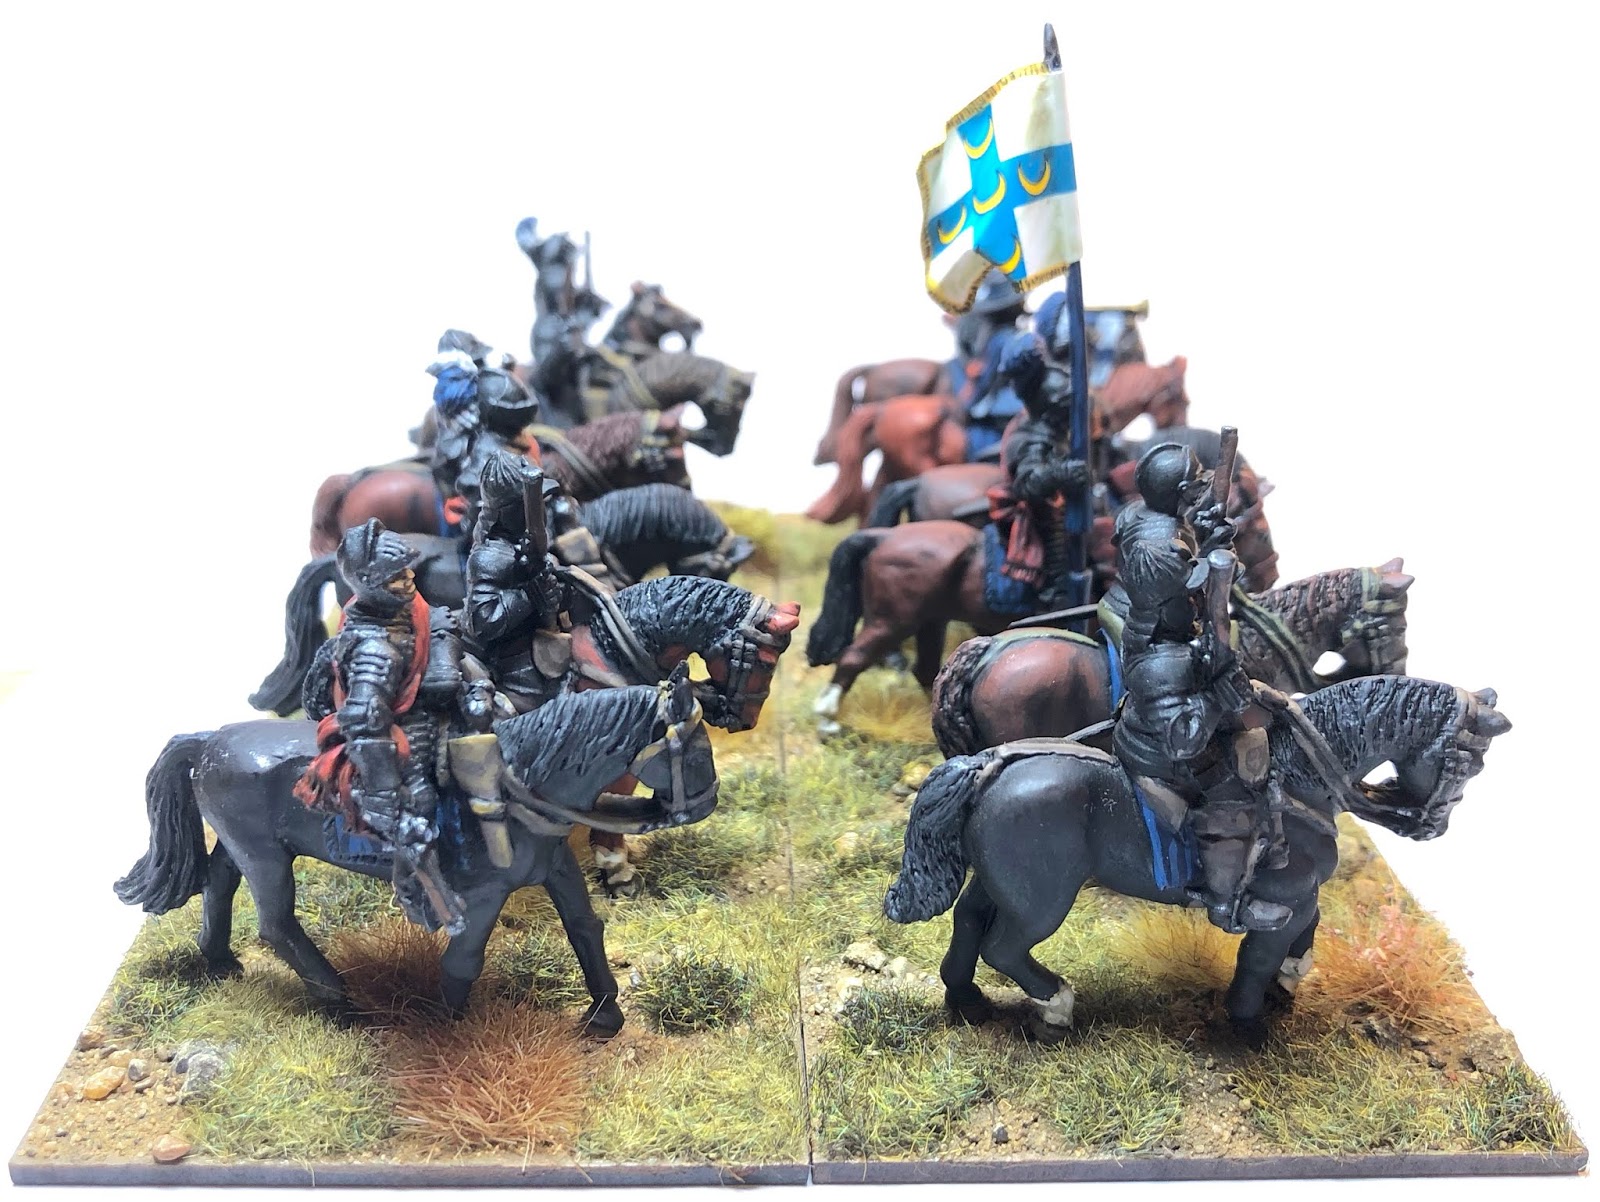
At Lutzen, while most of Gustav Adolf's cavalry were German, his lead, strike, squadrons were made up from his own Swedish horse.  I have chosen to model this unit as one of these Swedish regiments, the Uppland regiment, led by Overstelojtnant Isaak Axelsson 'Silfversparre'. 

When the Gustav Adolf became king he inherited an uninspiring mounted force.  The cavalry were poorly mounted and equipped.  In his first campaigns, Gustav Adolf's cavalry were also were facing, in the Baltic, some of the most impressive cavalry at that time, the dreaded Polish Winged Hussars.  Gustav set about improving the cavalry as he did with the rest of the army.  He supplemented them with experienced mercenaries, improved their equipment, and mounts, and tried to give them an edge over their opponents by deploying blocks of commanded muskets with the cavalry.  When the Swedes landed in Northern Germany and joined the Thirty Years Wars the cavalry were still seen as inferior to the Imperial cavalry, especially the mighty cuirassiers.  At Breitenfeld in 1631 Gustav Adolf proved that, with their commanded muskets, organised reserves, and aggressive charges, the Swedish and Protestant cavalry could defeat their Imperial counter-parts. 


By the time of Lutzen the Swedish cavalry had no doubt further improved their mounts, but were still more lightly equipped than the best of the Imperial cavalry.  They had tough day at Lutzen and on the Swedish right wing ultimately failed to break the opposing Imperial Cavalry, and despite Schiller's inspiring prose, were themselves eventually thrown back exposing their own infantry.
 
This unit is, unusually for me, made up entirely of figures from a single manufacturer.  In this case I have used the Warlord Games Swedish Cavalry box set (link).  The Warlord plastic cavalry sprues allow a nice variety of equipment, and in this box are accompanied by two metal mounted command figures, a cornet strapped to his standard, and an officer.  The cavalry are nicely mounted on good, large horses, probably acquired since landing in Germany the year before! 


Even by Lutzen the Swedish horse were still apparently short of armour and the King suggested that at least the front rank should have metal back and breast plates.  I therefore have most of the armour concentrated in the front rank of figures.  A few have managed to acquire sleeveless buffcoats, but most have only their long, woolen, riding coats.  Their is also a mixture of helmets and soft hats.  I have chosen blue coats, but a mixture of blues, representing the troopers having been re-clothed at various times with various shades of cloth. 

The unit is finished off with an Uppland regiment cavalry standard from Flags of War, and are based on trusty Warbases 50x60mm laser cut MDF 2mm thick bases. 


I hope that they will perform well at the Warlord Games Open day, this Saturday, in Nottingham (link), where they will be re-fighting Lutzen.  Will they be like furious lions, or like lambs to the slaughter?  I hope you'll be able to come along and see for yourself.

Until next time.

Andy @FOGH

Tuesday, 9 July 2019

Can the Empire Strike Back?


In this post I will talk about the upcoming re-run of the Battle of Lutzen at this year's Warlord Games Open Day, on the 20th July.


Warlord Games Open Day is a regular event where the company throws open its doors for the day at its Nottingham headquarters.  If you are interested in Warlord Games' products or games then it is well worth a day out. This link is to a video on YouTube where Warlord supremo, John Stallard, gives a run down of the day.

I've been to the open days in previous years, as both a punter and a demonstrator, and I think they are a great idea.  If you are interested in any of the Warlord games then you will find most of them on show, and you will also be able to try your hand at them, or just ask questions of the experts.  A sort of "try before you buy".  Warlord make an awful lot of games now, and so there is plenty to chose from.  So whether you want to try out the old stalwarts like Black Powder and Pike and Shotte, or if you want to investigate the new games like SPQR and Black Seas, the choice is yours. 

There are also talks by some of the game designers, so you can hear about how games were put together, and perhaps hints on plans for the future.  You can take tours of the HQ and see how Warlord operates, including the fascinating process of turning base metals in to shining white metal figures; magic in deed!  The icing on the cake is to pick up some goodies from Warlord, and there are normally some very good special offers.

Figures from Warlord Games, painted by Matt Slade at Glenbrook Games.
Its not just Warlord there on the day.  There will be other members of the Wargaming glitterati in attendance, and some other manufacturers from the East Midlands 'Lead Belt'.

Wallenstein, ready to battle against the Protestant Alliance.
Figures from Warlord Games, painted by Matt Slade at Glenbrook Games.


So what will the Friends of General Haig be doing there?  Well, to followers of the blog it will come as no surprise that we are running the Battle of Lutzen, 1632, using Warlord Games' Pike and Shotte rules.  This will be a slightly modified version of the game run at Salute.  We have changed things slightly to enable us to let people at the open day join the game for a turn or two, so they can try their hand at Pike and Shotte and get a feel for how the rules work.

Figures from Warlord Games, painted by Matt Slade at Glenbrook Games.

This proved popular last year when we ran the Battle of Auldearn, 1645 (link).  There were a number of people, interested in Pike and Shotte, who wanted to get a better understanding of the rules, and see how things really operate in practice.  Some were happy to just watch the action and ask questions.  Others took up dice and tape measure, and tried their hands at 17th century battling.

So, visitors on the day will be able to take part as either the King of Sweden, Gustav Adolf with his protestant alliance, or the Holy Roman Empire striking back under Imperial Generalissimo Albrecht Wallenstein.  We will have two big, 28mm armies thundering in to one another across the table top, ensuring there will be plenty of action.  The Friends of General Haig team will be on hand to discuss the game and rules with visitors, and also to help people take a a turn or two as a 17th century general.  There will be every weight of cannon, lots of pike, loads of shot, terrifying black-clad cuirassiers, and devilish Croat light horse.  Who could ask for anything more? 

The Open Day takes place here:
Warlord HQ Nottingham
The Howitt Building, 
Lenton Business Centre, 
Lenton Boulevard
Nottingham, 
 NG7 2BD  
United Kingdom
Tickets are available from the Warlord webstore here:
https://store.warlordgames.com/products/warlord-games-open-day-ticket-20th-july-2019

I hope very much to see you in Nottingham on the 20th July.  Just look for our battle sign.

By Andy @ FOGH.

P.S. Throughout this post, the lovely Imperial command groups are made up from Warlord Games Thirty Years War range, all expertly brought to life by the talented brush of Matt Slade at Glenbrook Games (link).

Wednesday, 12 June 2019

We march for plunder!

"God save us from famine, plague and the Croats!"
German prayer during the Thirty Years War

This blog post describes the latest unit for my Thirty Years War collection, based on the armies at Lutzen, 1632; the Croats.

Surely the most colourful troops that fought during the Thirty Years War were the Imperial Croat cavalry.  These light horse men were recruited from the Imperial lands that bordered on the Ottoman Turkish empire. Originally made up of Croatians, as time went on their ranks were filled from many ethnic groups from the South East of the Empire, such as Hungarians, Wallachians, and even Cossacks.  All experienced in the frequent minor border clashes with the Turks.  What ever their origin, they became collectively know as the Croat horsemen, and became feared wherever the Imperial armies campaigned.

A Croat horseman
On the battlefield they were perhaps no match for heavier horse in a straight fight, but in scouting, plundering, and the general 'beating up of quarters' there were none better.  They had a fearsome reputation for plundering and were feared by the civilian population on both sides.  The Croats became the 'bogey men' of which parents warned their children, and contemporary pamphleteers horrified their readers


The Croats were classic light cavalry.  Unarmoured, and riding hardy but nimble ponies, they would skirmish with their carbines and pistols, before closing with their sabres when they had found an advantage, or sufficiently weakened an enemy.  They were famed for their canny ability to lay or avoid ambushes, after many years learning from the wily Turks and their Tartar allies.   Even rivers were no obstacle, as they were able to cross bodies of water thanks to their strong swimming mounts.


I have been looking forward to collecting and painting the Croats since I started this period.  They are something quite exotic compared to the more regular pistol armed horsemen of Central and Northern Europe.  Warlord Games make Croats for the Thirty Years War (here), and The Assault Group (TAG)  also have Croats (here) as well as covering Poles, Cossacks and Tartars that can be used for Croats.  Wargames Foundry have a set of Cossacks (here) in their Severn Years War range, including mounted Cossacks that I think also can work as Croats. They are riding really characterful ponies, and have a great range of poses.


This unit is made up of the Wargames Foundry figures, with the addition of a TAG Croat trumpeter.  They carry a banner of a shape peculiar to the Croats, made by Flags of War (here).  The figures reflect the typical clothing and equipment of the Croats; brighter shades of red, blue and green, the long eastern style of coat, sometimes worn as a cloak, often braided, knee boots, fur trimmed hats, curved sabres, pistols and carbines.  I think they look like a fearsome bunch, and my Swedish baggage train had better look out!

All of these figures were a real joy to paint.  This range from Foundry have real character, with each pack and figure named.  It was easy to imagine a story building around the unit and its piratical members as I painted the figures.  I can't wait to get them on to the battlefield so that they can start bringing some of those stories to life.

Until next time!

Andy @ FOGH.

Monday, 27 May 2019

Generalmajor Count Nils Brahe

" ... it was so long since they had beene last beaten, 
that they had by this time forgotten how to runne away."  
William Watts, The Swedish Intelligencer, Part 3. 

Yellow Brigade attacking at Lützen wargame.  (Photo by Alan and Elaine Daniels)

A quote from Watts describing the destruction of the Old Blue Yellow regiments at Lutzen, 1632.  This blog post covers my command base for the commander of the Yellow regiment, Nils Brahe.  This is another command base for my Swedish Thirty Years War (TYW) army focused on the Lützen campaign.

The Yellow regiment is probably one of the most famous Swedish TYW regiments.  Dressed in their yellow jackets they make a very striking appearance on the battlefield.  This was the King's Guard and Court regiment, with the first two companies forming his Life Guard.  At Lutzen they were commanded by Generalmajor Count Nils Brahe.

Count Nils Brahe was Colonel of the Swedish Yellow Regiment at Lutzen (1632).  He was made Generalmajor of infantry in 1632, and at Lützen probably commanded the four leading brigades, which included the Yellow regiment which made up one brigade on its own.

Count Nils Brahe
The Yellow regiment was part of the Swedish attack at the start of the battle.  The King had ordered Brahe to attack the imperial infantry to his front, not giving fire until the Imperial troops had fired first.  This tactic expected the enemy to fire early, and then allow the Swedes to march up before discharging their own devastating volley at point blank range.  This seems to have gone disastrously wrong on the day, the Yellow regiment meeting veteran Imperial infantry who also held their fire.  The Imperial infantry did fire first, but at such close range that this initial volley cut down many of the Yellow regiment's officers.  With key officers, including Nils Brahe, out of action, the Yellow regiment was paralysed, and blown apart where it stood.

The Osprey Men-At-Arms on The Army of Gustavus Adolphus (1) Infantry (link) has a great picture of The Yellow Regiment in action, with Nils Brahe receiving the leg wound that would prove fatal.  (He died two weeks after the battle from this wound.). Nils Brahe was a rising star in the Swedish army. He had risen through the senior ranks quickly, being Generalmajor by the age of 28, and was a favourite of the King.


I have chosen to show Nils Brahe dismounted, leading his regiment forward. He is followed by two ensigns from the Yellow Regiment. I like the way that the ensigns are braced as if advancing in to heavy fire, which at Lutzen it is likely they were. Nils Brahe on the other hand is leading by example, bolt upright, coaxing his men forward.  He is finely attired, in a red suit, wearing a sleeveless buffcoat which was the fashion amongst wealthy officers on the continent.  His followers are clothed in yellow suits, as befits their regiment, and one is also wearing a grey cassock like those issued to the lifeguard  companies.


The figures are metal figures from Warlord Games.  Nils Brahe and the cassock-ed ensign are both from the Swedish infantry box set. I think these are both cracking command figures, and it’s a pity they are only available in the boxed set. The other ensign is actually from the Warlord Scottish gun crew.  His pose fitted well with the other ensign, and with a quick hat swap and hand change he was a perfect fit.


The colours are from Flags of War, of course!

I put all of my command on round bases, to differentiate from the troops on square bases. 2mm thick 6cm round from Warbases.


Until next time!

By Andy Mk1 @ FOGH.

Sunday, 19 May 2019

The Men That Will Undo Us

'As for those fellowes (meaning the Crabats) I care not for them', saies the King: 'but charge me those blacke fellowes soundly: for they are the men that will undoe us.'  
William Watts, The Swedish Intelligencer, London 1633

The "black fellowes"
According to this quote by Watts, of all of the enemy troops, Gustav Adolf was most concerned about the Imperial Cuirassiers at Lutzen.  In their three-quarter armour, blackened to protect the metal, on large, dark coloured horses, they must have been an imposing sight.  The Imperial Cuirassiers were Wallenstein's heavy strike force.  Very expensive to raise and maintain, but also very hard hitting on the battlefield.

I need more of these armoured cavalry for my own Thirty Years War (TYW) collection, so the first thing on the painting table post Salute has been a unit of Imperial Cuirassiers.  I like a variety of figures in my units; if I can get every figure to be different, then so much the better.  I like this more 'hotch-potch' look because TYW troops were supplied from different sources at different times and would seldom have a very uniform look.  Add on to this that men, and certainly horses, will rarely have been all doing exactly the same thing, and I think some variety looks good.   One of the ways I achieve this variety is by making up my units with figures from different manufacturers.   For example, perhaps manufacturer A makes three TYW cuirassier figures and manufacturer B also makes three.  By using both manufacturers I get 6 different figures.   Obviously a bit of care needs to be taken.  Different manufactures can make 28mm figures which do not always look right when standing next to one another.  Fortunately some do.

The 'raw' figures
Here is my selection used for this particular unit, that I think fit nicely together.  The riders are from Warlord Games (link), Perry Miniatures (link) Avanpost Miniatures (link), Foundry (link) and Horcata (link).  The horses are from Perry Miniatures, Foundry and Front Rank (link).  Horcata don't make horses themselves but make their riders to fit on Front Rank horses.  This is interesting as Front Rank do a nice selection of stationary, or near stationary, horses.  I wanted to give this unit the look of cavalry in reserve, waiting for the order to attack, so standing horses are ideal.  Although I like some variety in the figures of a unit, I like them to look as if they are all following the same order.  So all of the rank and file here have one of their two wheel-lock pistols at the ready.

Undercoated and fixed on plastic bottle tops to make handling easier.  
Next came painting.  I am definitely not an expert at this step and so will leave it to the very many gifted painters out there to provide painting tutorials.  There were two things that I did differently for this unit.  First was that I copied some brown triads (sets of three paints that work together as shade, base and highlight) from the Loki's Great Hall Site (link).  (Loki has some great Vallejo triads on his site.)  He also has some handy YouTube videos on horse painting (link).  We are always learning and so I'm always happy to look at new techniques and ideas.

The second new painting technique was trying to get blackened armour to come out as I wanted.  This is a key feature of the Imperial cuirassiers in this period.  I have struggled to get the effect to still look like metal armour, while also not looking too mid grey.  This time I gave the figures a relatively heavy dry brush with Natural Steel from Vallejo.  I then washed this in Nuln Oil from GW.  This gave me a very black finish, with just the hint that the surface was metal.  I like the result, so this will be my new method for this type of armour.

Varnished and based.
Here is the unit varnished and based.  I under Winsor and Newton Gloss varnish (for protection), followed by Daler Rowney Matt varnish to matt things down at the end of the process. Bases from Warbases (link).   The cornet (i.e. flag carried by cavalry units) is from Flags of War (link).  It is based on Ottavio Piccolomini's coat of arms.  Piccolomini is one of the larger than life characters of the TYW who, over the course of the war, rose from the rank of Captain to the the highest rank in the Imperial forces, that of Generalissimo.  At Lutzen he was the Colonel of a regiment of Arquebusiers.  They were supposedly so well equipped that they were better armoured then some of the titled cuirassier regiments.  Due to his stellar performance at the battle he was given many rewards by the Emperor, including his regiment being changed to a cuirassier unit.  I have therefore based my unit on this later full cuirassier version of Piccolomini's regiment.

The final step is basing.  I followed my normal formula of PVA, filler, sharp sand, and Humbrol Matt 29 Dark Earth, with a light dry brush of Cream/Beige.  Tufts and static grass added to taste.

The final 12 figure unit.
Here are some further shots from different angles.


Riding off!
As Piccolomini's Cuirassiers ride off in to the sunset, I am about to start the next unit on the painting table; more cuirassiers, this time with swords rather than pistols.

Until next time!

Andy mk1 @ FOGH.

Thursday, 9 May 2019

The Road Goes Ever On

This blog post covers the future of The Via Regia blog.


(The post is sprinkled with wonderful pictures from Alan and Elaine Daniels.  They took these at Salute and have been kind enough to share them with us to use on the blog.  I really, really like Alan and Elaine's pictures.  They are quite different to your run of the mill wargames photos.  I have been lucky enough to discuss these with them by email, and I hope to try to learn their approach in the near future.  More of this later.)

Back in January we set up this blog to chart the build up to our Lutzen 1632 game at Salute.  We have well and truly done that, so I suppose it could be the end of the Via Regia, the end of the road?  However, as J. R. R. Tolkien himself penned, 'The Road Goes Ever On', and as this blogging lark has been so entertaining to write we have decided to keep it going.


What will be the new topic for the blog if Lutzen and Salute are 'done'?  Well, the plan is for the blog to be about the more general wargaming journey we are on.  In the immediate future this will be building more  Thirty Years Wars (TYW) units.  The game at Salute featured figures from three collections.  The way we split the up the units we needed for the game meant that, if we intended to do games on our own in the future, we would have some gaps in typical TYW troops.  I, for example have not got any Croats yet, and have only one Imperial Cuirassier unit.


In the less immediate future we are all keen to investigate the battles further east during this period.  The Swedish-Polish wars look interesting.  We already have many Swedish units, and so we would mainly be collecting Poles.  Seventeenth century Poles?  What did they have?  Winged Hussars!  I have wanted to collect these since I first read about them in Gush, and then saw the spectacular factors they had in the WRG Renaissance rules.

It feels a bit like a mid-life crisis.  Some people get to that certain age and rush out, buy a leather jacket and motorcycle, and roar off in to the sunset.  Not me.  I think that I will keep my mid-life crisis to wargaming.  Who hasn't seen a fabulously painted unit of Winged hussars, bedecked with huge flags and lance pennants, and thought "phwoar!".  I will therefore be throwing all caution to the wind, strapping on my eagle feathered wings, lowering my striped lance, and charging full tilt in to future.  (I am already aware that the wings are a topic of some contention, but please don't spoil my dream this early!)


Once you start researching the Poles you then come across their other enemies, Cossacks and Turks.  Oh, dear.  I think I may have just mapped out the next 5 years!   It is just at this point that Barry Hilton at Warfare Miniatures releases his Turks and Cossacks.  https://www.leagueofaugsburg.com/shop/products-subcat-57.html
Well, one is only mortal flesh.  I think there is a certain amount fo inevitability about it all.  But, important to not get ahead of myself.  Expect things to stay firmly in the German states for the next few months.

It would be great to hear suggestions for the future plans from any readers .  Any recommended books on the Poles and the wars with Sweden in the 1620s would be gratefully received.

Until next time!

Saturday, 20 April 2019

Day of Battle


I’ve already written quite a few words about he day of Salute on the 6th April, but not yet actually written much about the Lutzen 1632 refight played out by the Friends of General Haig on the day.  This post therefore aims to correct this omission, and is the official battle report.

The order of battle has already been covered in a previous post here.

The troop rosters, set out for Warlord Games’ Pike and Shote, are also shared on Google drive here.

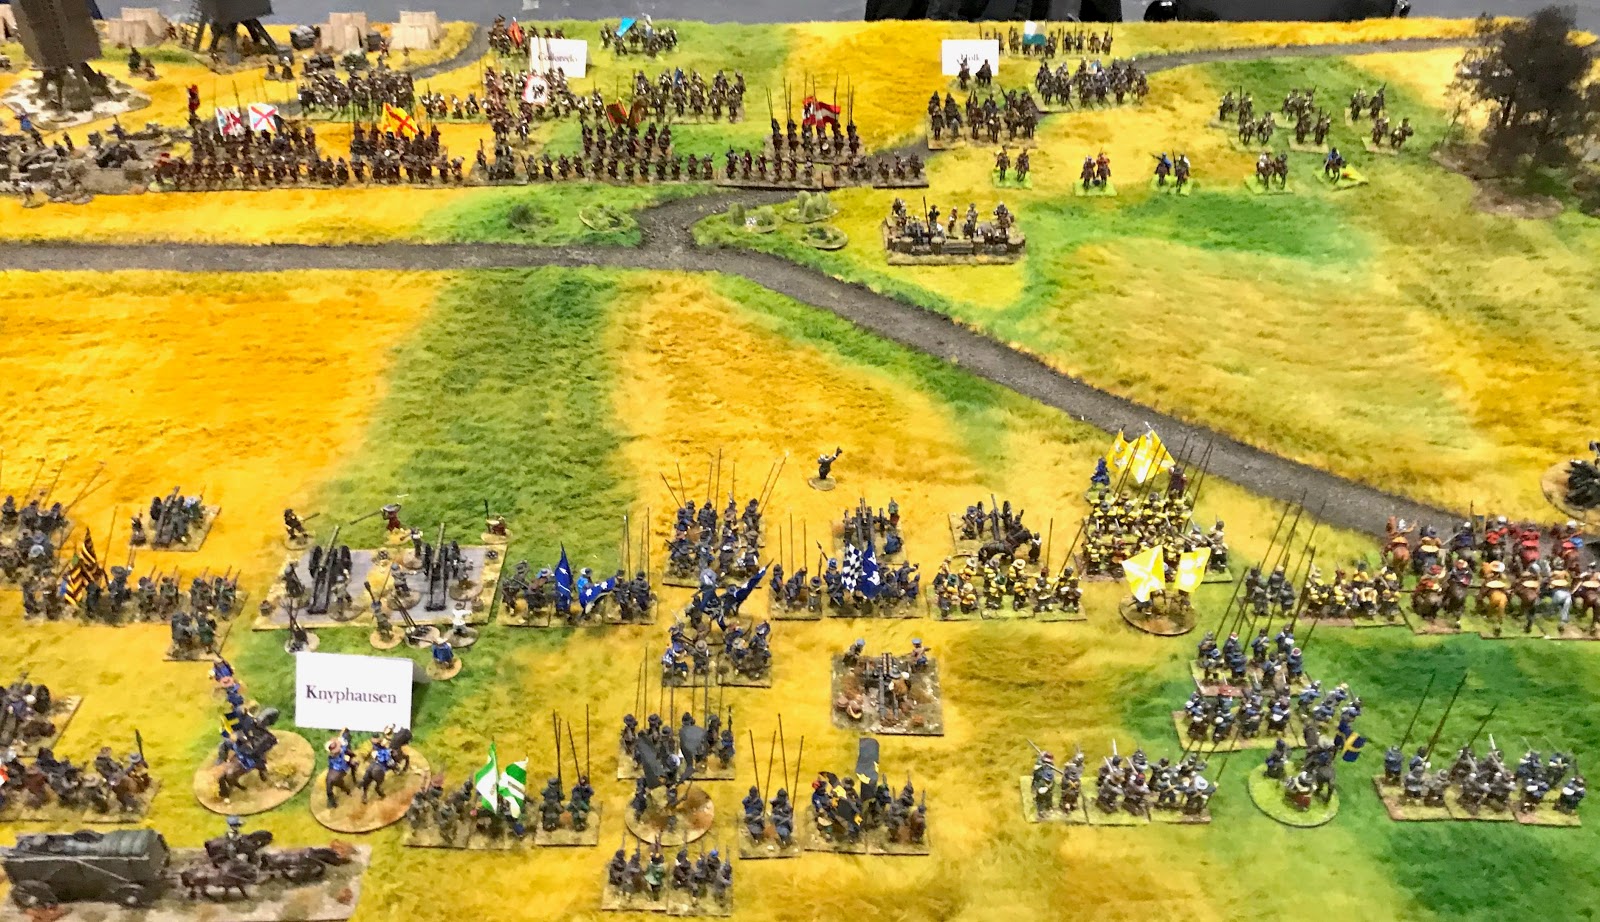
We followed the historical deployment as described in this picture.


We had divided each army into three commands.  We had six players and an umpire and so to start with we divided the commands among the six players.  As the day went on we allowed the players to have time off to go and see the rest of the show and so other commanders in the same army would take temporary control of their command.  The Imperial army had a fourth command (Pappenheim) which would arrive later and we decided to allow Wallenstein to command that in addition to his own command.


You can see it is a fairly cramped battle field, without much room for manoeuvre.  This was intentional, as the cramped conditions were all part of Wallenstein’s defence.  He knew that Gustav would try to outflank him and so he used the terrain to mitigate against this.  He also refused both flanks in an echelon formation, with some skirmishing Croats thrown forward to further protect each flank.


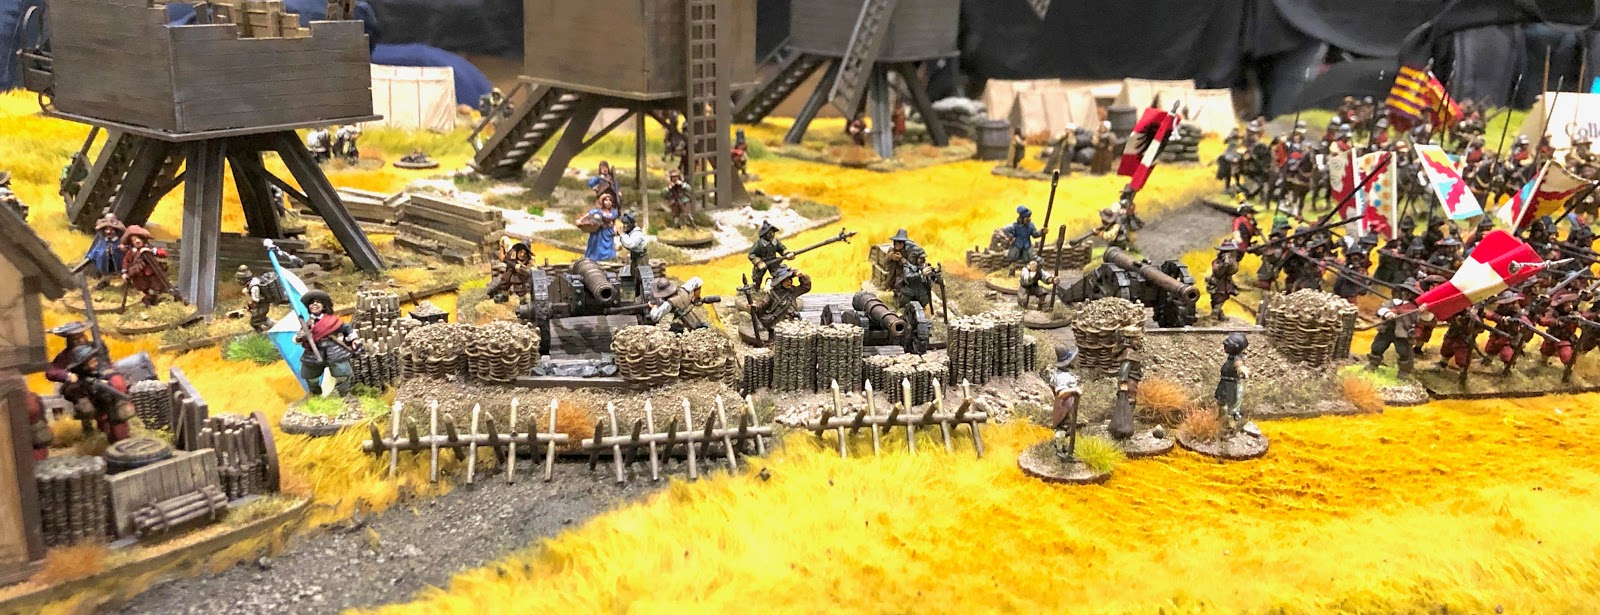
Wallenstein had the town of Lutzen burned to prevent the Swedes taking it and attacking through it.  He also used commanded shot to hold the gardens that surrounded the walls of the town.  The Imperial army also had two artillery redoubts, and had fortified the Miller’s house next to the Windmill battery.  The final Wallenstein touch was arming a group of camp followers to look like an infantry reserve on the left flank.


On the Imperial right we see the Windmill battery, the Miller’s House and the town of Lutzen.  There is little room for the Swedes to exploit their advantage in cavalry numbers here.  


They will need to take the gardens and the Miller’s house to allow they cavalry to move through the gap.  Wallenstein’s command here looks secure.


In the Imperial Centre we can see Colloredo has strength in depth, with cavalry units also mixed in the second line of the foot regiments.


The Imperial left under Holk looks the weakest position.  There is plenty of skirmishing light horse to try and slow down the Swedes.  Also some camp followers cowering at the back!


On the Swedish right we see Gustav Adolf II ready to attack the Imperial position. (In fact he is still waiting for his commanded shot and some more horse to deploy in this picture.)


In the centre Knyphausen has six infantry brigades, all in their 3 squadron formation with light guns attached.  The front three brigades are the elite Yellow, Old Blue and Green brigades.  There is also the Swedish heavy artillery position. 


On the Swedish left Bernhard of Saxe-Weimar has little room to manoeuvre and has the defended gardens of Lutzen to deal with.


The game started with the Swedes taking the first turn.  Gustav had no doubt what was required and immediately charged forward with his cavalry.  In fact, so keen was he to get to grips with the Imperial cavalry opposite that he decided to leave behind his slower moving commanded shot while he chased away the skirmishing light horse defending the Imperial left.  The Croats were dealt with in fairly short order but they had done their job and delayed the Swedes for a little while.  

The Imperial commanders knew they were out numbered on their left and they decided to move the reserve cavalry from the centre over to bolster the left flank.  This had a decisive effect and Gustav’s attack was quickly bogged down.  All of the Imperial horse had been made Caracole troops which in Pike and Shotte means they can not countercharge enemy horse.  This allowed the Swedes to have a slight edge in initiative to reflect their aggressive cavalry tactics.  However, the Imperial cuirassiers were still very tough nuts to crack.  Units were lost on both sides. 


Meanwhile the Swedes ground forward in the centre.  There were moving in to a storm of fire from Imperial Muskets and artillery.  But they managed to give back pretty much as good as they got.  The command dice were not kind though and it was hard work for Knyphausen getting his brigades forward.  

The player taking the role of Gustav was well aware of the historical fate of the Swedish king at this battle.  Despite this he did risk Gustav in a melee in an attempt to break the Imperial line.  There was a collective sharp intake of breath as the dice were rolled for risk to the general in combat.  He survived, and won the melee.  After this Gustav was kept out of the fighting.


On the Imperial fourth turn they could roll to see if Pappenheim arrived.  A 5 or a 6 on a D6 was required and a 5 was duly rolled.  Pappenheim’s troops arrived and charged straight in to the fray on the Imperial left.  Just at this moment, Holk, who had been commanding the Imperial left, was killed in a melee.  Pappenheim had arrived in the nick of time.  


In the centre the Old Blue brigade were up to the Imperial line but the rest of the Swedish Brigades were still struggling to come up.  Both sides were losing units due to the concentrated firepower of close range muskets and guns.  (The grey smoke indicates units disordered by enemy fire.)  Frustrated by the Imperial defences Bernhard decided to demonstrate with his cavalry against the Imperial windmill battery. 


Bernhard also sent his cavalry to attack Wallenstein’s flank, but to no avail.  A storm of musket and carbine fire prevented his Saxon horse from making any impression.  Perhaps their hearts were not in it!  No such qualms for Bernhard’s lifeguards who continued to threaten the heavy guns, and suffered accordingly.  


The tide had now turned against Gustav and it was only the Swedish Commanded shot and support from the Yellow brigade that halted Pappenheim’s rampaging cavalry.  It seemed that a stalemate was being reached on the Swedish right, Imperial left.  The Imperial forces couldn’t break through the combined arms of the Swedes, and the Swedes had lost too many cavalry to push forward.  


Could the Swedish centre save the day?  The Swedish infantry brigades had finally made it to the Imperial battle line.  You can see here only a few reserves and the Swedish heavy guns left on the Swedish side. 


The Imperial commander in the centre, Colloredo, was not going to let the Swedes dictate this final phase of the battle, and as the Swedes approached, Colloredo marshalled his reserves and counter attacked.  Imperial pike blocks stormed forward in to the Swedish formations.  The Imperial troops had the best of the ensuing melees, but the couldn’t break the Swedes.  


With stalemates along the whole line of battle , and darkness falling, the two sides had to withdraw.  The Swedish attack had been stopped, so a marginal victory to the Imperial troops.  But Gustav had survived (as the god like finger points to in this picture!).  It would have been fascinating to fight a second day, but sadly the Excel centre wanted the hall back, and so we had to end it there.

This was the Friends of General Haig’s first Thirty Years War game, and so I was very pleased that all of the commanders had really enjoyed the game, and all were eager to play it again.  Both sides were sure they could pull it off next time.  I think this is a good sign that we have a well balanced game.  The rules worked well, and all the players felt we had the factors about right.  I am certainly really looking forward to getting these troops on the table again!

Until next time!