
This blog post covers a new light cavalry unit for my Polish-Lithuanian Commonwealth army of the 1620s; Polish cossack cavalry.
 |
| Polish cossack cavalry in 28mm TAG, Foundry and Warlord |
The stunning ‘Winged’ Hussars did not make up all of the army’s cavalry. They were supported by lighter equipped cavalry referred to as cossack cavalry, as well as by cavalry equipped in a Western style. In this post I will cover a little bit of historical background, the figures I used for the unit, and a technique for adding fancy patterns to the figures.
For this post I’ve referred to Michał Paradowski’s fantastic book ‘Despite Destruction, Misery and Privatisations…’ (link) which has become the go to book for my army. All mistakes remain my own!
Note. To hopefully clear up the use of the word “cossack”. Here (with a small ‘c’) I am referring to the term used to describe the lighter class of cavalry, fighting in native Polish style, and not the ethnic Cossacks (with a capital ‘C’) who were a semi-autonomous people living in what is now the Ukraine.
Historical Background
The Polish cossack cavalry were recruited in the same manner as the Hussars; a commission was issued to a ‘rotmistrz’ (captain/colonel) to raise a ‘banner’ (company) of cossack cavalry and he in turn recruited Polish nobles to the unit. Each noble would bring one or more retainers that together with the nobles made up the banner of cavalry.
They acted as both medium cavalry on the battlefield, providing fire support to the heavier hussars, and as light cavalry during campaigns, performing the classic scouting role. Their primary armament in this period were firearms, typically a carbine. This allowed the cossack cavalry to provide mobile firepower on the battlefield, and was also useful in their light cavalry duties, fighting in the typical smaller actions and skirmishes of any campaign. As well as their carbines they also carried the ubiquitous sabre, a required item for all nobles and soldiers in this period. The horseman’s pick was also a popular weapon among nobles in this period as were bows. Bows may appear an unnecessary item for cavalry equipped with firearms, but many period illustrations show cavalry equipped with both firearms and bows. It seems that bows were as much a fashion item as a functional weapon, and something seen to emphasise the bearer’s martial nature.
The cossack cavalry had been typically unarmoured, but in this period armour was beginning to be used by some individuals. It is difficult to say how widespread the practice was, but Polish commanders were starting to call for the cossack cavalry to be armoured, especially where they were expected to face Western style cavalry in hand to hand combat. Armour would normally be in the form of a short chainmail shirt, often with plate metal vambraces to protect the lower arms. Helmets would also be rare, and when used, typically of the ‘misiurka’ form, a plate metal skull cap with chainmail suspended from it that protected the back and side of the head, as well as the neck. Small round shields of the ‘kalkan’ type were also carried by some cossack cavalry to provide protection.
The Wargaming Unit
Most of my figures for this unit come from The Assault Group (TAG, link) who have a fairly extensive range of Polish troops for the period, including cossack cavalry. I have also used a couple of rider figures from the Foundry range (link). Finally I have a couple of riders from the Warlord Games Croat set (link). To include a few riders in armour I have used ‘Pancerni’ figures from the TAG and Foundry ranges. Pancerni as a separate class of cavalry within Polish armies that come slightly later in the 17th century, but the figures are just right to represent the richer/better equipped cossacks in my earlier army.
 |
| A Foundry cossack, with some potential extra accessories from TAG |
I have noticed while looking at period pictures of Polish nobles and cavalry that they are always very well armed. This might be a horseman’s pick as well as their sabre, a bow as well as a carbine, the addition of pistols, or any combination of these weapons. I therefore wanted to try and give the impression of the cossack cavalry being ‘tooled up’ so to speak! I found some suitable extra carbines, and bows in eastern-style cases, in the accessories part of the TAG online catalogue. TAG also make extra kalkan type shields that were another item that the best dressed cossack cavalry shouldn’t be without. These bows, carbines and shields were added to a few figures to give them the ‘well armed’ look that I was after.
 |
| TAG Pancerni figure with Warlord plastic horseman’s pick added |
 |
| TAG cossack with TAG bow added |
Adding Some Colour
There were no uniforms issued to the cossack cavalry and so I was free to paint up the unit in a variety of colours. Red was a popular colour for Polish nobles, and often used for the finest and therefore most expensive clothes, so my most armoured and wealthiest nobles have red clothing. For the remainder I used shades of blue and green that were also popular, but perhaps cheaper.
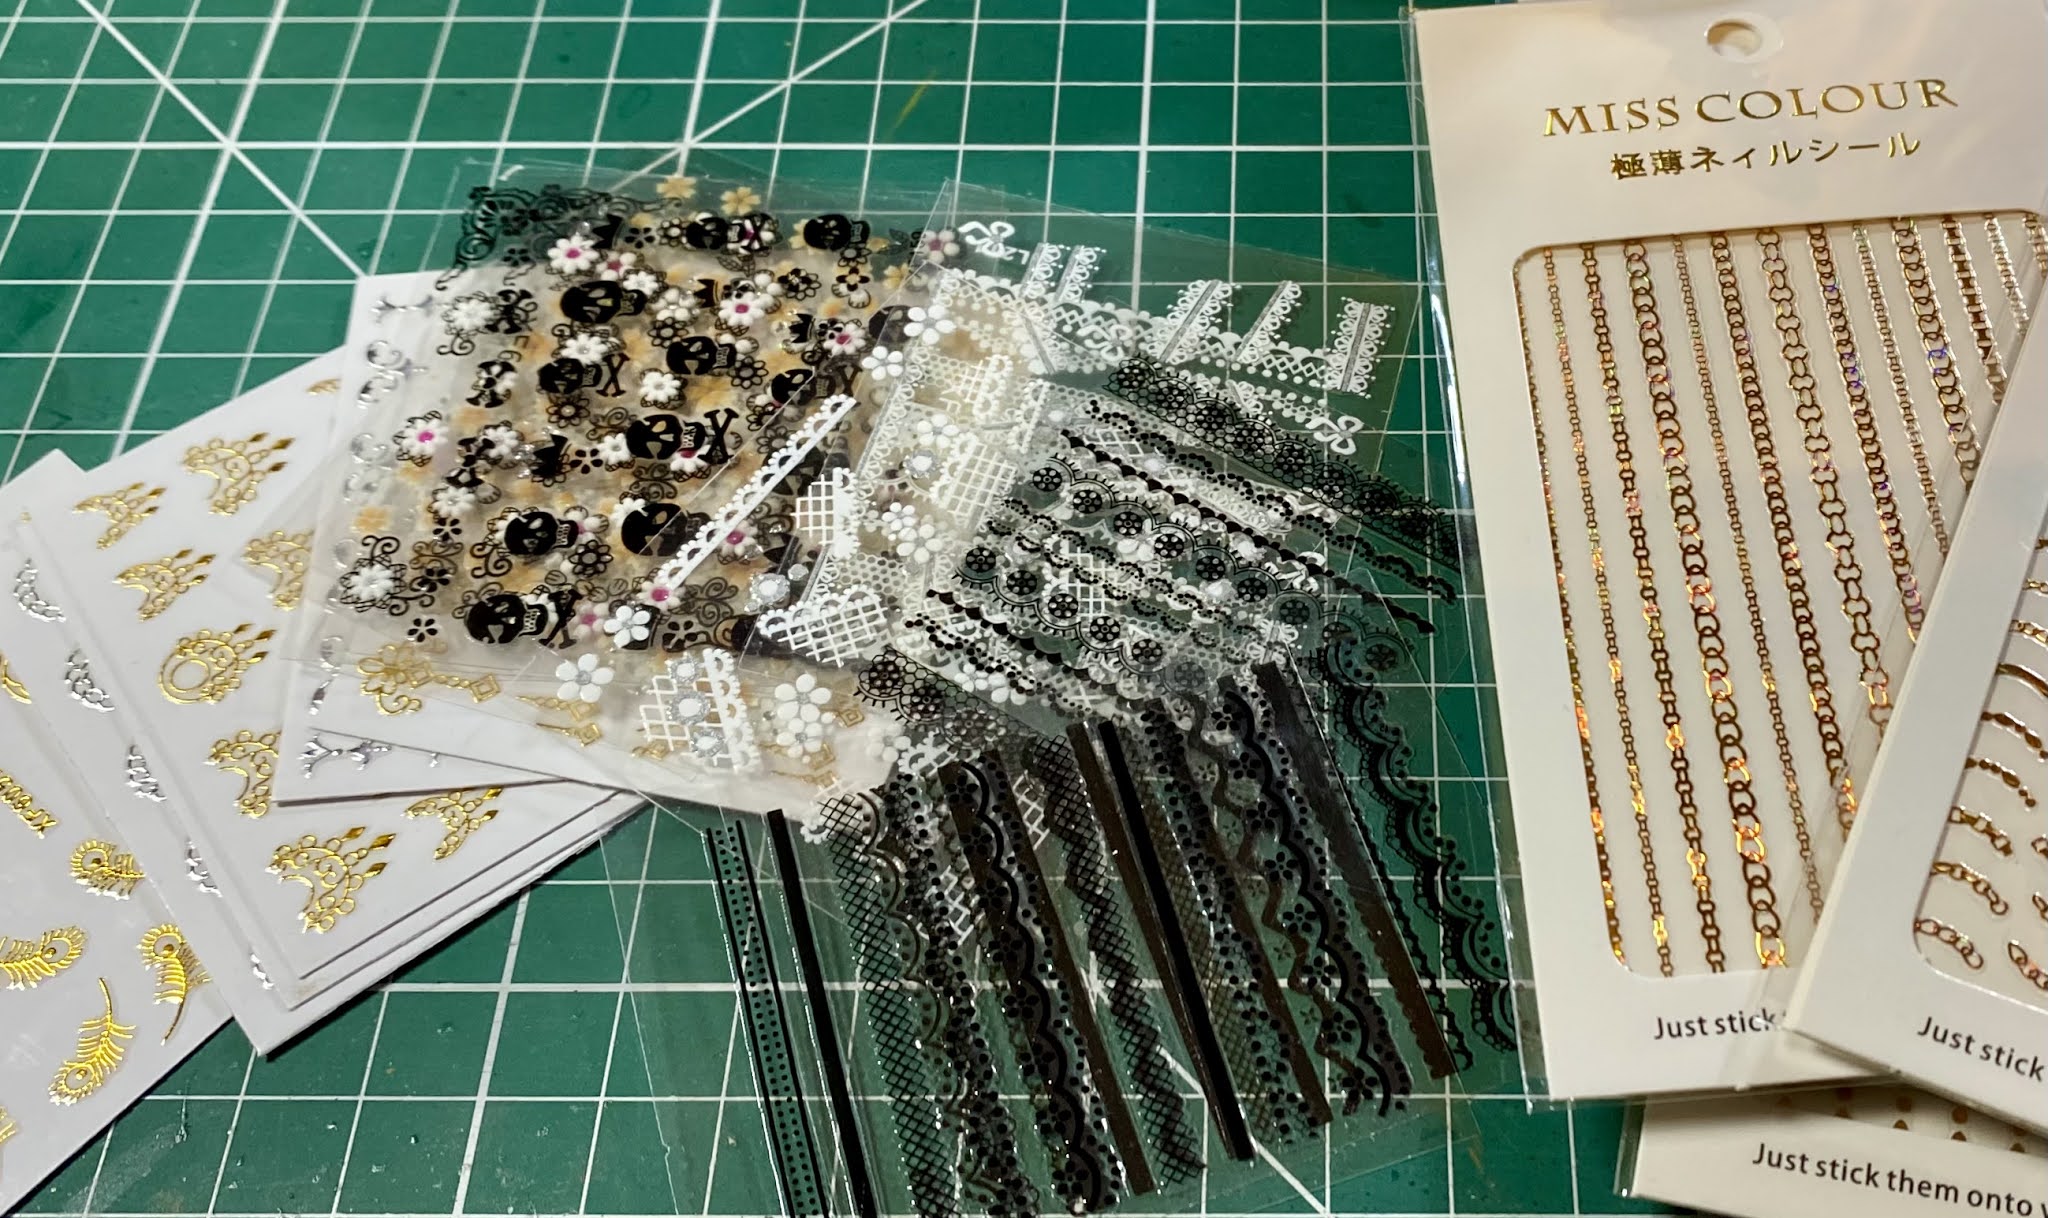 |
| Nail Art stickers from Amazon |
As well as the riders clothing, there were often ornate decorative horse coverings used by the Polish nobles. I used fairly bright colours but I also needed some way to add patterns to them to represent the decoration seen in illustrations. I remembered on another blog (link) someone using nail transfers to jazz up their Polish cavalry (and they did a much better job than me!). I searched on Amazon for nail stickers and transfers and came up with many results. There is a bewildering array of designs available, many probably not very useful for wargames figures. I found you have to buy a selection and be prepared to sideline some of the designs, or perhaps pass them on to the people in your life that love nail art! The ones I bought are plastic stickers that need to be carefully peeled off the backing and then applied. Tweezers are a massive help for this.
Here are some of the horse trappings with added nail art. (Note that the pictures were taken before the final matt varnish so everything is still shiny from the gloss varnish stage.)


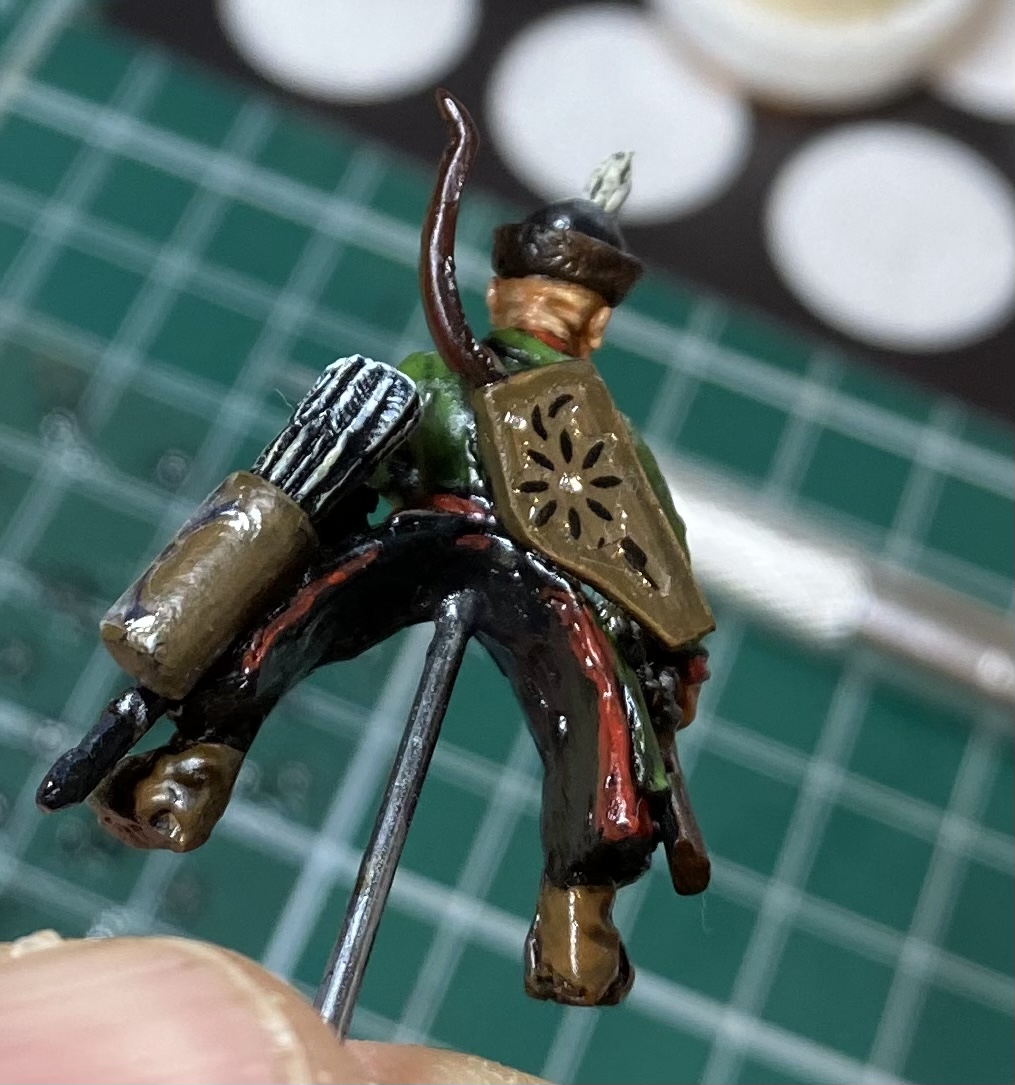

The downside with the the nail art stickers is that they are relatively thick glossy plastic. Too tough for Micro Sol etc. to break down. I applied them after gloss varnishing the figures to provide a flatter surface for the stickers to adhere to. I gloss varnished again to seal them, and then a matt varnish as a final finish to the figure. Some have worked better than others. Overall I like the effect, and will be trying it again. These may also work as a guide to help painting the design on to the figure, and I will be trying this next time. They’re relatively inexpensive so if you need to add some fancy designs, and don’t feel your free-hand paint skills are up to it, then I suggest you give them a try.
Here is the finished unit. The flag is from from the Battle Flag Polish cavalry sheet.


Next on the painting table are the some opponents for the Poles; Swedish cuirassiers!
Until next time!
Andy @ The Friends of General Haig


Splendid looking unit, I really like mix of different levels of equipment. Having both bow and bandolet (carbine) by one soldier probably wasn't used during the campaign, we only see it during some ceremonial entries. And thanks again for mentioning my book, second one will be finished this week, so we should probably see it published in autumn. Then you will be able to work on Vienna 1683 project, hahaha :)
ReplyDeleteMany thanks, Michal! I will have to think about whether to add the extra bows for the next unit. Some later Hussars coming soon 👍.
DeleteAs always, if you need any help with historical information or references, you know where to find me :)
DeleteWonderful work. I like the additional weapons, especially the axe added to the noble.
ReplyDeleteMuch appreciated, Codsticker! It fitted in very neatly - could have been made for the figure 😀.
DeleteGood lord, all the time I swore at the freehand mistakes I made!
ReplyDelete#$@%&! Thanksfor the nail art demo and tips,TRULY a timesaver!
You’re very welcome, Pancerni - it really helps to add some neat patterns. I may try using them as a painting guide on future units so I can very the colours more.
DeleteFantastic work- brilliant! Have just stumbled across your blog. Definitely on my regular read list now!
ReplyDeleteMany thanks, John. Very glad to have you along 👍
DeleteGreat effect with the transfers onto already superbly painted figures but it is your basing that really stands out. 10/10
ReplyDeleteThanks, Pat - very much appreciate that 👍.
DeleteGreat looking cavalry - and those nail transfers are excellent - never heard of this before - it's genius!
ReplyDeleteCheers, Dean! Can’t claim it as an original - but it is a neat idea and glad to have spread the technique 👍
DeleteSome nice conversions in there, well done.
ReplyDeleteThanks, FireyMonkeyBoy! I have a bit of an obsession in trying to avoid having duplicate figures in a unit, and that encourages the conversions 😆.
DeleteSplendid looking conversions, lovely painting and great tip on the nail art!
ReplyDeleteBest Iain
Many thanks, Iain! Appreciate the comments👍
DeleteIt was great seeing these figures as I am currently painting six of the TAG Polish Cossacks myself to add to the six finished a while ago. My converting isn't as complex as your own but I have enjoyed changing the commander and standard bearer into carrying firearms in their hands to match the men. The standard bearer of course just needed something gluing into the hand - the leader needed to lose his mace first. All good fun. I look forward to seeing your Swedes. I'd als endorse your recommendation of Paradowski's book.
ReplyDeleteAll the best,
Stephen