

“… Let it never be thought that they have triumphed over our currage, nor the loyaltie we ow to our soveraigne lord, and let ws hope the best. God is stronge enough!” Mac Colla urging his men for one last desperate charge to hold off the Covenanters.
This blog post continues to look at Mac Colla and Montrose’s victory at the battle of Auldearn in 1645 as part of the War of the Three Kingdoms (the ECW if you will). The Friends of General Haig are running a game recreating this battle at the Warlord Games Open Day on 25th September (https://store.warlordgames.com/products/warlord-open-day-ticket-2021).
You can see my first blog entry on Auldearn here: https://theviaregia.blogspot.com/2021/09/auldearn-1645-boath-doocot.html

This time I’m looking at the terrain needed to populate the battlefield. The key features of the battlefield are the village of Auldearn, two pieces of high ground, and some boggy ground. These will give each of the two armies different challenges to consider in their battle plans. The battle is also a surprise, dawn attack by the Covenanters, rather than a more classic encounter battle where both armies have the opportunity to deploy before the fighting starts. (See the brief background to the battle that I wrote on the Warlord site here: https://www.warlordgames.com/warlord-games-open-day-auldearn-1645/)
The battle starts in the early morning with the Covenanters hurrying to deploy from the march columns in which they approached, and then rushing to scatter the Royalist forces around Auldearn before the Royalists can be gathered together from their sleeping quarters, and formed up into units.
Between the road where the Covenanters march on to the West end of the battlefield, and the village, is the long, low Garlic Hill. The North East and East sides of this hill descend in to some boggy, marshy ground, in front of the village itself. The buildings and associated enclosures on the west side of the village provide some cover to troops defending them. At the North West end of the village is the smaller hill, called Castle Mound (topped with the Boath Doocot). These are the key features of the battlefield.

This map shows how the miniature battlefield is laid out, and the initial troops deployed. This is how the key features of the terrain will effect the game:
- Garlic hill is gently slopped giving no great advantage to troops uphill.
- The marshy ground at the bottom of the North-East, and East sides of Garlic hill should be inconvenient to troops passing through it, slowing them down to a degree.
- Castle Mound is more steeply slopped and troops uphill should receive some advantage in melee over troops coming up the hill.
- Finally, the yards and buildings of Auldearn should confer some benefit to defenders.
 |
| The Gordon Horse ready to sally forth from the Chapel yard. |
These effects are translated for the rules, Pike & Shotte, as follows:
Marshy and other Broken Ground
- Maximum of one move per turn.
- Pike and Horse disordered on a roll of 5 or 6.
- All others disordered on a roll of 6.
Village Buildings
- -1 to hit Defenders (Not Clear Target)
- +2 Morale (Save) for Defenders
- +3 Combat Resolution for Defenders
- Other rules as per main rule book
Castle Hill (Steep Slopes)
- +1 Combat Resolution for Defenders
- Attackers get no Charge bonus
For this game the fighting is taking place down the length of the wargames table so that we can recreate Hurry’s Covenanters arriving in a column and trying to rush the enemy defences, while Mac Colla’s advanced guard try to hold off the Covenanters until the Royalist army forms up. A table in the region of 8’ x 5’ works well for 28mm armies using the Pike & Shotte rules.
For the game at Warlord’s Open Day we will be using terrain boards specifically modelled to allow refighting Auldearn with the main hills, Garlic Hill and Castle Mound, included. It is fairly straightforward to create something similar by adding to a flat table a fairly large, long hill to represent Garlic hill, and a smaller hill, perhaps with steeper slopes to represent Castle Mound.
For the village of Auldearn a collection of small rural type buildings, suitable for the 17th century are needed. (It’s not essential to include Boath Doocot, covered in the previous blog post, as it can be left out by assuming it hadn’t been built at the time of the battle, which is quite possible!) I have used a selection of buildings, including a small chapel to represent the original village church. These should fit with the illustrations and details provided in the Osprey Campaign book on Auldearn.
The buildings I have used are from a variety of sources:


Supplied by Warlord Games, produced by Tabletop Workshop, a Cottage and Medieval Chapel. These are incredibly sturdy, easy to build and really nicely detailed.

From Perry Miniatures, a Medieval Cottage. A lovely detailed model which comes with some handy wattle fencing and an outbuilding.


A smithy and a grain store, both really nice resin buildings. (I received these as gifts and I’m not sure who made them!) These both have great interior details and removable roofs.


Produced by Hudson and Allen, from their Medieval village set. These are made from some sort of extruded foam. They are as detailed as resin, but much lighter and more robust. No interiors, but lovely details on the outside.
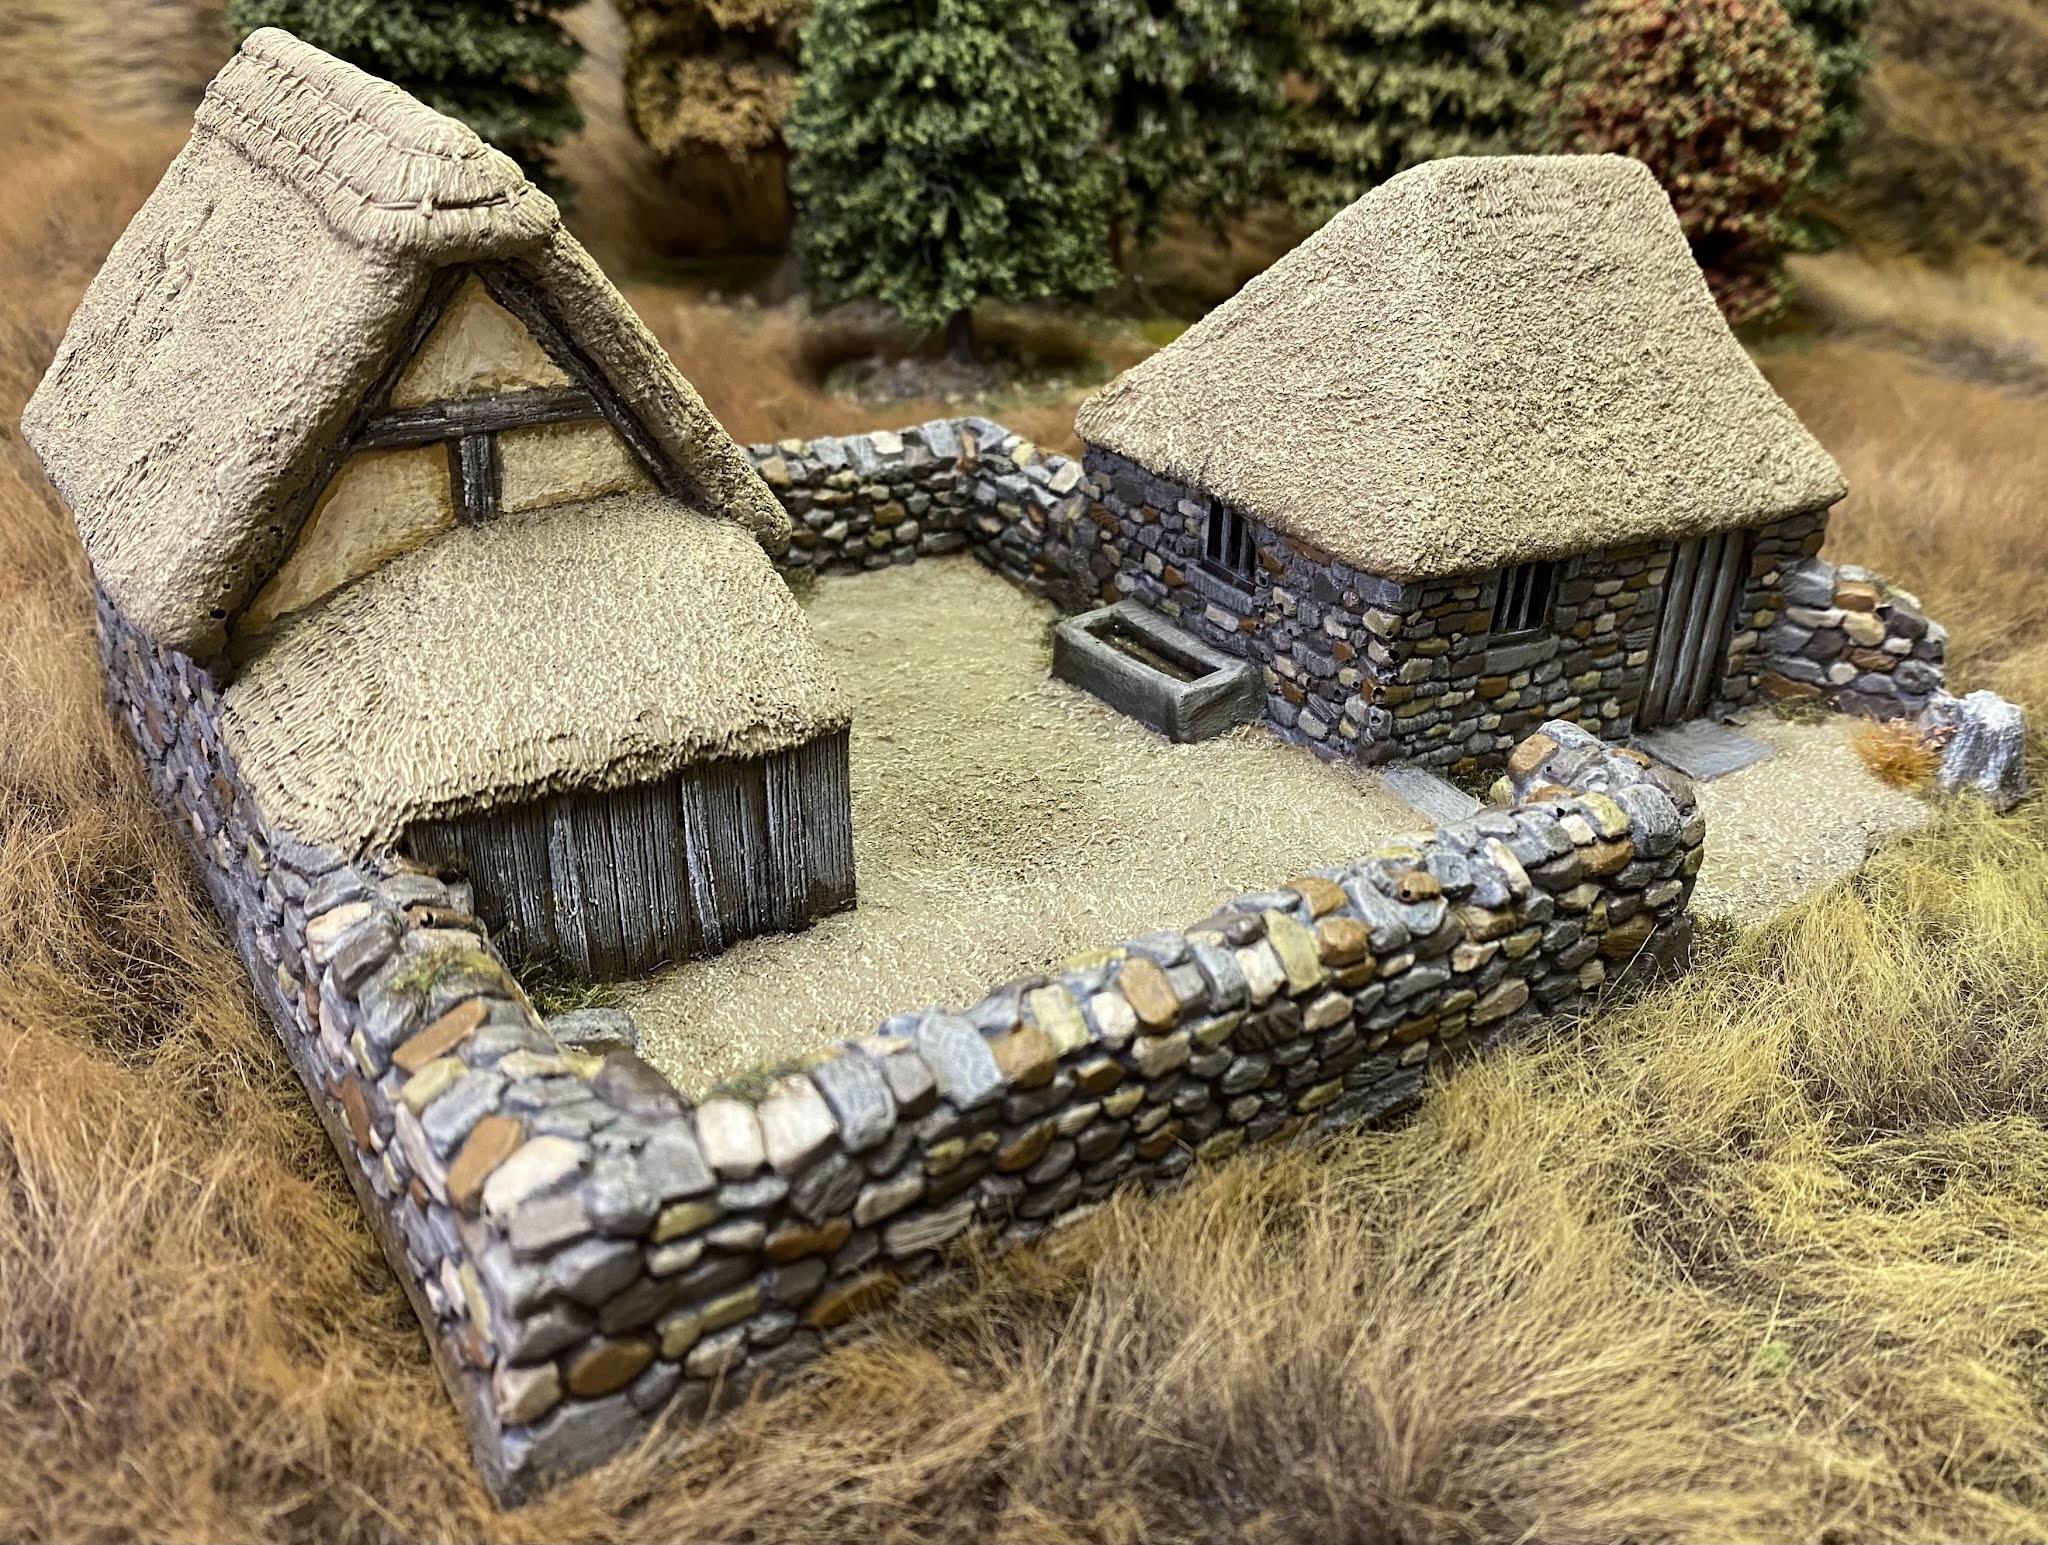
As the fighting will probably spill into the village, just as it did in the real battle, it is necessary to allow for this in modelling the village buildings. I have built a number of yards, or small enclosures, that allows the built up area to be easily split in to defined sections. It is then possible to nominate how many units can defend each section, and therefore also how many can attack a section. Model buildings are placed in the enclosures, and can be moved to facilitate placing troops as required. Having a village broken down in to easy sections likes this makes fighting around buildings much easier in Pike & Shotte.
To make the enclosures I used a mix of fencing and walls, added to Warbases’ Terrain Bases in a variety of sizes.


Supplied by Warlord Games, made in plastic by Italeri, Stone Walls set. This is a really useful set with gates and gate posts included.

Produced by Ferris games, these are probably the most detailed and realistic dry stone walls I have seen. Gate posts here made with pieces of balsa.


From the Perry cottage set, the included plastic wattle fencing.
The last part of the key terrain features is the marshy, boggy ground just outside of the village. Some scatter terrain pieces, representing marshy and rough going is used to represent this area. These are easy to place on the table where needed and can be moved to allow troops to be placed if necessary.
 |
| Some of the Irish Brigade charging through the bog. |
The scatter pieces are made from scraps of card. These have had sand with PVA added, and then painted in the same way as when I base my figures. Some areas have been left clear of sand and painted to represent pools of water. The pools were gloss varnished for a simple ‘wet’ effect. Finally, when the varnish was completely dry, tufts, clump foliage and scenic grass were added.
The wargames table would look a bit bare with just these key features modelled and so, as can be seen from map above, the table also had woods and farmsteads to add some interest and colour. Although not absolutely necessary for the game, the Royalist camp is also represented around the village with suitable tents, wagons, pack animals, baggage, and camp followers. A final touch is to add some of the locals with their flocks and herds.


The civilians and scatter terrain are from a myriad of places but I will detail a few of my favourites. Warlord do 17th century civilians, club men, as well as wagons, livestock and vignettes, like the surgeon. Warbases have carts and other bits of baggage. Ainsty Castings have useful collections of barrels and sacks. Renedra do the plastic soldiers’ tents.
I hope this description of how the battlefield has been represented will provide some ideas to others. Next time I will cover the orders of battle for the two armies.
Alba gu bràth!
Andy @ Friends of General Haig.


Tremendous stuff. I really enjoyed this post. Thanks. What a great mix of buildings and the walled and fenced areas are both practical as you describe and bring added realism to the scene.
ReplyDeleteStephen
Stephen
Thanks, Duke, much appreciated!
DeleteYou set a GORGEOUS table, Andy! Simply awesome spectacle. I like you rendering of bogs. Nifty idea.
ReplyDeleteCheers, Jonathan! The bogs turned out better than I hoped. I am planning some bigger sections of marsh so hope this will be useful experience 😀
DeleteGreat stuff and a handy inventory of what's needed.
ReplyDeleteCheers, Uiduach! Glad it was useful.
DeleteAwesome looking village and terrain! Greta table!
ReplyDeleteThanks, John!
Deletelove your map style and terrain bases.
ReplyDeleteMuch appreciated, Norm!
DeleteWonderful work! I really like the terrain bases with fences and the removable buildings; great flexibility there.
ReplyDeleteCheers, Codsticker👍. I’ve found it really useful for all sorts of games, and a lot less fiddly than keeping lots of separate bits of walls etc.
DeleteSuperb buildings and figures, truly gorgeous!
ReplyDeleteMany thanks, Phil 👍
Delete