Thursday, 16 December 2021

What The Butler Recruited

This blog entry looks at a new unit for my 1620s Polish Lithuanian Commonwealth army, a unit of dragoons.

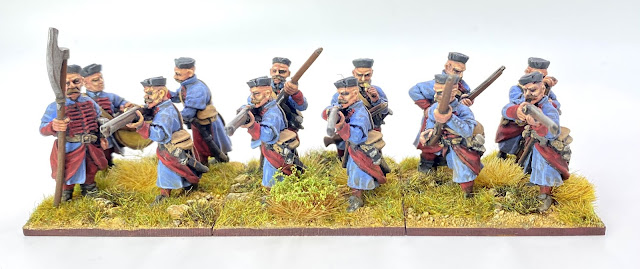
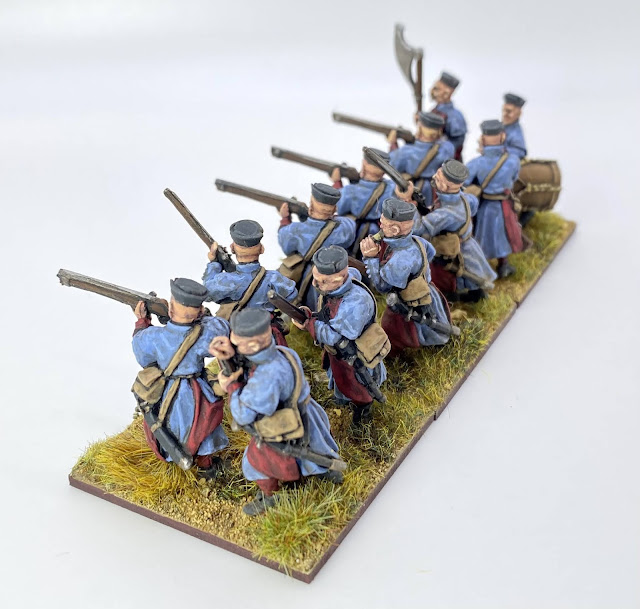
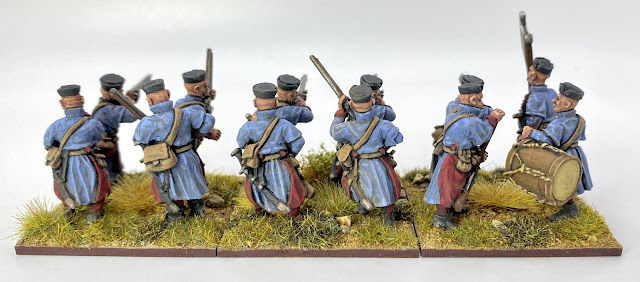
Butler’s Dragoons, dismounted. 28mm from Bloody Miniatures.

Background

European armies in the early 17th century were experimenting with mounting units of infantry to improve their mobility and therefore their ability to support their army’s cavalry. The experiments were successful, where the mounted infantry were equipped with muskets, and the dragoon as a troop type was born. They were able to dismount and provide fire support to the real cavalry and, off the battlefield, they were well suited to the typical activities of the ‘small war’; raiding, scouting and garrisoning outposts.

Assault on a Convoy, by Sebastiaen Vrancx with Jan Breughel the Elder.  A typical action of the ‘small war’.

Polish armies were no exception and in the 1620s they were forming units of dragoons, typically recruited from foreign troops (see my previous entry on the Foreign Infantry here: https://theviaregia.blogspot.com/2021/03/polish-lithuanian-foreign-infantry.html ), and sometimes converted from existing infantry units into dragoons. Dragoons use on and off the battlefield required smaller, flexible sizes of units, and so just a few companies of infantry may be converted to dragoons rather than larger formations.  

James Butler

The unit of dragoons I decided to collect was that belonging to James Butler, as it is likely that they were at Dirschau/Tczew in 1627. James Butler was an Irish noble who had been fighting in Polish service since at least 1617. He seems a fascinating character. (Short bio here: https://www.st-andrews.ac.uk/history/ssne/item.php?id=6450 .)  He was an experienced, and successful, officer who was well connected in England and Ireland, as well as in the Commonwealth, and it appears he recruited at least some of his men from England and Ireland.  His dragoons were formed from some of his existing ‘foreign’ infantry companies.

(While looking in to James Butler I discovered there were several James Butlers from Ireland serving in Polish and Imperial armies in this period.  This makes things a bit confusing, but the Butlers were obviously a family whose sons were often seeking employment abroad.)

A company being ambushed in the Thirty Year War by Peeter Snayers.  An opportunity for plunder!

Dragoons seem to have had a reputation, at least among the more puritanical in England, as being too often tempted in to ‘plundering and ungodliness’. I suspect this reputation may be a result of dragoons often being quartered away from the main army with its commanders, and also due to their function often being the disruption of the enemies supplies. 

Based on this I wanted my unit of Butler’s dragoons to look like they have been living off the land and what ever they can ‘acquire’.  Also to look like they are following their own whims of personal comfort, rather than being uniformed. As they are treated as skirmishers in the Pike & Shotte rules, a good variety of poses would also be required to represent the dragoons defending some outpost or attacking the enemy rear areas.

All of these requirements fitted neatly with the latest release of figures from Bloody Miniatures.  This second release includes a couple of sets with muskets (Game Keepers and Sentinels) and also a set of desperate and dangerous looking Mossers (Moss Troopers). With the addition of a few figures from the original release, I had my 12 figures, including command, as well as a couple of horse holders (more of them in the future).

The Halt of the Cavalry by Peeter Snayers.  I like the dishevelled and ragtag appearance of this unit that Snayers has chosen to represent.

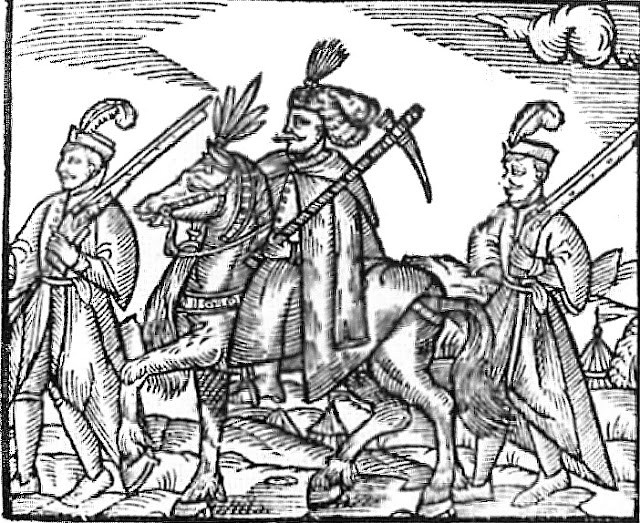
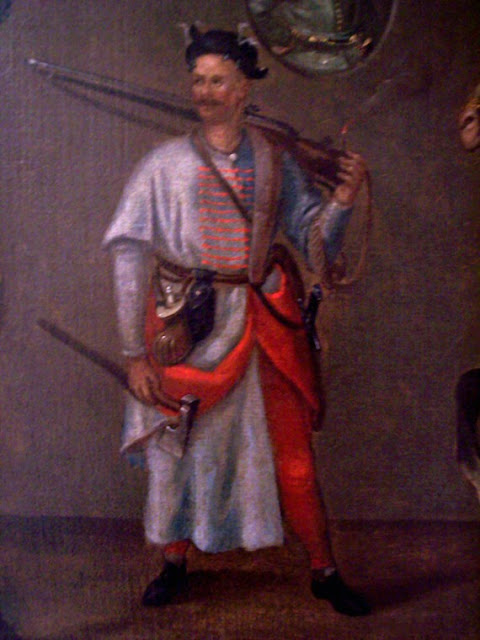
I also decided to do some head swaps to add a Polish feel to the unit. Although these men would have been recruited from foreigners I rationalised that a few items of Polish headgear could have made their way in to use in a unit that sometimes had to operate, and fend for themselves, away from the main army.

Three figures with head swaps to give a flavour of troops fighting in Poland.

As desperado dragoons were certainly not going to be uniformed and so I was able to fully explore my paint racks in deciding on colours in which to clothe each figure. They’ve also been given a fairly grubby appearance to suggest they’ve been on campaign for a while.

Cornet, Officer and Drummer.

The command figures for the unit include a Cornet (flag bearer) carrying a dragoon guidon. Sadly Butler’s foot and dragoons don’t have any known flag designs. I’ve used an example that is possibly from an unknown Polish dragoon unit (see  https://www.helion.co.uk/military-history-books/despite-destruction-misery-and-privations-the-polish-army-in-prussia-during-the-war-against-sweden-1626-1629.php?sid=d20622fac8e2f6ae07608fbfa93e14e3 ).  I’ve also included a drummer, with a handily slung drum, that will help him get about when mounted. 


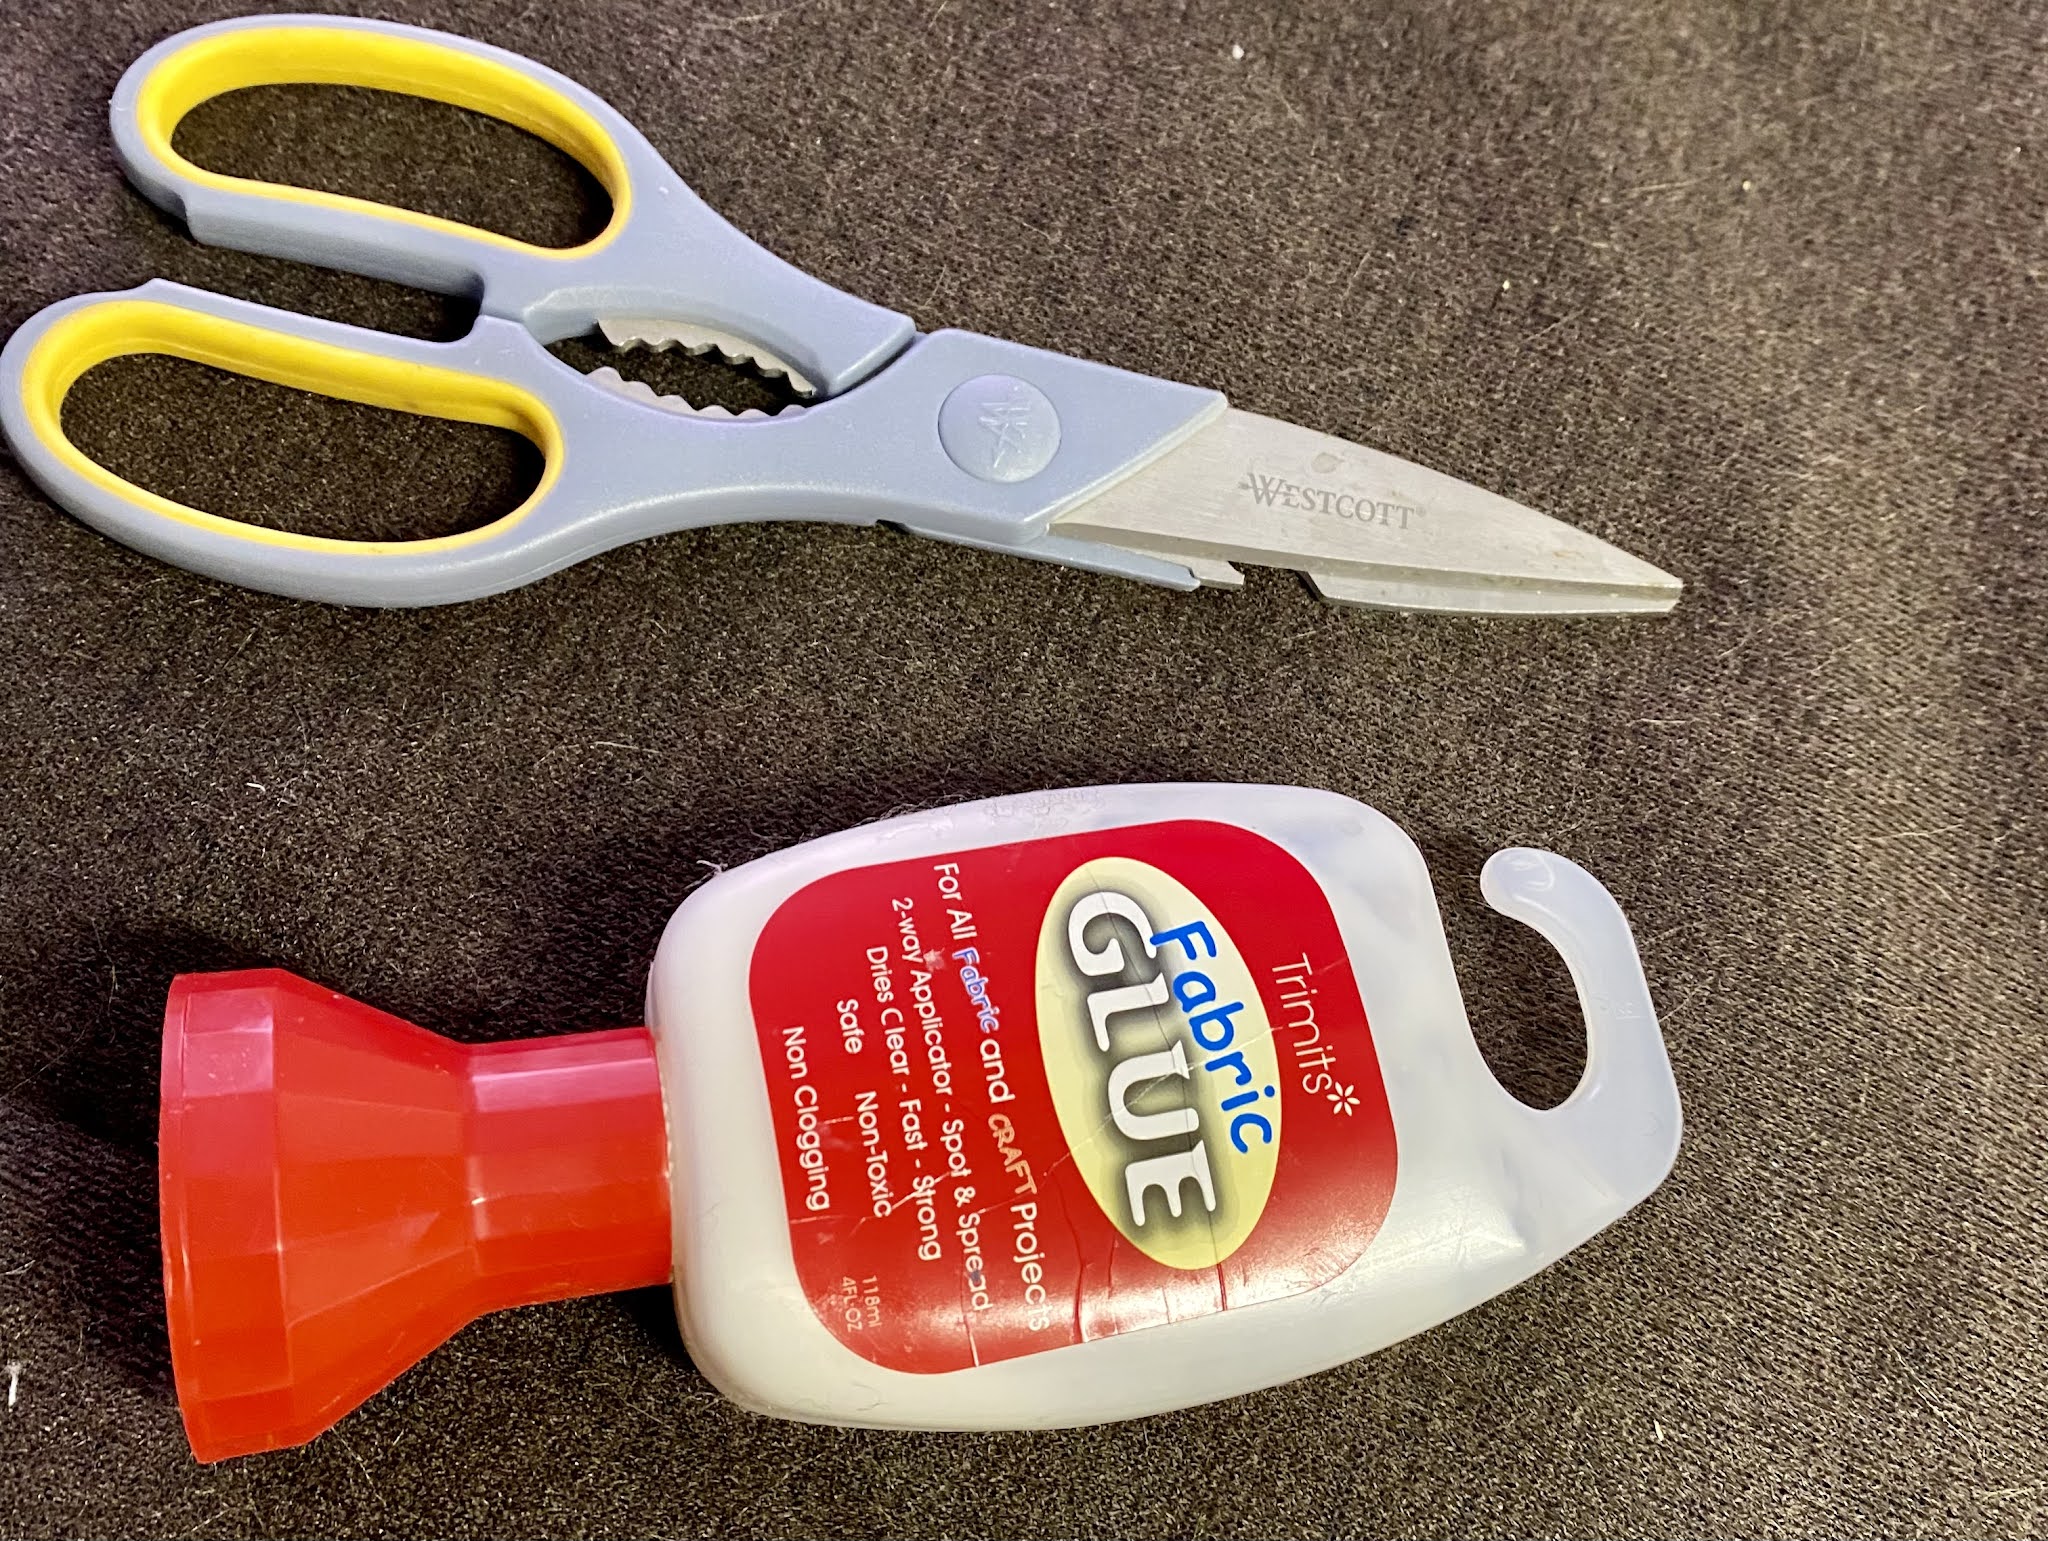
They are based individually so that they can act as skirmishers in Pike & Shotte and this will also give me the opportunity to use them in skirmish games like En Garde or Pikeman’s Lament (both by Osprey Games).  I used to use 2 pence pieces for individual bases, but I don’t seem to get much loose change anymore, and so I’m switching to 2 pence size bases in MDF, produced by Warbases, which have a hole in them for a magnet that will help with storage.  I’ve also bought some movement trays from Warbases to make it easier to move the Dragoons around the battlefield. These also include magnet holes which should help keep the figures on the trays.

2 pence piece bases and base trays from Warbases, all with 5mm magnets added.

Figures on this movement trays from Warbases.

At this point I suspect some people might be saying “This is just a unit of infantry, where are the horses?”. Good point.  You’ll have to wait to next time for my cunning plan to be revealed!


Until next time,

Andy @ The Friends of General Haig


Tuesday, 30 November 2021

Polish Haiduks

In this blog post I cover a new addition to my Polish-Lithuanian Commonwealth army, a unit of Polish Haiduks.

Polish Haiduks - 28mm from Wargames Foundry & TAG

My painting progress over the summer and autumn has been almost nonexistent and so I am really pleased to be back in the saddle, so to speak!

Haiduk (or Hajduk) was a term used in this period for native Polish and Hungarian infantry. They were armed with muskets and provided fire support to the cavalry arm in open battles, as well as providing the ability to hold fortifications, or indeed assault enemy fortifications. Along with their firearms they were equipped with sabres and hand axes, which they used when involved in hand to hand melee.  They were typically uniformed, and their coats (called a zupan) were usually lined in contrasting colours. The Haiduks therefore provide a distinctive and iconic part of any Polish force, and I have been looking forward to getting some of these on the painting table since I started my Polish army.

Contemporary picture showing a Polish noble escorted by his Haiduk bodyguard.

The Polish infantry were recruited, like the cavalry, through the issuing of a commission to a Rotmistrz.  The Rotmistrz had to recruit the required number of  men as instructed in their commission, and they typically did this in their own home region, looking for volunteers amongst the townsfolk and peasants. The infantry were formed in to banners (companies) with a set of officers, and each tenth man was armed with a long axe or halberd. These tenth men acted as NCOs, directing the rank and file, and were also meant to act as a defence against cavalry with their pole-arms.  

My 28mm miniature Haiduks have been recruited from Wargames Foundry and The Assault Group (TAG).  Like their Hussars, the Foundry Haiduks are a very old range, and so a little on the short side being closer to 25mm than 28mm, but they fit in ok with TAG to my eye. The details on the Foundry figures hold up well; all part of the Perry sculpting genius! 

As well as a tenth-man with his halberd, I have also added a drummer to the unit. Various types of musicians are shown in Haiduk units including fifers, pipers and drummers. 

Contemporary colour picture of a Polish Haiduk

This first unit is painted up in one of the most common colour combinations shown for Haiduks in this period; a lightish blue coat with deep red lining. I want to acknowledge the fabulous painting tutorial by Sonic Sledgehammer that I used as inspiration for this unit, after I saw Troy painting a TYW Bavarian musketeer in just the shade of blue I wanted to use (see the tutorial here: https://youtu.be/ZqpHAV_A1U0). 

I plan to add a few more units like this to the army, and also some separate command bases. The Stockholm Scroll (https://commons.wikimedia.org/wiki/Category:Stockholm_Roll) shows a number of Haiduk units, with a variety of uniform colours and I hope to represent these with the future units. 

Until next time!

Andy @ The Friends of General Haig 

Saturday, 2 October 2021

Adventures With Fur

In this blog post I walk through updating my Killing Fields ‘Classic Teddy Battle Mats’.

A Highland Charge across the final mat.

My first experience of making a fur based terrain mat is shown on the blog here https://theviaregia.blogspot.com/2019/03/fun-with-fur.html .  

Since then I have acquired two of the 7’ x 5’ ‘Classic Teddy Battle Mats’ from Killing fields (https://www.killingfieldsterrain.com/store/p14/Killing_Fields_Classic_Teddy_BattleMat_7x5%27.html). These are great as they are pre-dyed in a multi tone effect to simulate grass land.  

The Material 

The mats are fine just to use as you receive them, but I wanted to ‘upgrade’ mine. First, I wanted to permanently attach them together.   The tables in our club hall can easily be set up for 10’ x 6’ games, and I wanted something able to take advantage of this and cover the whole area. Two  7’ x 5’ joined along the 7’ edge make a great 10’ x 7’ matt.   Secondly I wanted to change the colour and look of the matt a bit. Especially with such a big area, now two mats are joined together, having only one colour theme didn’t look so good to my eye. 

Two Became One


Dress making pins used to pin the fur matt to the long strip of calico material.

I used the same method to join the two mats as I had when making my large mat for Lutzen (see link above).  I cut a strip of calico material to roughly 12” wide and 7’ long. This would act as a join between the two mats. I pinned one mat to half of the calico material.  

Recommended glue.  A pair of large, sharp scissors is a help too.

Once happy that it was fairly straight I then glued the calico down. I found this fabric glue in Hobby Craft and it was a bit easier to work with, and one tube did the whole job for me.  This was left overnight to dry thoroughly. 

Glue liberally applied to calico base, then second mat neatly lined up with other mat

I then pinned the second mat to the other half of the calico so that it matched up with the first as closely as possible. (Pro Tip: Make sure the knapp of the fur lies the same way in both mats!) Once pinned, the second matt was glued and set aside overnight to dry again.

Repair tip.

During this process I came across a couple of small holes in the mat.  This must have happened while moving or storing the mats. While I had the glue and calico to hand, I glued small patches of calico underneath the holes to prevent larger gaps developing. 

The Coloured Mat


Trusty cheap, re-chargeable dog trimmer from Amazon

With the two original mats securely joined in to a single giant sized mat, I set about adding some new colours. Before slapping on the paint I gave the mat a quick once over with a dog hair trimmer. I randomly shaved areas using the 6mm, 9mm and 12 mm guides that came with my dog trimmer. The original mats are dyed with three colours in layers. The bottom layer is dark brownish, the mid level greenish, and the top level a light buff colour. This meant areas trimmed heavily look darker as the brown shows through, and areas trimmed less were greener/lighter.

Number One Daughter demonstrates fur mat shaving!

This gives a very nice effect on the original mats, and can also effects the result when more colour is added, depending on the strength/saturation of the colour added.  On my previous mat I poured paint directly on to the mat, and then spread it around with a wet brush. This resulted in areas being too saturated in paint and the fur becoming matted. A lot of combing had been required to rescue these areas. 

A generous dollop will do.

Blue gloves covered in dubious brown - not always a good look!

For this mat I decided to follow Barry Hilton’s advice from a recent one of his blog posts (http://leagueofaugsburg.blogspot.com/2021/08/no-bears-were-harmed-in-making-of.html). He’d used his hands to apply different colour paints, and so I followed suit, wearing a pair of thin plastic gloves to make the process easier to start and stop. The paints were a mixture of acrylic paints, picked up from Hobby Craft (a UK craft store). I bought bottles of kids’ paint and tubes of artist acrylics that were on sale. Yellows, buffs, browns and greens. The technique is to squirt a handful of paint on to one (gloved!) hand, then massage it across both hands, before running the paint covered hands over the mat.  Once the colour has worn off your hands, and is on the mat, then you go to work with a comb. This is essential and the only bit which is anywhere near hard work. This combing should stop the fur getting clumped together with the paint, as well as blending colour changes together.  Loose fur, gunked up with paint, will get combed out, but this is fine.

The best bit - painting by hand!

After a few trials I settled on the colours I liked. The cheap kids paint acts as more of a tint as there isn’t as much colour in the paint. The artists’ stuff is more colour saturated and will change the colour of the fur more.

The all important combing

This ‘by-hand’ approach worked like a dream and gave a better result than my earlier attempt. It is also immense fun painting with you hands. I got the kids involved, and they were naturals at it!  I ended up using a just two of three colours, trying to vary them across the mat. As one coat of the paint dries, you can apply different colours over the top to produce tonal variations.


Painting the whole mat was done in a couple of sessions, and left to dry overnight. This approach left the mat soft and furry, and I think it gives a nice look to a whole battlefield, or used as a base and backdrop for model photo shoots. 

What’s next?

For next steps, I’m considering shaving some roads and tracks into the mat. I could place modular road sections on top of the mat, but shaved in looks better. I also need some marsh and stream sections for my Dirschau battlefield, but I think I might make these modular and place them on top. More thinking time required. 

To create hills simply place things under the mat and it drapes over them nicely.

Battle of Alford 1645 set out on the new mat.

The new colour variations.

I hope this post will inspire others to have a crack at fur. This was very easy to do, and the Killing Fields mats are a great starting point. 

This new fur mat ties in nicely with #terraintober on Twitter. Also check out Alex’s Storm of Steel YouTube Channel (https://youtube.com/channel/UCNUYwNznn-ZuNMoHoF3urwQ) where he is going to feature some of the terrain made. 

Cheers,

Andy @ Friends of General Haig

Sunday, 26 September 2021

Auldearn 1645 - The Game

Mac Colla, with his vanguard, trying to hold off the Covenanter’s surprise attack.

This blog post is a battle report for the Auldearn 1645 game that the Friends of General Haig played at the Warlord Games Open Day on the 25th September.  

You can see the previous Auldearn blog posts on:

Despite a cloudy start to the day the weather brightened up as we arrived at Warlord Games new HQ in Nottingham.  The Warlorders were as busy as bees getting everything ready for the start of the Open Day, and we were soon directed to our pitch.  We were allocated a space for the Auldearn game in a marquee in front of the building.  For this game we would be playing on a set of terrain boards that belongs to Warlord supremo, John Stallard.  John had it crafted by the talented Ernie Baker some years ago with the Auldearn battlefield in mind.

The board set up and ready to go!

On top of the board we added my terrain and two armies, as described in the previous blog posts (see links above), and before you could say “Irn Bru; brewed in Scotland from girders!” we were ready to go.

As a quick re-cap, the battle starts with Major General Hurry and his Covenanter force springing a surprise dawn attack on Montrose’s Royalists, who are camped in and around Auldearn; a small village less than 20 miles from Inverness in NE Scotland. 

The Covenanters form up ready to attack Auldearn, with only a scant few Royalists to hold them off.

Our game started with the Covenant force shaking itself out from column of march in to battalia formation for the attack.   To oppose them there is just a small Royalist vanguard, led by Montrose’s right-hand man, Alasdair MacDonald, better known as Mac Colla ‘The Devastator’.

The Covenanters had a brisk start and they made good progress over Garlic hill towards Auldearn.  The Covenanters knew that time was a critical factor, and that if they could break in to Auldearn, then they could hinder the rest of the Royalists from forming up to fight them. The Covenanters therefore threw themselves forward, with speed being of the essence.

Mac Colla knew that he had to hold up the Covenanters for as long as possible, to give Montrose enough time to rally the rest of the army, and reinforce him. Not wanting to engage in a firefight with the Covenanters superior numbers, Mac Colla decided that attack was the best form of defence, and led an immediate charge with his lifeguard in to the leading Covenanter regiment. The lead Covenant regiment reeled back from this onslaught, and Mac Colla also pulled back to rally his men for another charge.  

Mac Colla leads in his lifeguard again, while behind him, Gordon clansmen try to fend off Covenant horsemen

There was some confusion while the Covenanters tried to bring up supporting troops.  Hurry managed to bring up Drummond’s Horse on the Covenant right to threaten Mac Colla’s beleaguered troops.  Mac Colla then took a gamble; he charged again in to the Covenant foot with his lifeguard, and trusted to luck that his Gordon clansmen would hold off Drummond’s horse.

Some well timed shots from the Gordons slowed the attacking horsemen enough that their charge was held, and then, despite the fear with which the newly raised Gordons faced their first mounted attack, the horsemen were thrown back. 

To the rescue! The Irish Brigade marching out of Auldearn to join the battle.

Mac Colla’s charge was even more successful and some of the Covenanters were scattered by the impact of his lifeguard. However Mac Colla’s forces were tiring fast, and had to continue to fall back against the overwhelming numbers of the Covenanters.  It was with much relief that Mac Colla saw the first of the Royalist reinforcements marching out of the village, the doughty Irish Brigade.  

Covenant pikemen trying to develop another attack while Hurry tries to rally the Covenant horse.

The next Covenant regiment finally managed to push forward towards Mac Colla.  Their fresh musket fire tore in to the rallying Royalist vanguard. This was too much for the Gordon clansmen who ran for the shelter of the village. Despite Hurry’s pleas, Drummond’s horse would not rally to charge again, and finish off the remainder of Mac Colla’s force. 

The arrival of the Irish brigade, and the Covenanter’s continuing difficulty in bringing forward more troops, stabilised the position for the Royalists.  If only their own Royalist horse could arrive.  Suddenly the urgent sound of trumpets sounded from the Royalist left flank.  Could this be the Gordon Horse arriving in the nick of time?    

Well maybe it should have been, but something had gone awry.  Maybe it was patch of unexpected boggy ground, or may be some confusion in orders, but the Gordon Horse were delayed.  

The Earl of Seaforth’s levies moving forward against the Irish Brigade.

This gave the Covenanters a chance to recover their lines and prepare for the Royalists who were trying to flank their position. It also seems to have encouraged the Earl of Seaforth, on the Covenanter’s left wing, to push forward with his levies.  The Irish Brigade now had their hands full facing off a horde of Clansmen from the far North Western parts of Scotland, including the dread Lewis bowmen. Seaforth’s levies were supported by Halkett’s regular horsemen. 

Finally, the Royalist cavalry arrive.

The Gordon Horse finally galloped on to the field and found that the Covenanters had started to pull back from their approach.  Despite having lost some of the element of surprise, the Gordon Horse still put in a well timed charge and put Drummond’s Horse to flight.  Lord Gordon managed to rally his horsemen, and regrouped as the Strahbogie regiment, arrived from the village, marching up in support of their kinsmen. 

The wall of firepower waiting for Mac Colla’s last, desperate charge. 

Mac Colla’s lifeguard were worn out from their earlier heroics and so Mac Colla instead lead forward his remaining Gordon foot to try and keep up the pressure on the Covenanters.  This proved to be one charge too many.  The Gordon foot faltered in front of well timed volleys from the Covenant musketeers, and were finally routed. A wounded Mac Colla was last seen being dragged back to the village by the Gordons while he protested that “Just one more charge will see them off!”. 

Hurry, seeing Montrose in the front line, tries to lead his cavalry in a charge. 

On the Covenant left a fierce firefight now developed between the Irish Brigade and Seaforth’s troops. Montrose had to intervene personally to rally some of the Irish.  Hurry thought he saw an opportunity to catch the Marquis while he was rallying these troops in the frontline, but Halket’s horsemen refused to follow him in a charge on the Irishmen around Montrose. 

Covenant pikemen lead a charge into the Royalist line.

A lull in the fighting along the whole front line allowed the Covenanter to regroup and bring forward the last of their regular troops for another attack. Some well time volleys from the Covenant musketeers unsteadied the Royalists, and Hurry threw in his men at charge of pike to try and break the Royalist line. 

Lord Gordon leads his regiment of horse in to the flank of the Covenanters, supported by the Strathbogie foot.

The Covenant pike went in hard.  The Royalist foot bent, but didn’t break.  A fierce melee ensued and the Covenant officers urged on their pikemen sensing they were near to breaking through.  At this moment Lord Gordon put himself at the head of his regiment of horse, and bellowing “A Gordon! A Gordon!”, charged past the Strathbogie foot, and into the flank of the Covenanter’s attacking troops.  Some of the Strathbogie foot, perhaps being carried forward holding on to the stirrups of the Gordon horse, followed suit.

The Gordon Horse sweep though the Covenent flank.

The Covenant foot had no reply to this, and beset to their front, and now charged to their flank, started to fall back.  This last setback proved too much, and the Covenant army finally turned on their heals, broke, and ran for Inverness.

A Royalist victory; in the final turn of the game, just as we timed out at the end of the day!  It had been a hard fought, and exciting game all of the way through, with many twists and turns of fate.   Mac Colla’s early aggression was effective in holding up the Covenanters, but his troops were worn down very quickly and only the early arrival of the Irish Brigade saved them.  With the Irish Brigade and the Gordon Horse in the battle line for the Royalists, the Covenanters had a much harder battle on their hands. The Covenanters did manage to organise a final attack which was very close to being successful, but the final charge by the Gordon Horse, neatly recreating events in the real battle, finally broke the Covenant army.

The Pike & Shotte rules worked very well for us. The only issue we had was that we were reminded to not have too many special rules for your troops, as they are very easy to forget in the middle of a game!  One of the things that we really liked about rules was that they provided lulls in the battle, as well as reversals of fortunes, which are often found in actual battle accounts, but can be rare under some other rules.  

Many thanks to the Warlord crew for inviting us to the Open Day, and for looking after us during the day.  Also many thanks to John Stallard for lending us his beautiful terrain boards for the game, they set the game off very nicely.

Our pitch for the day.

A big thank you as well to all of those that came and talked to us during the day and said very nice things about how the game looked.  We had some help from a few people during the day who helped us play the game, but James gets the prize for having the worst dice throws; almost as bad as mine ;-) .


I hope that we were able to show people a little bit about how a game of Pike & Shotte works, and perhaps also inspired a few to try this period for their own games. 

Finally a big “cheers” to ‘Friends of General Haig’ Paul for playing the part of Montrose so well.


Alba gu bràth!

Andy @ Friends of General Haig


Monday, 20 September 2021

Auldearn 1645 - The Armies

The Strathbogie Regiment ready for battle.

… they being confident both of their men and their number fell hotly on, but being beaten back, seimd to cole of their fury, and only intended to blocke us up (as it wer) till more number should come which perceiving I divided myselfe in to two wings (which was all the ground would suffer) marched upon them most unexpectedly.” Extract from Montrose’s account of the battle in his letter to King Charles.

In this blog post I’m looking at the two armies for Auldearn 1645, ready for the Friends of General Haig running a game recreating this battle at the Warlord Games Open Day on 25th September (https://store.warlordgames.com/products/warlord-open-day-ticket-2021).  

You can see the previous Auldearn blog post on terrain here: https://theviaregia.blogspot.com/2021/09/auldearn-1645-battlefield.html

… and the first blog entry on Auldearn looking at Boath Doocot here: https://theviaregia.blogspot.com/2021/09/auldearn-1645-boath-doocot.html

Scots Royalists

For the two orders of battle I have leaned heavily on Stuart Reid’s ‘Auldearn 1645’ in the Osprey Campaign series (https://ospreypublishing.com/auldearn-1645).  This actually covers all of the battles in Montrose’s “Year of Miracles”, with added emphasis on Auldearn.  As part of this it also includes a handy breakdown of the likely regiments and numbers of men taking part in the battle.  It is a small battle when compared with some of the major engagements, such as Edgehill and Marston Moor,  in England.  Mr. Reid’s estimate, based on the primary sources, is around 2,000 Royalists and 3,300 Covenanters. This makes a fabulous size for a wargame as it is possible to represent every unit, and have a figure to man ratio of less than 1:20.

My starting point to organise the two wargames armies was to first try and figure out a rough ratio of wargames units to numbers of men in the actual battle. The Pike & Shotte rules work on the basis of armies being divided into standard size ‘units’.  (This works quite well for this period when the common practice of commanders was to organise the available companies (foot) or troops (horse) into appropriate size battlefield formations for their standard drill and battle plans.)  Looking over Mr. Reid’s order of battle I could see that Mac Colla’s Lifeguard was attributed 140 men. This unit played a pivotal role in the Royalist early defence when it was hard pressed trying to hold off the Covenant army while the rest of the Royalists were being woken from their beds and formed up.  It would be a good start if this 140 man unit was a ‘regular’ sized unit under the rules. 

The Earl of Seaforth’s regiment awaits a ‘highland’ charge.

Using 140 as the template for a unit, I then broke down the rest of the order of battle, and it came out with a number of units that I had enough figures to represent, as well as looking like it would make a nice table-filling spectacle.  This is the breakdown in units 

Scots Royalists

  • Mac Colla’s Lifeguard - 1 unit
  • Irish Regiments - 4 units
  • Strathbogie Regiment - 3 units
  • Gordon of Monymore’s Regiment - 2 units
  • Dismounted dragoons - 1 unit
  • Gordon Horse - 2 units
  • Other Horse - 1 unit

Total of 14 units

Scots Covenanters

  • Campbell of Lawers’ Regiment - 3 units
  • Lord Chancellor’s Regiment - 3 units
  • Earl of Findlatter’s Regiment  - 3 units
  • Earl of Lothian’s Regiment - 3 units
  • Earl of Seaforth’s Regiment - 4 units
  • Earl of Sutherland’s Regiment - 3 units
  • Northern Levies - 2 units
  • Halkett’s Horse - 1 unit
  • Drummond’s Horse - 1 unit

Total of 23 units

(Note.  In this scale of battle particularly, the Pike & Shotte rules represent Pike and Shot formations with their pike and musket armed troops in separate units. So a typical pike and shot formation translates in to 3 units; one pike unit and two shot units. )

Using this breakdown of units I created two army rosters using the the Army Lists in the Pike & Shotte supplement, To Kill A King, as a guide.  (There may be one or two small tweaks to the units stats. based on my own preference, and figure availability!) I have set out each army’s roster in a PDF on Google Drive; links below.

Covenanter Roster (PDF in Google Drive): 

https://drive.google.com/file/d/1EE0Sjf9O2OqKPOUtMtpfFZ9T8OG1J5OX

Royalist Roster (PDF in Google Drive): 

https://drive.google.com/file/d/17Er-cZo-Mq_bICdBg5Z9PamVf8tH4w9n

Major General Sir John Hurry - the Covenant army commander.

You will see that, although very much outnumbered, the Royalists have a definite edge in troop quality and commanders’ ratings.  With the troops sorted out the next step is to consider the tactical situation and how deployment will work. 

I decided to start the battle with Mac Colla’s vanguard deployed on Garlic Hill. These were those troops that were to hand when the Covenanter’s surprise dawn attack was discovered. The Covenanters start the game with their first few units deployed from their forced march, and the rest trailing on to the table behind them.  The remaining Royalists, who at this point in the battle were hurrying to arm themselves and form up in their respective formations, are not deployed at the start of the game.

Preparing for a ‘cheeky’ highland charge! 

Sir John Hurry, the Covenanter’s commander in chief, had hoped to take the Royalist camp completely by surprise, and scatter or destroy Montrose’s army. The Royalists were lucky that some of their scouts heard the sound of the Covenanters firing off their muskets, so as to clear any problems with wet powder after heavy rain in the night, when they were a few miles from the Auldearn. The alarm was duly raised in the Royalist camp but Montrose’s army had spread itself around the surrounding countryside, probably in search of dry sleeping quarters, and it would take some time to gather the Royalist army together. While Hurry had not achieved the complete surprise he wanted, he could still deal a heavy blow to Montrose if he could storm in to the heart of the Royalist camp in the village, and prevent the Royalists troops having a central point on which to rally. 

Lieutenant General James Graham, The Marquis of Montrose - the Royalist army commander

Although surprised, Montrose was not going to simply dance to Hurry’s tune. If Mac Colla’s small force could hold up the Covenanters for long enough, Montrose may be able to turn the tables on the Covenanters, and outflank their attack. 

To represent this situation the following special game rules were defined for each army. 

Royalist Special Rules


Deployment

 At the start of the game the Vanguard (MacColla’s) command can be deployed anywhere East of the centre of Garlic Hill.   The artillery must be deployed on Castle Hill.  Montrose’s command stand is deployed in Auldearn village between the chapel and the dovecote on Castle Hill.   Montrose must remain here until all the Royalist army is deployed on table.   This represents the frantic organisation of the troops following the dawn surprise by the Covenanters. 

The remaining troops can be deployed as follows:

  • The Irish Regiment units are rallying in the village.  To represent this, even before the troops are deployed, 1 dice of shooting can be made each turn from each village building. Roll one dice each turn.  If the number rolled is less than the turn number, then the Irish Regiment units can be deployed in the village.
  • On the turn after the Irish Regiments arrive the Horse units can be deployed behind the village.  Montrose may to choose to wait for an additional turn and then the Horse regiments can arrive on both or either flanks up to half way along the board edge instead.  Montrose may choose to delay the flank marching Horse until a turn of his choice.   If flank marching, then each unit must pass a normal command roll to move on to the board.
  • In the turn after all the Horse units are deployed on the board the Strathbogie regiment can be deployed in the Royalist camp to the South of the village.

Special Rule - Fall Back!

MacColla’s Battalia have orders to delay the enemy and then fall back to the village.  Therefore, these units can always move back toward the village, even if disordered, and even if they fail a command roll.  If they fail a command roll, and they chose to use this option, then they must move a whole move back directly toward the village.  

Objectives

If Montrose’s command position is taken by the Covenanters, then the Horse regiments cannot use the flank marching option and instead must deploy behind the village.

The Royalist army is broken when 8 (eight) units are destroyed or shaken.  If the Royalist army survives the battle, then this is a draw.  If the Covenanter army is broken, then this is a Royalist victory.

Generals in Hand-to-Hand

If a general joins a unit that is in hand-to-hand combat, then Montrose and Gordon add 1 dice to a unit’s Hand-to-hand factor.  MacColla adds 2!

Alasdair Mac Colla ‘ The Devastator’ with his bodyguards. 


For the Covenanters:


Deployment

At the start of the game the Campbell’s battalia may be deployed anywhere up to the Western edge of Garlic Hill.  The rest of the army starts in column and will arrive by the road from the West end of the board.   All of the Covenant commanders start the game on the board.

Objectives

The Royalist army has been surprised by the Covenanter’s dawn attack and only a few Royalist units are able to be deployed at the start of the battle.   To take the greatest advantage of the Royalist army’s disorder it will be necessary disperse the troops as they are being assembled.   Montrose and the Royal Standard represents the centre of Royalist camp.   Capture this position to reduce the Royalist options for their troops deployment.  

Break the Royalist army for a victory.   If the Covenant army is unbroken at the end of the day, then the battle is drawn.  The Covenant army breaks when 11 (eleven) units are broken or shaken.

Generals in Hand-to-Hand

If a general joins a unit that is in hand-to-hand combat they add 1 dice to a unit’s Hand-to-hand factor.

The Earl of Sutherland’s pike advance on Irish shot.

You can see from these extra games rules that the battle starts as a race for the Covenanters to overpower the Royalist vanguard so as to disrupt the Royalist forces rallying and being able to react to the attack. The Royalists have to hang on to give their troops time to rally, but also have the opportunity to turn the tables on their attackers. 

So, how will the game play out? I’m looking forward to Saturday 25th to see what happens. I hope some of you will be coming to the open day and so able to come and see the game in full swing.  If you are coming along, and you can spare some time from the great set of events set up over the day, perhaps you’ll come and play a turn or two as your favourite character from the battle? Newbies welcome!

Alba gu bráth!

Andy @ The Friends of General Haig